
Related Manuals for Russell Hobbs PRO ELITE RHFP001


Summary of Contents for Russell Hobbs PRO ELITE RHFP001
- Page 1 INSTRUCTIONS AND WARRANTY MODEL NO. RHFP001 RUSSELL HOBBS PRO ELITE 8-IN-1 FOOD PROCESSOR...
-
Page 2: Important Safeguards
Congratulations on purchasing our Russell Hobbs Pro Elite 8-in-1 Food Processor. Each unit is manufactured to ensure safety and reliability. Before using this appliance for the first time, please read the instruction manual carefully and keep it for future reference. - Page 3 3. Incorrect operation and improper use can damage the food processor and cause injury to the user. 4. This food processor is intended for household use only. Commercial use invalids the warranty and the supplier can not be held responsible for injury or damage caused when using the appliance for any other purpose than that intended.
- Page 4 19. The appliance can be used for up to 1 minute without stopping (this is one cycle). Ensure the appliance is cooled down for at least 2 minutes after each cycle. After the 3 cycle the food processor should be switched off for 5 minutes. 20.
- Page 5 34. In case of technical problems, switch off the machine and do not attempt to repair it yourself. Return the appliance to an authorised service facility for examination, adjustment or repair. Always insist on the use of original spare parts. Failure to comply with the above mentioned pre-cautions and instructions, could affect the safe operation of this machine.
-
Page 6: Parts Diagram
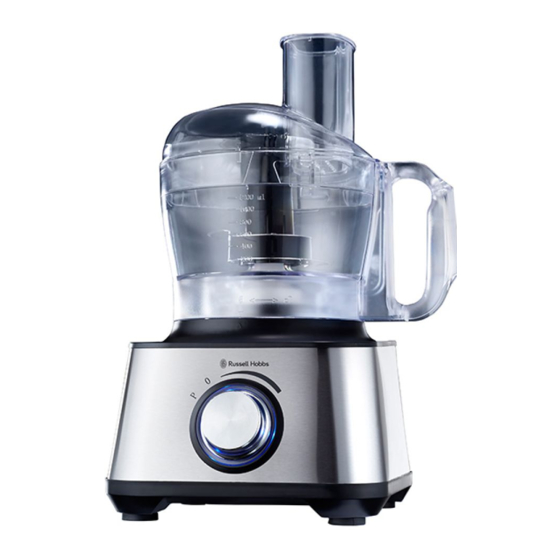
PARTS DIAGRAM (1) Safety pusher ( 11) Stainless steel reversible thin slicing/fine shredding disc (2) Feed chute (12) Stainless steel chip slicing disc (3) Maxi blend canopy ( 13) Stainless steel rasping/grating disc (4) Removable drive attachment ( 14) Citrus press juicing cone (5) Plastic food processor bowl (15) Citrus press attachment plastic strainer (6) Motor shaft attachment... - Page 7 OPERATING INSTRUCTIONS Locking the bowl/jug Align the base and jug/bowl as illustrated. Turn the jug/bowl clockwise until it locks into place. The jug/bowl will lock onto the base in 3 different positions for user convenience. NOTE: The food processor will not work unless the jug/bowl is locked into position. Assembling the lid Align the lid as illustrated by placing your thumb on the lid tab and twisting the lid clockwise.
- Page 8 start/stop control, turn the dial clockwise to the (P) PULSE setting by rotating it counter clockwise. To turn off the machine, rotate the dial to the OFF (O) position. Processing tips and techniques 1. The food processor is excellent for chopping, mixing, slicing and shredding most foods.
- Page 9 8. Lock the lid onto the bowl. 9. Plug in the appliance and switch it on to process the food. 10. Process the food by pushing it through the feed chute with the safety pusher. 11. When finished processing, turn the dial to the OFF (0) position or release from the PULSE position.
- Page 10 Tips • To slice or shred cheese, make use of firm cheese like, Cheddar, Monterey Jack, or Swiss. Place the cheese in the freezer for 30 minutes before processing for best results. • To slice/shred longer shaped thin foods (such as pepperoni, carrots, and celery) lock the lid.
- Page 11 1. Make sure the control dial is turned to the OFF (O) position and the unit is unplugged. 2. Attach the motor shaft attachment to the blending base. 3. Lock the plastic food processor bowl onto the base (See “Locking the bowl”). 4.
-
Page 12: Troubleshooting Guide
3. Screw the blender base clockwise into the main machine motor body (counter clockwise for loosening). 4. Add desired ingredients and put the blender lid and the blender cap on. 5. Select the appropriate speed for blending the ingredients. TROUBLESHOOTING GUIDE POTENTIAL PROBLEM PROBABLE CAUSE/SOLUTION •... - Page 13 RELEASING THE SUCTION CUP FEET AFTER USE The suction cup feet on the bottom of the food processor are designed to keep the unit stationary during use. To maximize the life of the unit please review the following instructions: 1. Lift the fully assembled food processor from the counter by placing hands underneath the unit as shown and lift it to one side 2.
-
Page 14: Cleaning And Maintenance
CLEANING AND MAINTENANCE 1. Wash the bowl, lids, blades, discs, removable drive attachment and safety pusher in warm, soapy water. 2. Rinse and dry thoroughly. To clean food thoroughly from the bowl and the bowl lid/feed chute, immerse in warm, soapy water. NOTE: Do not store the unit with lid in locked position;... - Page 15 The banana has high levels of potassium, helping you to quickly replenish electrolytes. (The riper a banana, the higher sugar content), the peanut butter is high in protein and the raw oats is a Low GI filler. Flax seed is a great source of fibre and Omega 3 fatty acids, and yoghurt contains protein, calcium, riboflavin, vitamin B and vitamin B Berry smoothie...
- Page 16 1 Cup ice Method: 1. Add all ingredients into the blender. 2. Pulse it at first to break the ice. 3. Blend for about 2 minutes until smooth. Sesame oil is a source of vitamin E which is an anti-oxidant and has been correlated with lowering cholesterol levels.
- Page 17 Green tea Smoothie Ingredients: 250ml Green Tea 1Tbsp Honey 1 Tsp Chopped Mint 100ml Vanilla flavoured low fat ice cream/frozen yoghurt Method 1. Brew a cup of green tea using 2 tea bags and chill. 2. Once the tea has cooled down, add all ingredients into the blender. 3.
- Page 18 Tip: Papaya fruit is an excellent source of dietary fiber, folate, vitamin A, C and E. It also contains small amount of calcium, iron, riboflavin, thiamine and niacine. It is also very rich in antioxidant nutrients flavonoids and carotenes, very high in vitamin C plus A, and low in calories and sodium.
- Page 19 1/8 Tsp Ground Cardamom ½ Tsp vanilla Extract 1 Cup Ice Method: 1. Add all ingredients into the blender. 2. Pulse it at first to break the ice. 3. Blend for about 2 minutes until smooth. Tip: This rendition of India's popular yogurt shake makes a cooling counterpoint to any spicy dish For a great cocktail, add 50 ml dark rum.
-
Page 20: Storing The Appliance
Tomato Smoothie Ingredients: 2 tomatoes (chopped then frozen) 1 small tin of tomato juice ¼ Cup Chopped Celery juice and rind of 1/2 lemon Tbsp Chopped basil leaves Tobasco To taste Salt & Pepper to taste 1 Cup Ice Method: 1. -
Page 21: Changing The Plug
• You have followed the instructions correctly • That the unit has been wired correctly and that the wall socket is switched on. • That the mains power supply is ON. • That the plug is firmly in the mains socket. If the appliance still does not work after checking the above: - Consult the retailer for possible repair or replacement. - Page 22 PLEASE AFFIX YOUR PROOF OF PURCHASE/RECEIPT HERE IN THE EVENT OF A CLAIM UNDER WARRANTY THIS RECEIPT MUST BE PRODUCED. 2 YEAR WARRANTY 1 year retail ⵏ 1 year extended warranty upon registration* visit www.russellhobbs.co.za W A R R A N T Y AND EXTENDED WARRANTY Home of Living Brands (Pty) Limited ("Home of Living Brands") warrants to the original purchaser of this product ("the customer") that this product will be free of defects in quality and workmanship which under normal personal, family or household use and purpose may manifest within a period of 1 (one) year from...
- Page 23 EXCLUSIONS TO W A R R A N T Y AND EXTENDED WARRANTY Any accessories supplied with the product, including but not limited to, bowls, jugs, mills or carafes made either of glass or plastic and supplied with this appliance (hereinafter referred to as “the accessory or accessories”), is warranted to be free from material and workmanship defects for the duration of the appliance warranty.
Need help?
Do you have a question about the PRO ELITE RHFP001 and is the answer not in the manual?
Questions and answers