Table of Contents
Advertisement
Available languages
Available languages
Quick Links
Manuale dell'utente
Felhasználói kézikönyv
GRUP ELECTROGEN CU INVERTOR | pg.04
GENERATORE ELETTROGENO AD INVERTORE | pg. 25
ПРЕВОД НА ОРИГИНАЛНИТЕ ИНСТРУКЦИИ ЗА ЕКСПЛОАТАЦИЯ |
pg.46
INVERTER GENERÁTOR
INVERTER GENERATOR | pg.88
Italia Star Com Due S.R.L.
Autostrada Bucuresti-Pitesti, km. 13/2, Loc. Chiajna, IF
004/021.433.03.27
Manual de utilizare
User's Guide
| pg.67
SC 2000i/is
info@italiastar.ro
www.italiastar.ro
Advertisement
Chapters
Table of Contents

Related Manuals for Senci AP2000i


Summary of Contents for Senci AP2000i
- Page 1 Manual de utilizare Manuale dell'utente Felhasználói kézikönyv User’s Guide GRUP ELECTROGEN CU INVERTOR | pg.04 GENERATORE ELETTROGENO AD INVERTORE | pg. 25 ПРЕВОД НА ОРИГИНАЛНИТЕ ИНСТРУКЦИИ ЗА ЕКСПЛОАТАЦИЯ | pg.46 INVERTER GENERÁTOR | pg.67 INVERTER GENERATOR | pg.88 SC 2000i/is Italia Star Com Due S.R.L.
- Page 2 Italia Star Com Due S.R.L. www.italiastar.ro 004/021.433.03.27 info@italiastar.ro...
- Page 3 ДЕКЛАРАЦИЯ ЗА СЪОТВЕТСТВИЕ DECLARATIE DE CONFORMITATE DECLARATION OF CONFORMITY DECLARACION DE CONFORMIDAD MEGFELELŐSÉGI NYILATKOZAT DICHIARAZIONE DI CONFORMITÀ Producator si titularul fisei tehnice: - Manufacturer and holder of the technical file: - Fabbricante e detentore del fascicolo tecnico: - производител и притежател...
-
Page 4: Table Of Contents
Noi apreciem Afacerea dumneavoastră. Vă mul umim i vă felicităm pentru că a i ales SENCI. SENCI Power, Luminează Lumea! Acest Manual de Operare a fost conceput pentru a vă instrui cu privire la utilizarea corectă i func ionarea produsului SENCI. Satisfac ia dumneavoastră... -
Page 5: Sec Iunea 1: Instruc Iuni De Siguran Ă I Avertismente
Acest Manual de Operare a fost conceput pentru a vă instrui cu privire la utilizarea corectă i func ionarea produsului SENCI. Satisfac ia dumneavoastră fa ă de acest produs i func ionarea sa în condi ii de siguran ă este preocuparea noastră... - Page 6 PREVENIREA ELECTROCUTĂRII Nu utiliza i niciodată motorul în ploaie sau ninsoare. Nu atinge i niciodată aparatul cu mâinile ude întrucât pute i provoca un oc electric (electrocutare). • Conecta i conductorul de masă al aparatului la borna de masă 1 (împământare) i conecta i capătul la electrodul de masă...
-
Page 7: Sec Iunea 2: Măsuri De Control I Caracteristici
AVERTIZARE Citi i manualul utilizatorului i toate etichetele înainte de utilizare. Utiliza i aparatul numai în spa ii bine ventilate. Gazele de evacuare con in monoxid de carbon otrăvitor. Veri ca i dacă există carburant vărsat sau scurgeri de carburant. Opri i motorul înainte de realimentare. -
Page 8: Panoul De Control
2.2 Panoul de control 1. Clapă de închidere (Negru) 2. Bec martor AC 3. Bec indicator suprasarcină 4. Bec de avertizare ulei 5. Comutator motor 6. Ie ire 12V DC 7. Disjunctor 8A DC 8. Robinet de decompresie combustibil 9. oc 10. - Page 9 ATENTIE Clapa de închidere trebuie să e în pozi ia “OFF/OPRIT" atunci când se folosesc dispozitive electrice care necesită un curent de pornire mare, cum ar un compresor, pompă, sau frigider. Indicatoare LED Indicatorii LED ajuta în comunicarea func iilor adecvate i improprii ale unită ii. Indicator de ie ire (Verde) Indicatorul de ie ire se aprinde când motorul porne te i produce curent.
-
Page 10: Sec Iunea 3: Pornirea
Inspecta i generatorul electric pentru a vă asigura că în timpul transportului sau manipulării nu au avut loc deteriorări. Dacă grupul electrogen pare deteriorat, NU adăuga i carburant i nu încerca i să porni i generatorul. Vă rugăm să suna i la serviciul clien i al SENCI la + 86-23-86021111 Veri ca i pentru a vă... -
Page 11: Adăugarea De Ulei De Motor
3.2 Adăugarea de ulei de motor Generatorul a fost livrat fără ulei de motor. NU adăuga i combustibil sau porni i motorul înainte de a adăuga ulei de motor. PENTRU A PUTEA ADĂUGA ULEI DE MOTOR, VA TREBUI SĂ SCOATE I PANOUL LATERAL AL UNITĂ... -
Page 12: Adăugarea De Combustibil
3.3 Adăugarea de combustibil Capacitatea rezervorului de combustibil este 4.1 Litri. NU umple i excesiv rezervorul, în caz contrar se poate revărsa atunci când combustibilul se încălze te i î i dilată volumul. Aten ie: Din motive de siguran ă, odată ce combustibilul a fost adăugat la acest aparat, nu poate returnat la locul de achizi ie. 1. -
Page 13: Oprirea Motorului
3. Roti i butonul robinetului de combustibil în pozi ia “ON/PORNIT”. 4. Roti i comutatorul motorului (ro u) în pozi ia “ON/PORNIT” 5. Trage i complet butonul ocului. Aten ie: Nu este nevoie de ac ionarea ocului pentru a porni un motor cald. Împinge i butonul în pozi ia ini ială la pornirea motorului cald. -
Page 14: Sec Iunea 4: Conexiunea Electrică
SEC IUNEA 4: Conexiunea electrică 4.1 Capacitatea Urma i ace ti pa i simpli pentru a calcula wa ii de func ionare i de pornire necesari obiectivelor dumneavoastră. A se vedea Sec iunea 4.5 pentru Ghid de referin ă pentru putere. 1. -
Page 15: Ghidul De Referin Ă Pentru Putere
4.5 Ghidul de referin ă pentru putere Acestea sunt doar estimări. Veri ca i cerin ele exacte de putere ale utilajului sau aparatului dumneavoastră. Puterile enumerate în tabel se bazează pe cerin ele estimate de putere. Pentru puteri electrice exacte, exprimate în wa i, veri ca i plăcu a de date sau manualul utilizatorului în legătură cu elementul pe care dori i să... -
Page 16: Sec Iunea 5: Mentenan A
Necesarul de putere electrică SEC IUNEA 5: Mentenan a 5.1. Mentenanta perioadica Inspec ia periodică, reglarea i lubri erea vor men ine generatorul în cea mai sigură i mai e cientă stare cu putin ă. Inainte 6 luni 12 luni de uz Mentenanta de rutina sau 100 h... -
Page 17: Mentenan A Bujiei
Inainte 6 luni 12 luni de uz Mentenanta de rutina sau 100 h sau 300 h • Verificați starea Element filtru de aer • Curățați • Verificați starea • Ecran toba de esapament C/ură a i sau inlocuiti daca este cazul •... -
Page 18: Schimbarea Uleiului De Motor
5.3. Schimbarea uleiului de motor Înlocuirea ini ială a uleiului de motor se face după o lună sau 20 de ore de func ionare. 1. A eza i generatorul pe o suprafa ă plană i încălzi i motorul timp de câteva minute. -
Page 19: Mentena A Ecranului Tobei De E Apament I A Camerei De Scântei
5.5 Mentenan a ecranului tobei de e apament i a camerei de scântei Trebuie efectuată la ecare 6 luni sau 100 de ore. Filtrul de aer poate necesita o cură are mai frecventă atunci când se utilizează în zone neobi nuit de umede sau prăfuite. 1. -
Page 20: Sec Iunea 6: Depozitarea
SEC IUNEA 6: Depozitarea 6.1 Depozitarea pe termen lung Depozitarea pe termen lung a aparatului va necesita unele proceduri preventive pentru a-l proteja împotriva deteriorării. Scurge i combustibilul 1. Pune i comutatorul motorului în pozi ia “OFF/OPRIT” 1. 2. Scoate i bu onul rezervorului de combustibil. Extrage i con inutul rezervorului într-un recipient de benzină... -
Page 21: Sec Iunea 7: Depanare I Specifica Ii Tehnice
SEC IUNEA 7: Depanare i specifica ii tehnice 7.1 Diagrama detectării defec iunilor tehnice Mentenanta ltrului de combustibile Utiliza i această sec iune pentru a depana erorile comune. Motorul nu porne te Sisteme de combustibil: Nu a fost furnizat combustibil în camera de combustie Nu este combustibil în rezervor... - Page 22 SPECIFICATII SC 2000 SC 2000 În 4 timpi OHV Răcire cu aer, Monocilindric, În 4 timpi OHV Răcire cu aer, Monocilindric, Tip de motor Certificat EPA (Motor SENCI SC80) Certificat EPA (Motor YAMAHA MZ80) 79cmc 79cmc Capacitate cilindrica 1600w 1600w...
- Page 23 CERTIFICAT DE GARANTIE Seria AA Nr. ___________ Nume marca produs:_______________________ Model : _________________________________ Seria nr.:________________________________ Accesorii:________________________________ Vanzator:________________________________ Semnatura si stampila: _____________________ Cumparator:_____________________________ Adresa :_________________________________ Data cumpararii: __________________________ Semnatura/stampila: ___________________________ : ........ISTRIBUITOR : ............ : ..........DRESA Prin prezenta confirm ca am primit produsul in perfecta stare de functionare impreuna cu ghidul de utilizare in limba romana si am luat la cunostiinta ca prezentul certificat de garantie este valabil numai insotit de factura de achizitie si de bon fiscal sau chitanta.
- Page 24 · Aparatul prezinta deteriorari cauzate de accidente mecanice, lovituri, socuri, patrunderi de lichide, expuneri la foc, utilizare gresita sau neglijenta, schimbari ale starii aparatului, pastrarea in conditii improprii – functionarea repetata in regim de mari diferente de temperatura care cauzeaza fenomenul de “condens” intern, expunerea excesiva la umezeala sau radiatii solare, neglijenta in utilizare;...
- Page 25 SENCI Power, Illumina il Mondo! Tale Manuale Operativo è stato ideato per istruirvi circa l'uso corretto ed il funzionamento del prodotto SENCI. Vostra soddisfazione nei confronti di tale prodotto ed il suo funzionamento in termini di sicurezza è la nostra finale preoccupazi- one.
- Page 26 PREMESSA Tale Manuale Operativo è stato ideato per istruirvi circa l'uso corretto ed il funzionamento del prodotto SENCI. La vostra soddisfazione nei confronti di tale prodotto ed il suo funzionamento in termini di sicurezza è la nostra finale preoccupazione.
- Page 27 PREVENIRE l'ELECTROCUZIONE Mai impiegare il motore quando piogge o nevica. Mai toccare l'apparecchio alle mani bagnate poiché potete cagionare un trauma elettrico (elettrocuzione). • Connettere il conduttore di massa dell'apparecchio al morsetto di massa 1 (messa a terra) e connettere l'estremità...
-
Page 28: Sezione 2: Misure Di Controllo E Caratteristiche
AVVERTENZA Leggere il manuale dell'utente e tutte le etichette prima dell'uso. Impiegare l'apparecchio soltanto negli spazi ben ventilati. I gas di scarico contengono monossido di carbonio tossico. Controllare se c'è carburante sparso o perdite di carburante. Arrestare il motore prima di re-erogare. Non impiegare l'apparecchio vicino a materiali in ammabili. -
Page 29: Funzioni Di Controllo
2.2 Panello mandi 1. Letta di chiusura (Nero) 2. Lampadina teste AC 3. Lampadina indicatrice sovraccarico 4. Lampadina avvertente olio 5. Interruttore motore 6. Inserimento output 12V DC 7. Disgiuntore 8A DC 8. Valvola di decompressione combustibile 9. Shock 10. Inserimenti output 220/230/240V Tale morsetto corrisponde soltanto ad un cliente, varie leggi e vari ordinamenti ai sensi dell'area di vendite verranno cambiati secondo il morsetto. - Page 30 Attenzione: L'aletta di chiusura si deve trovare nella posizione “OFF/ARRESTO" allor quando si usano dispositivi elettrici occorrenti una corrente d'avvio maggiore, come sarebbero un compressore, pompa,o frigorifero. Luci LED Le luci LED aiutano a comunicare le funzioni idonee ed errate dell'unità. Luce output (Verde) La luce output si accende quando il motore è...
-
Page 31: Sezione 3: Avvio
• Generatore AP2000i 2000W • Cavi di carico 12V • Bidone con olio • Imbuto d'olio Se non si sono ricevuti tali componenti, contattare l'u cio clienti della SENCI al + 86-23-86021111 3 Italia Star Com Due S.R.L. www.italiastar.ro 004/021.433.03.27... - Page 32 3.2 Aggiungere olio di motore Il generatore è stato consegnato senza olio di motore. NON aggiungere combustibile o avviare il motore prima di aggiungere olio di motore. PER POTER AGGIUNGERE OLIO DI MOTORE, SI DOVRÀ TOGLIERE IL PANELLO LATERALLE DELL'UNITÀ. Impiegando un cacciavite a testa #2 Phillips, togliere le viti 1 e 2 (notate nella gura 1) ed alzare in su e lateralmente per togliere il panello laterale.
-
Page 33: Aggiunta Di Combustibile
3.3 Aggiunta di combustibile La capacità del serbatoio di combustibile è di 4.1 Litri. NON riempire eccessivamente il serbatoio, al contrario può traboccare allor quando il combustibile si riscalda e gli si espande il volume. Attenzione: Per motivi di sicurezza,una volta aggiunto il combustibile nell'apparecchio medesimo, non si può restituire al luogo d'acquisto. - Page 34 3. Girare il pulsante della valvola di combustibile nella posizione “ON/AVVIO”. 4. Girare l'interruttore del motore (rosso) nella posizione “ON/AVVIO” 5. Tirare completamente il pulsante dello shock. Attenzione: Non occorre agire sullo shock per avviare un motore caldo. Spingere il pulsante nella posizione iniziale nell'avviare il motore caldo.
-
Page 35: Sezione 4: Conessione Elettrica
SEZIONE 4: Connessione elettrica 4.1 Capacità Seguire gli stessi passi semplici per calcolare i watt funzionali e di avvio necessari ai vostri oggettivi. Vedere Sezione 4.5 per Guida di riferimento per potenza. 1. Selezionare i dispositivi elettrici cui si pensa impiegare nello stesso tempo. 2. -
Page 36: Guida Di Riferimento Per Potenza
4.5 Guida di riferimento per potenza Tali sono soltanto stime. Veri care i requisiti esatti di potenza della vostra attrezzatura o del vostro apparecchio. Le potenze elencate nella tabella si fondano sui requisiti di potenza stimati. Elemento Potenza funzionale Potenza di avviamento Oggetti di primordiale necessità... -
Page 37: Sezione 5: Manutenzione
Necessario di potenza elettrica SEZIONE 5: Manutenzione 5.1 Manutenzione periodica L'ispezione periodica, la regolazione e rubricazione vanno a mantenere il generatore nel più sicuro ed e ciente stato possibile. Prima 6 mesi o 12 mesi o Manutenzione ordinaria dell'uso 100 ore 300 ore Veri care lo stato Candela... -
Page 38: Manutenzione Della Candela
• Verificare lo stato Elemento filtro d’aria • Pulire • Verificare lo stato Schemo del’insonorizzante • Pulire o sostituire se fosse il caso • Verificare lo stato Camera di scintille • Pulire o sostituire se fosse il caso • Verificare lo stato Filtro carburante •... -
Page 39: Cambio Dell'olio Al Motore
5.3 Cambio dell'olio di motore La sostituzione dell'olio di motore avviene un mese dopo o a 20 ore di funzionamento. 1. Disporre il generatore su una super cie piana e riscaldare il motore per qualche minuto. Poi arrestare il motore e girare il pulsante della valvola di combustibile nella posizione "OFF/ARRESTO", ed il pulsante della bocca di ventilazione del turacciolo del serbatoio di combustibile nella posizione "OFF/ARRESTO". -
Page 40: Manutenzione Del Filtro Di Combustibile
5.5 Manutenzione dello schermo dell'insonorizzante e della camera di scintille Si deve eseguire ogni 6 mesi o 100 ore. Il ltro d'aria può richiedere una pulizia più frequente allor quando si usa in aree insolitamente umide o spolverate. 1. Togliere le viti 1 e poi togliere la gabbia 2. 2. -
Page 41: Sezione 6: Deposito
SEZIONE 6: Deposito 6.1 Deposito a lungo termine Il deposito a lungo termine richiederà alcune procedure preventive per proteggere contro danneggiamento. Prosciugare il combustibile 1. Mettere l'interruttore del motore nella posizione “OFF/ARRESTO” 1. 2. Togliere il turacciolo del serbatoio di combustibile. Estrarre il contenuto del serbatoio in un recipiente di benzina autorizzato con aiuto di un sifone manuale disponibile nel commercio. -
Page 42: Sezione 7: Riparazione E Specifiche Tecniche
SEZIONE 7: Riparazione e specifiche tecniche 7.1 Diagramma di rilevazione dei malfunzionamenti tecnici 7.2 Manutenzione del ltro di combustibile Fare uso di tale sezione per riparare gli errori comuni. Il motore non viene avviato Sistemi di combustibile: Non si è fornito combustibile nella camera di combustione Non c'è combustibile nel serbatoio... fornite il combustibile. -
Page 43: Specifiche Tecniche
Specifiche tecniche SC 2000 SC 2000 A 4 tempi OHV Raffreddamento ad aria, Monocilindrico, A 4 tempi OHV Raffreddamento ad aria, Tipo di motore Monocilindrico, Certificato EPA (Motore SENCI SC80) Certificato EPA (Motore YAMAHA MZ80) 79cmc Cilindrata motore (cm³) 79cmc 1600w... - Page 44 CERTIFICATO DI GARANZIA Serie AA N°. ____________ Denominazione del marchio del prodotto: _______________________ Modello : ___________________________________ Serie n°.:___________________________________ Accessori: __________________________________ Importatore: ________________________________ Firma e trimbro: ______________________________ Acquirente: _________________________________ Indirizzo: ___________________________________ Data di acquisto: _____________________________ Firma e timbro: ______________________________ : ........... ISTRIBUTORE Telefono: ..............
- Page 45 messa in servizio, funzionamento e manutenzione previste nel manuale utente o in condizioni che contravvengono alle norme tecniche di Romania; - I documenti di garanzia non sono presentati, sono stati danneggiati/modificati o sono illeggibili; - L'apparecchio presenta danneggiamenti dovuti agli incidenti meccanici, colpi, urti, penetrazione di liquidi, esposizioni al fuoco, uso improprio o negligenza, cambiamenti dello stato dell'apparecchio, stoccaggio in condizioni improprie-funzionamento ripetuto in regime di grandi differenze termiche che causano il fenomeno di “condenso”...
- Page 46 Senci. Italia Star Com Due S.R.L. www.italiastar.ro 004/021.433.03.27 info@italiastar.ro...
- Page 47 – · . · . · – . · · – · · 1m(3 ft) · · · · Italia Star Com Due S.R.L. www.italiastar.ro 004/021.433.03.27 info@italiastar.ro...
- Page 48 · · · · (I E C 245). Italia Star Com Due S.R.L. www.italiastar.ro 004/021.433.03.27 info@italiastar.ro...
- Page 49 Italia Star Com Due S.R.L. www.italiastar.ro 004/021.433.03.27 info@italiastar.ro...
- Page 50 2. AC 6. 12V DC 7. 8 DC 10. 220/230/240V 4500rpm Italia Star Com Due S.R.L. www.italiastar.ro 004/021.433.03.27 info@italiastar.ro...
- Page 51 ) – – – – 12 V 8A DC 8A DC Italia Star Com Due S.R.L. www.italiastar.ro 004/021.433.03.27 info@italiastar.ro...
- Page 52 – 220/230/240V 1600W 50 HZ – AP 2000 – Italia Star Com Due S.R.L. www.italiastar.ro 004/021.433.03.27 info@italiastar.ro...
- Page 53 – 10W-30 10W-40 – Italia Star Com Due S.R.L. www.italiastar.ro 004/021.433.03.27 info@italiastar.ro...
- Page 54 – 3.4. – Economy Throttle OFF – Italia Star Com Due S.R.L. www.italiastar.ro 004/021.433.03.27 info@italiastar.ro...
- Page 55 – Italia Star Com Due S.R.L. www.italiastar.ro 004/021.433.03.27 info@italiastar.ro...
- Page 56 4.2. – : Volts x Amps = Watts. 60HZ 4.4. + – – Italia Star Com Due S.R.L. www.italiastar.ro 004/021.433.03.27 info@italiastar.ro...
- Page 57 Italia Star Com Due S.R.L. www.italiastar.ro 004/021.433.03.27 info@italiastar.ro...
- Page 58 – – Italia Star Com Due S.R.L. www.italiastar.ro 004/021.433.03.27 info@italiastar.ro...
- Page 59 Italia Star Com Due S.R.L. www.italiastar.ro 004/021.433.03.27 info@italiastar.ro...
- Page 60 – – Italia Star Com Due S.R.L. www.italiastar.ro 004/021.433.03.27 info@italiastar.ro...
- Page 61 – – – – 1 – – – Italia Star Com Due S.R.L. www.italiastar.ro 004/021.433.03.27 info@italiastar.ro...
- Page 62 – – OFF, – – . 3. . 5. Italia Star Com Due S.R.L. www.italiastar.ro 004/021.433.03.27 info@italiastar.ro...
- Page 63 Italia Star Com Due S.R.L. www.italiastar.ro 004/021.433.03.27 info@italiastar.ro...
- Page 64 Italia Star Com Due S.R.L. www.italiastar.ro 004/021.433.03.27 info@italiastar.ro...
- Page 65 ГАРАНЦИОННА КАРТА Серия AA №. ____________ Марка на продукта: _______________________ Модел: ___________________________________ Серия №:___________________________________ Аксесоари: __________________________________ Продавач: ________________________________ Подпис и печат: ______________________________ Купувач: _________________________________ Адрес: ___________________________________ Дата на закупуване: _____________________________ Подпис / печат: ______________________________ ДИСТРИБУТОР: ........... ИМЕ: ..............e-mail: ................. АДРЕС: ..........
- Page 66 ръководството за употреба, или в условия, които противоречат на румънските технически стандарти; Гаранционните документи не са представени, те са били повредени / променени или нечетливи; ■ Машината има повреди, причинени от механични инциденти, натъртвания, шокове, проникване на течности, излагане на огън, злоупотреба или небрежност, промени...
- Page 67 SENCI Power, Lights Up The World! Ez az üzemeltetési kézikönyv azt a célt szolgálja, hogy útmutatásokat adjon Önnek arra, hogyan kell szabályosan használni és üzemeltetni SENCI termékét. Fő célunk az, hogy Ön elégedett legyen a termékkel és annak biztonságos működésével. Ezért kérjük, szánjon időt arra, hogy elolvassa a teljes kézikönyvet, különösen annak Biztonsági Óvintézkedésekkel...
-
Page 68: Fejezet: Biztonsági Utasítások És Figyelmeztetések
Ez az üzemeltetési kézikönyv azt a célt szolgálja, hogy útmutatásokat adjon Önnek arra, hogyan kell szabályosan használni és üzemeltetni SENCI termékét. Fő célunk az, hogy Ön elégedett legyen a termékkel és annak biztonságos működésével. Ezért kérjük, szánjon időt arra, hogy elolvassa a teljes kézikönyvet, különösen annak Biztonsági Óvintézkedésekkel foglalkozó... - Page 69 ÁRAMÜTÉS MEGELŐZÉSE Tilos a gépet esőben vagy hóban üzemeltetni. Tilos a géphez nedves kézzel hozzáérni, máskülönben áramütés fog bekövetkezni. A gép föld vezetékét az 1. föld terminálhoz kell bekötni, és a vezeték végét a földbe ásott föld elektródához kell csatlakoztatni. BEKÖTÉSRE VONATKOZÓ...
-
Page 70: Fejezet: Vezérlő Elemek És Funkciók
FIGYELMEZTETÉS Üzemeltetés előtt el kell olvasni a tulajdonosi kézikönyvet és az összes címkét. A gépet csak jól szellőztetett területen szabad üzemeltetni. A kipufogógáz mérgező szén-monoxidot tartalmaz. Ellenőrizni kell a gépet és a helyszínt kiömlött üzemanyag, illetve üzemanyag szivárgások szempontjából. Az üzemanyag feltöltése előtt le kell állítani a motort. A gépet tilos gyúlékony anyagok közelében üzemeltetni. -
Page 71: Vezérlőpanel
2.2 Vezérlőpanel 1. Takarékos fojtószelep (fekete) 2. AC jelzőlámpa (pilot light) 3. Túlterhelés jelző lámpa 4. Olaj gyelmeztető lámpa 5. Motorkapcsoló 6. 12 V DC kimenet 7. 8 A DC Megszakító 8. Üzemanyag csap (Petcock) 9. Szivató 10. 220/230/240 V AC kimenetek Ez az aljzat csak egy ügyfélnek felel meg. Az adott értékesítési területre vonatkozó különböző törvényeknek és rendeleteknek megfelelően módosulnak az aljzatok. - Page 72 Megjegyzés: A fojtószelepnek „OFF” pozícióban kell lennie, amikor olyan elektromos készüléket használ, amelynek nagy indítóáramra van szüksége, például kompresszort, szivattyút, illetve hűtőszekrényt. LED-es jelzőlámpák A LED-es jelzőlámpák segítenek az egység szabályos és szabálytalan funkcióinak közlésében. Kimenet Jelzőlámpája (Zöld) A kimenet jelzőlámpája akkor gyullad ki, amikor a motor elindul és áramot termel.
-
Page 73: Fejezet: Első Lépések
Ellenőrizze, hogy megkapta-e az alábbi tételeket AP 2000i 2000W Generátor 12 V-os töltőkábelek Egy palack olaj Olajtölcsér Amennyiben nem kapta meg a fenti tételek bármelyikét, kérjük, vegye fel a kapcsolatot a SENCI ügyfélszolgálatával a +86-23-86021111 telefonszámon. Italia Star Com Due S.R.L. -
Page 74: A Motorolaj Feltöltése
3.2 A motorolaj feltöltése A generátort olaj nélkül szállítottuk. TILOS a motort üzemanyaggal feltölteni, illetve elindítani a motorolaj feltöltése nélkül. A MOTOROLAJ FELTÖLTÉSÉHEZ EL KELL TÁVOLÍTANI AZ EGYSÉG OLDALPANELJÉT. Egy #2 Phillips fejű csavarhúzó segítségével el kell távolítani az -es és -es csavart (amely az 1. -
Page 75: Az Üzemanyag Feltöltése
3.3 Az üzemanyag feltöltése Az üzemanyagtartály kapacitása 4,1 liter. TILOS a tartályt túltölteni, mert különben túl fog csordulni, amikor az üzemanyag felmelegszik és kitágul. Megjegyzés: Biztonsági okokból az az üzemanyag, amelyet egyszer már betöltöttek ebbe az egységbe, nem adható vissza a vásárlás helyén. -
Page 76: A Motor Leállítása
3. Fordítsa el az üzemanyag csap gombot „ON” pozícióba. 4. Állítsa a motor kapcsolót (Piros) „ON” pozícióba 5. Teljesen húzza ki a szivató gombot Megjegyzés: A szivatóra nincs szükség a meleg motor beindításához. A gombot be kell nyomni eredeti pozíciójába meleg motor indítása esetén 6. -
Page 77: Fejezet: Elektromos Bekötés
4. FEJEZET: Elektromos bekötés 4.1 Kapacitás Az alábbi egyszerű lépésekkel kell kiszámolni az Ön céljaihoz szükséges működési és indító watt teljesítményigényeket. A Watt Teljesítmény Referencia Útmutató a 4.5 fejezetben található. 1. Válassza ki azokat az elektromos készülékeket, amelyeket egyszerre szeretne üzemeltetni. 2. -
Page 78: Watt Teljesítmény Referencia Útmutató
4.5 Watt Teljesítmény Referencia Útmutató A fenti adatok csak becslések. Ellenőrizze szerszámát, illetve készülékét a pontos watt igények szempontjából. A felsorolt watt igények a becsült watt igények alapján lettek megadva. A pontos watt igények megállapításához ellenőrizze annak a tételnek az adattábláját, illetve tulajdonosi kézikönyvét, amely számára az áramot a generátor segítségével szeretné... -
Page 79: Fejezet: Karbantartás
Az Ön teljesítményigényei 5. FEJEZET: Karbantartás 5.1 Rendszeres karbantartás A rendszeres időközönként végrehajtott ellenőrzés, beállítás és kenés generátorát a lehető legbiztonságosabb és leghatékonyabb állapotban fogja tartani. Használatot 6 havonta 12 havonta Végrehajtandó feladat megelőzően vagy 100 vagy 300 óránként óránként Állapot ellenőrzése Gyújtógyertya Tisztítás és szükség... -
Page 80: A Gyújtógyertya Karbantartása
Állapot ellenőrzése Légszűrő betét Tisztítás Állapot ellenőrzése Kipufogódob szita Tisztítás és szükség esetén csere Állapot ellenőrzése Szikrafogó Tisztítás és szükség esetén csere Állapot ellenőrzése Üzemanyag szűrő Tisztítás és szükség esetén csere 5.2 A gyújtógyertya karbantartása A gyújtógyertya ellenőrzése A gyújtógyertya a motor fontos alkatrésze és rendszeres időközönként ellenőrizni kell. -
Page 81: Motorolaj Csere
5.3 Motorolaj csere A motorolaj első cseréje egy hónap vagy 20 üzemóra után esedékes. 1. Helyezze a generátort vízszintes felületre és néhány percig járatva melegítse fel a motort. Ezt követően állítsa le a motort és fordítsa az üzemanyag csap gombot „OFF” pozícióba, majd az üzemanyag tanksapka légtelenítő... -
Page 82: A Kipufogódob Szita És A Szikrafogó Karbantartása
5.5 A kipufogódob szita és a szikrafogó karbantartása E feladatot 6 havonta vagy 100 üzemóránként kell végrehajtani. A légszűrőt lehet, hogy gyakrabban kell tisztítani, amennyiben a berendezést szokatlanul nedves, illetve poros területeken használják. 1. Távolítsa el a csavarokat , majd a fedelet . 2. -
Page 83: Fejezet: Tárolás
6. FEJEZET: Tárolás 6.1 Hosszú távú tárolás Gépének hosszú távú tárolása esetén néhány megelőző karbantartást kell végrehajtani a gép tönkremenetelének megelőzése érdekében. Eressze le az üzemanyagot 1. Kapcsolja a motorkapcsolót „OFF” pozícióba. 2. Távolítsa el az üzemanyagtartály sapkáját. Szívja ki az üzemanyagot az üzemanyagtartályból egy tanúsított benzin konténerbe, egy kereskedelemben kapható... -
Page 84: Fejezet: Hibaelhárítás És Specifikációk
7. FEJEZET: Hibaelhárítás és Specifikációk 7.1 Hibaelhárítási diagram 7.2 Az üzemanyag szűrő karbantartása Ez a fejezet szolgál az általános hibák elhárításának céljára. A motor nem indul Üzemanyag rendszerek: Az égéstér nem kap üzemanyagot Nincs üzemanyag a tartályban ... töltsön üzemanyagot a tartályba. Van üzemanyag a tartályban ... -
Page 85: Specifikációk
SC 2000 SC 2000 4 ütemű OHV léghűtéses 4 ütemű OHV léghűtéses egyhengeres, EPA által tanúsított egyhengeres, EPA által tanúsított (YAMAHA MZ80 típusú motor) (SENCI SC80 típusú motor) Motor típusa 79cmc 79cmc Motor löket térfogata (cc) 1600w 1600w Működési Watt teljesítmény... - Page 86 Garancialevél _______________ sorozatszám Termék neve: ____________________________ Típusa: _________________________________ Sorozatszám: ________________________________ Tartozékok: _________________________________ Értékesítő: __________________________________ Aláírás / bélyegző: _____________________________ Vásárló: ____________________________________ Címe: ______________________________________ Vásárlás dátuma: _____________________________ Aláírás / bélyegző: ____________________________ FORGALMAZÓ: ........NÉV: ............ CÍM: ..........Ezennel megerősítem, hogy a terméket hibátlan állapotban, a felhasználói kézikönyvvel együtt kaptam kézhez, és elfogadom, hogy a jelen garancialevél kizárólag a vásárlást igazoló...
- Page 87 A garanciális időszak alatt végzett javítások során sem szünetel az általános garanciális időszak. A garanciális szolgáltatások alá tartozik a meghibásodott alkatrészek javítása vagy cseréje is. Amennyiben a javítást a vásárló lakcímén vagy telephelyén kell elvégezni, a Segítségnyújtó Központ és a javítás helyszíne között szükséges szállítások költsége a vásárlót terheli. Minden garanciális javítást előzetesen jóvá...
- Page 88 We Appreciate Your Business. Thank you and congratulations on choosingSENCI. SENCI Power, Lights Up The World! This Operating Manual has been designed to instruct you on the correct use and operation of yourSENCI product. Your satisfaction with this product and its safe operation is our ultimate concern.
- Page 89 Read this manual carefully before operating this machine. This manual should stay with this machine if it is sold INTRODUCTION This Operating Manual has been designed to instruct you on the correct operation of your Senci product. Your satisfaction with this product and its safe operation is our ultimate concern. Therefore please take the time to read the entire manual, especially the Safety Precautions.
- Page 90 ELECTRIC SHOCK PREVENTION · Never operate the engine in rain or snow. · Never touch the machine with wet hands or electri- cal shock will occur. · Connect the ground lead of the machine to the ground (Earth) terminal 1 and connect the end to the ground electrode buried in the ground.
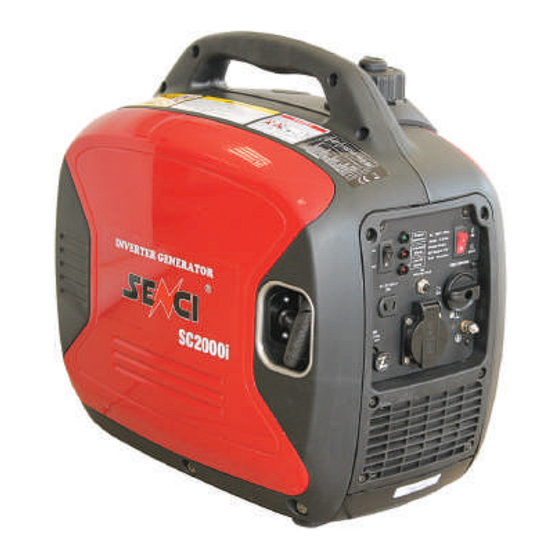
- Page 91 CONTROLS AND FEATURES 2.1 Generator Italia Star Com Due S.R.L. www.italiastar.ro 004/021.433.03.27 info@italiastar.ro...
- Page 92 2.2 CONTROL PANEL 2.3 Control Functions Throttle When the Throttle switch is in the "ON" position the throttle controls the engine speed according to the connected electrical load. The results are better fuel consumption and less noise. When the switch is in the "OFF" position the engine runs at 4,500 rpm regardless of the electrical load.
- Page 93 NOTE: The Throttle must be "OFF" when using electrical devices that require a large starting current, such as a compressor, pump, or refrigerator . LED INDICATORS The LED Indicators assist in communicating proper and improper functions of the unit. Output Indicator (Green) The Output Indicator comes on when the engine starts and produces power.
- Page 94 Inspect the generator to ensure that no damage has occurred in shipping or handling. If the unit appears to be damaged, DO NOT add fuel or attempt to start the generator. Please callSENCI customer service at+86-23-86021111 Check to ensure that you received the following items: AP2000i 2000W Generator • 12V Charging Cables • Bottle of Oil •...
- Page 95 3.2 Adding Engine Oil The generator has been shipped without engine oil. DO NOT add fuel or start the engine before adding engine oil. IN ORDER TO ADD MOTOR OIL YOU WILL NEED TO REMOVE THE SIDE PANEL FROM THE UNIT. Using a #2 Phillips-head screwdriver remove screws G) and @ (seen in gure 1) and lift up and away to remove the side panel Place the generator on a level surface.
- Page 96 3.3 Adding fuel 3.4 Starting the Engine OPERATE THE ENGINE IN A WELL VENTILATED AREA. DO NOT connect any electrical devices to the outlets on the generator before starting the engine. 1. Turn theEconomy Throttle switch "OFF" You may turn theEconomy Throttle switch to "ON" once the engine is started and a steady idle is achieved.
- Page 97 3. Turn the Fuel Petcock knob to the "ON" position. 4. Turn the Engine Switch (Red) "ON" 5. Pull the Choke Knob fully out. Note: The Choke is not needed to start a warm engine. Push the knob in to the original position when starting the engine warm. 6.
- Page 98 SECTION 4: Electrical Connection 4.1 Capacity Follow these simple steps to calculate the running and starting watts necessary for your purposes. See Section 4.5 for Wattage Reference Guide. 1. Select the electrical devices you plan on running at the same time. 2. Total the running watts of these items. This is the amount of power you need to keep your items running.
- Page 99 4.5 Wattage Reference Guide These are estimates only. Check your tool or appliance for exact wattage requirements. The wattages listed are based on estimated wattage requirements. For exact wattages , check the data plate or owner's manual on the item you wish to power using the generator. Operating voltage and frequency requirement of all electronic equipment should be checked prior to plugging to plugging them into this generator.
- Page 100 Your Power Needs SECTION 5: Maintenance 5.1 Periodic Maintenance Periodic inspection, adjustment and lubrication will keep your generator in the safest and most e cient condition possible. 6 mos. 12 mos. Routine Prior to use 100 hrs 300 hrs • Check condition Spark plug •...
- Page 101 • Check Condition Air Filter Element • Clean • Check Condition Muffler Screen • Clean or replace if necessary • Check Condition Spark Arrestor • Clean or replace if necessary • Check Condition Fuel Filter • Clean or replace if necessary 5.2 Spark Plug Maintenance Spark plug inspection The spark plug is an important engine component...
- Page 102 5.3 Engine Oil Replacement Initial replacement of the engine oil is after one month or 20 hours of operation . 1. Place the generator on a level surface and warm up the engine for several minutes. Then stop the engine and turn the Fuel Petcock knob to "OFF"...
- Page 103 5.5 Muffler Screen and Spark Arrestor Maintenance Should be performed every 6 months or 100 hours. The air filter may need to be cleaned more frequently when using in unusually wet or dusty areas. 1. Remove the screws <D and then remove the cover @.
- Page 104 SECTION 6: Storage 6.1 Long Term Storage Long term storage of your machine will require some preventive procedures to guard against deterioration . Drain the fuel 1. Turn the Engine switch to "OFF" G). 2. Remove the fuel tank cap. Extract the fuel tank into an approved gasoline container using a commercially available hand siphon.
- Page 105 Section 7: Troubleshooting & Specifications Troubleshooting diagram 7.2 Fuel Filter Maintenance Use this section to troubleshoot common errors. Engine won't start Fuel systems: No fuel supplied to combustion chamber • No fuel in tank..supply fuel. • Fuel in tank..Fuel tank cap air vent knob and fuel cock knob to "ON".
- Page 106 7.3 Specifications SC 2000 SC 2000 4-Stroke OHV Air Cooled Single 4-Stroke OHV Air Cooled Single Cylinder EPA Certified ( YAMAHA Cylinder EPA Certified ( YAMAHA MZ80 Engine) MZ80 Engine) Engine Type 79cmc Engine Displacement (cc) 79cmc 1600w Running Watts 1600w 1800w Starting Watts...
- Page 107 Warranty Certificate Series AA No. ____________ Product name:______________________________ Model : ___________________________________ Series no.:_________________________________ Accessories:________________________________ Seller:_____________________________________ Signature / stamp: ___________________________ Buyer:_____________________________________ Adress :___________________________________ Date of purchase: ___________________________ Signature / stamp: ___________________________ : .......... ISTRIBUTOR : ..................... DDRESS I hereby confirm that I received the product in perfect condition with the utilization manual and I fully agree that this warranty certificate is valid only accompanied with the purchase invoice or receipt.
- Page 108 centres, have to be approved by Italia Star Service department in order to allow the reparations. The warranty cannot be accepted in the following cases: · When the reparation or substitution of the parts has been done by a non-authorised Italia Star assistance service;...
Need help?
Do you have a question about the AP2000i and is the answer not in the manual?
Questions and answers