Birlea LYNX 2 DOOR SLIDING ROBE WITH MIRRIOR Assembly Instructions Manual
Hide thumbs
Also See for LYNX 2 DOOR SLIDING ROBE WITH MIRRIOR:
- Assembly instructions manual (9 pages)
Advertisement
Quick Links
Assembly Instructions
Thank you
purchasing a
Birlea
product.
Are you happy with your purchase?
Yes: That's great, we would love to hear more from you. Please leave us a review on
our social media channels or Trustpilot. Your feedback will be greatly appreciated.
No: If for any reason there is something missing, indifferent or incorrect with
your order, please contact the retailer you purchased the item from. We will
work with the retailer to resolve your issue as quickly as possible.
for
For a chance to win a Love 2 Shop voucher
simply post a picture of your new product
on your preferred social channels tagging
Birlea Furniture and using the hashtag
#ShareYourStyle
will be selected at random each month.
To view our full terms and conditions please visit our website. www.birlea.com
Social icon
Rounded square
Only use blue and/or white.
For more details check out our
Brand Guidelines.
www.birlea.com
and #Birlea. One winner
Advertisement

Subscribe to Our Youtube Channel
Related Manuals for Birlea LYNX 2 DOOR SLIDING ROBE WITH MIRRIOR


Summary of Contents for Birlea LYNX 2 DOOR SLIDING ROBE WITH MIRRIOR
- Page 1 To view our full terms and conditions please visit our website. www.birlea.com Are you happy with your purchase? Yes: That’s great, we would love to hear more from you. Please leave us a review on our social media channels or Trustpilot.
- Page 2 Assembly Video For a step by step guide on how to build our Lynx 2 Door Sliding Robe with Mirror visit our YouTube channel ‘BirleaFurnitureLtd’ or alternatively scan the QR code on your smart phone. How to scan a QR code from an apple device Step One: Open up the camera app Step Two: Hold the device’s camera up to the QR code Step Three: Your Apple devise will automatically recognise the QR code and...
-
Page 3: Health And Safety
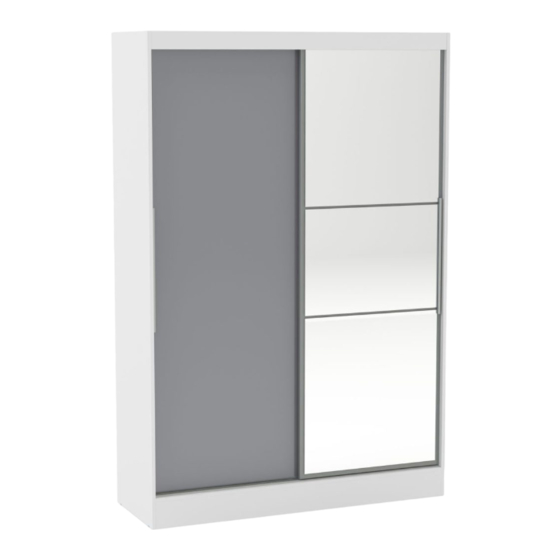
Vendor: S000139 ASSEMBLY INSTRUCTIONS LYNX 2 DOOR SLIDING ROBE WITH MIRRIOR IMPORTANT: READ THESE INSTRUCTIONS CAREFULLY BEFORE ATTEMPTING TO ASSEMBLE OR USE YOUR LYNX 2 DOOR SLIDING ROBE WITH MIRROR. PLEASE KEEP THESE INSTRUCTIONS FOR FUTURE REFERENCE. ASSEMBLY: Assembly should be carried out with this item laying flat, not standing upright. - Page 4 Vendor: S000139 Identification of Accessories Part Descripion 5 x 60 mm Screw Bushing Metalic Angle Plates Metal Claw 8 x 30mm Wooden Dowel Small Plastic Foot Strap 8 x 50mm Wooden Dowel Parts List Simple Minifix Screw Part Descripion Top Panel Double Minifix Screw Cam Lock Shelf...
- Page 5 Vendor: S000139 Step 1: Prepare these parts for assembly using hardware parts B5, E, E7, F, J, N, P5, S, V4, V5, W3A, W3B, W3C, W3D, W3E, W4, W5 and Z4. You will need to use a small mallet and a screwdriver (not provided). DO NOT use any power tools as this may damage the frame and will invalidate any claim.
- Page 6 Vendor: S000139 Step 2: Attach the back rails (9) to the back support (7) using hardware parts E, K and L with a small mallet and screwdriver (not provided). DO NOT use any power tools as this may damage the frame and will invalidate any claim. Step 3: Attach the back support (7) and front support (8) to the base panel (14) using hardware parts F, L and M with a small mallet and a screwdriver (not provided).
- Page 7 Vendor: S000139 Step 4: Attach the shelf (2) using hardware parts K, L and M with a screwdriver (not provided). DO NOT use any power tools as this may damage the frame and will invalidate any claim. Step 5: Attach the self divider (6) and the top panel (1) using hardware parts L and M with a screwdriver (not provided).
- Page 8 Vendor: S000139 Step 6: Attach the bottom plinths (10) to the right panel (5). DO NOT use any power tools as this may damage the frame and will invalidate any claim. Step 7: Join the assembled inner frame section of the assembled side frame section using hardware parts L and M with a screwdriver (not provided).
- Page 9 Vendor: S000139 Step 8: Position the hanging rail R4 then attach the left panel (4) using hardware parts L and M with a screwdriver (not provided) DO NOT use any power tools as this may damage the frame and will invalidate any claim. 1º...
- Page 10 Vendor: S000139 Step 10: Secure the back panels (13) using hardware parts C1 and N with a small mallet (not provided). Attach the top plinth (3) using harware part S with screwdriver (not provided). DO NOT use any power tools as this may damage the frame and will invalidate any claim. Step 11: Attach the doors (11) and (12) as shown in the diagram.
-
Page 11: Additional Information
To secure the item to the wall use hardware parts A, B3 and E9 using a drilling machine (not provided) and a screwdriver (not provided).Then attach hardware part S to the item with a screwdriver (not provided). Birlea Furniture advise you use the wall straps provided to further enhance the safety of this product. 1°...
Need help?
Do you have a question about the LYNX 2 DOOR SLIDING ROBE WITH MIRRIOR and is the answer not in the manual?
Questions and answers