Table of Contents
Advertisement
Quick Links
Download this manual
See also:
Instructions for Using
Advertisement
Table of Contents

Related Manuals for CDA CYLINDER EXTRACTORS EVCK4


Summary of Contents for CDA CYLINDER EXTRACTORS EVCK4
- Page 1 Manual for Installation, Use and Maintenance Passionate about style Customer Care Department • The Group Ltd. • Harby Road • Langar • Nottinghamshire • NG13 9HY T : 01949 862 012 F : 01949 862 003 E : service@cda.eu W : www.cda.eu...
- Page 2 Under no circumstances should any external covers be removed for servicing or maintenance except by suitably qualified personnel. Appliance information: Please enter the details on the appliance rating plate below for reference, to assist CDA Customer Care in the event of a fault with your appliance and to register your appliance for guarantee purposes. Appliance Model...
-
Page 3: Using Your Extractor
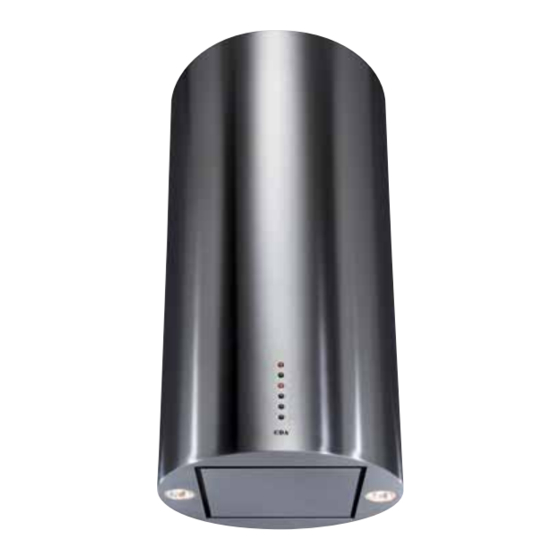
Using your Extractor For best performance, you should switch on the extractor 15 minutes before starting to cook and leave it to run for approximately 15 minutes after the end of cooking. Control Panel A – Light button B, C, D – Speed level buttons E –... -
Page 4: Care And Maintenance
Care and Maintenance IMPORTANT : DO NOT PERFORM MAINTENANCE OR CLEANING OF THE EXTRACTOR WITHOUT FIRST SWITCHING OFF THE ELECTRICITY SUPPLY. Cleaning You should use a nonabrasive cleaner. Any abrasive cleaner (including Cif) will scratch the surface and could erase the control panel markings. You can clean your extractor effectively by simply using a dilute solution of water and mild detergent and drying to a shine with a clean cloth. -
Page 5: Changing The Light
Changing the Light IMPORTANT: DO NOT PERFORM MAINTENANCE OR CLEANING OF THE EXTRACTOR WITHOUT FIRST SWITCHING OFF THE ELECTRICITY SUPPLY. DO NOT CHANGE THE LIGHT BULB IMMEDIATELY AFTER USE AS THE BULB WILL BE HOT. ALLOW IT TO COOL BEFORE REMOVING IT. Open the base of the extractor as described above and then press downwards on the light housing as shown in figure 5 before removing the bulb. -
Page 6: Mains Electricity Connection
Mains Electricity Connection THIS APPLIANCE MUST BE CONNECTED TO THE MAINS SUPPLY BY A COMPETENT PERSON, USING FIXED WIRING VIA A DOUBLE POLE SWITCHED FUSED SPUR OUTLET AND PROTECTED BY A 3A FUSE. We recommend that the appliance is connected by a qualified electrician, who is a member of the N.I.C.E.I.C. and who will comply with the I.E.E. -
Page 7: Installation
CDA hob. (The height should be measured from the top of the hotplates or burners) Where the extractor is to be installed above a non-CDA hob, the instructions supplied with the hob may dictate that the height required above the hob is greater than 650mm. -
Page 8: Mounting Your Extractor
Mounting your extractor 1. Using the supplied template, mark the positions of the 3 main fixing holes and the additional fixing hole (X) on the ceiling. 2. Drill and plug the holes, as required. If screwing directly to the ceiling joists, plugs may not be required (See Important note above) 3. - Page 9 Mounting your extractor 6. When used with a CDA hob, the extractor is required to be 650mm above the hotplates. Measure the height of the ceiling and then the hotplate height from the floor. The length of the support sections should be calculated as follows: - Length of support = Ceiling height –...
- Page 10 (Fig 12) or re-circulating (Fig 13), in which case you will need to purchase an optional accessory T-piece(M) from CDA. Ensure that the duct adapter (F) is securely connected to the duct pipe or T-piece in order to minimise noise.
- Page 11 Mounting your extractor IMPORTANT NOTE: The extractor is now mounted and secured to the wall; the electrical connections are now required to be made in order for the extractor to function. 1. Ensure that there are no trapped wires - The mains lead and control wires are easily trapped when securing the stainless section to the motor.
- Page 12 Passionate about style Customer Care Department • The Group Ltd. • Harby Road • Langar • Nottinghamshire • NG13 9HY T : 01949 862 012 F : 01949 862 003 E : service@cda.eu W : www.cda.eu...
Need help?
Do you have a question about the CYLINDER EXTRACTORS EVCK4 and is the answer not in the manual?
Questions and answers