
Summary of Contents for ExcelPool Products Excelpool Salt System
- Page 1 Excelpool Salt System Saltwater Chlorine Generator Installation and Operation Manual IN ORDER NOT TO VOID WARRANTY, READ MANUAL BEFORE INSTALLATION. Not following proper installation and or proper use guidelines may void your warranty.
- Page 2 READ AND FOLLOW ALL INSTRUCTIONS WARNING - Disconnect all AC power during installation. WARNING - Do not permit children to use this product. WARNING – Risk of Electric Shock. All electrical wiring MUST be in conformance with applicable local codes, regulations, and the National Electric Code (NEC).
- Page 3 Failure to properly install this product could result in a dangerous condition, including but not limited to electrical or structural hazards. ExcelPool Products disclaims all liability arising from the installation and the user assumes all risk associated with the installation.
- Page 4 CAUTIONS Please note, the total working hours for the T-Cell should be 8 hours or less per day. If you are using a variable speed pump for 24 hours a day be sure to adjust the chlorine output to 25-30%. If the pump is only running 10 hours per day adjust the chlorine output between 60-80%.
-
Page 5: Table Of Contents
SAVE THESE INSTRUCTIONS Table of Contents OPERATION General................5 Water chemistry..............5 Controls................12 Maintenance...............16 INSTALLATION Mounting................19 Plumbing................19 Wiring.................21 TROUBLESHOOTING Troubleshooting..............25 WARRANTY Warranty................28 P a g e... -
Page 6: Operation
OPERATION The Excelpool System is an automatic chlorine generation system for pool & spa sanitation. The operation requires a low concentration of salt (sodium chloride) in the pool water at levels low enough that it normally cannot be tasted. Excelpool System automatically sanitizes your pool by converting the salt into free chlorine, which kills bacteria and algae in the pool through a process called electrolysis. - Page 7 IDEAL CHEMICAL LEVELS Salt 3200 to 4000 ppm Free chlorine 1.0 to 3.0 ppm 7.2 to 7.6 Cyanuric Acid 50 to 100 ppm (Stabilizer) Total Alkalinity 80 to 120 ppm Calcium Hardness 200 to 400 ppm Metals 0 ppm Saturation Index -.2 to .2 (0 best) SATURATION INDEX The saturation index (Si) relates to the calcium and alkalinity in...
- Page 8 Calcuim Total ℃ ℉ Hardness Alkalinity How to use: Measure pool pH, temperature, calcium hardness, and total alkalinity. Use the chart above to determine Ti, Ci,and Ai from your measurements. Insert values of pH, Ti, Ci and Ai into the above equation.
- Page 9 Gallons Liters (pool size feet) (pool size in meters) Length×Width×Average Length×Width×Average Rectangular Depth×7.5 Depth×1000 Diameter×Diameter×Average Diameter×Diameter×Average Round Depth×5.9 Depth×785 Length×Width×Average Length×Width×Average Oval Depth×6.7 Depth×893 • The ideal salt level is between 3200-4000 ppm (parts per million) with 3600 ppm being the optimal level. Calculate the number of gallons in the pool and add salt according to the chart on page 10.
- Page 10 HOW TO ADD OR REMOVE SALT • IN GROUND POOLS: Turn the filter pump on and add the salt directly into the pool at the shallow end. • ABOVE GROUND POOLS WITH MAIN DRAINS: Add directly in front of the return jet to pool. Run the filter pump for 24 hours with the suction coming from the main drain (use the pool vacuum if there is no main drain) to allow the salt to evenly disperse throughout the pool.
- Page 11 POUNDS and (Kg) OF SALT NEEDED FOR 3200 PPM Gallons and (Liters) of Pool/Spa water 10 | P a g e...
- Page 12 STABILIZER (CYANURIC ACID) Always test for stabilizer (cyanuric acid) level, when testing for salt. This test should be done at least once per month. Use the chart below to determine how much stabilizer must be added to raise the level to 80 ppm . POUNDS and (Kg) OF STABILIZER (CYANURIC ACID) NEEDED FOR 80 PPM Gallons and (Liters) of Pool/Spa water 11 |...
-
Page 13: Controls
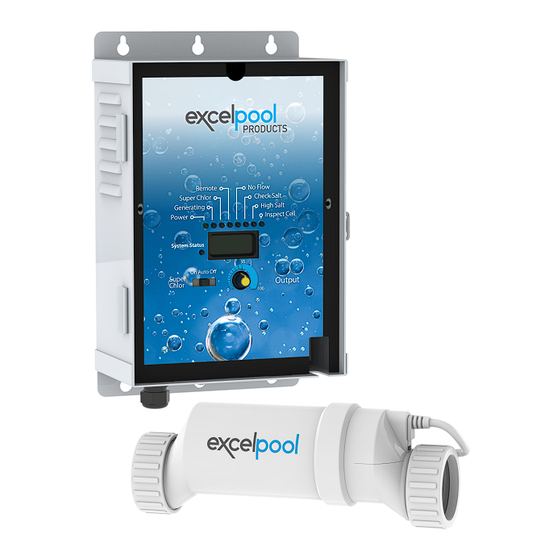
POLYMERS It is advised to use polymers (commonly sold as poly algaecide) on salt water sanitizing systems. The poly algaecide is sold in 30% and 60% concentrations. Application rate is 1 quart of Poly 30 (or ½ quart of Poly 60) per 15,000 gallons (60,000 liters) of pool water, per month. - Page 14 DESIRED LEVEL ADJUSTMENT KNOB This setting is used to control the amount of chlorine the Excelpool System generates. Adjust this setting to increase or decrease the chlorine output level. The reading is from 5 percent output to 100% output capacity of Excelpool System. INDICATOR LED •...
- Page 15 • HIGH SALT: When illuminated, the salt level is too high, and Excelpool System has shut down. The pool water must be diluted with fresh water before operation is restored. • INSPECT CELL: If flashing, either the cell efficiency is reduced, or it is time for regularly scheduled cell inspection.
- Page 16 3. Cell current (typically 2.50 to 7.80 amps when chlorine is being generated, otherwise 0 amps) 4. Desired Output % ("0P" -- "100P" depending on knob position or input from remote pool automation controller) 5. Instant salinity ( -xxxx ppm or -x.xx grams/Liter) 6.
-
Page 17: Maintenance
To find the optimum “Desired Level %” setting, start at a fairly high setting and work downward. It will take a few days of adjustments to find the ideal setting for your pool. Once determined, it should only take minor adjustments. The Excelpool System control will not produce chlorine at temperatures below 50°F If your pool water is colder than 50°F, you must chlorinate manually. - Page 18 Servicing and Cleaning the Cell • Turn off power to the Excelpool System before removing the CELL. • Once removed, look inside the cell and inspect for scale formation (light colored crusty or flaky deposits) on the plates and for any debris that has passed through the filter and gotten caught on the plates.
- Page 19 ALWAYS POUR ACID INTO WATER-NEVER POUR WATER INTO ACID. BE SURE TO WEAR PROTECTIVE GLASSES, CLOTHING AND CHEMICAL RESISTANT GLOVES • The level of the solution in the container should just reach the top of the cell so that the wire harness compartment is NOT submerged.
-
Page 20: Installation
INSTALLATION Installation must be performed in accordance with Local NEC codes. Preparing Pool Water: The pool’s chemistry must be balanced BEFORE activating the Excelpool System. It is recommended that you consult a pool professional for the initial balancing each season. NOTE: At the beginning of each season,add metal remover and polymer based (non-copper) algaecide to the pool, per manufacturer’s instructions. - Page 21 For proper plumbing, refer to the overview diagram below. Flow switch: IMPORTANT: To insure proper operation, verify that the arrow on the flow switch (located on the side) points in the same direction of water flow. Electrolytic Cell: Install using the unions provided. Tighten by HAND for a watertight seal.
-
Page 22: Wiring
Wiring Power must be turned off at the circuit breaker before performing any wiring. Be sure to follow Local and NEC electrical codes. To provide safe operation, Excelpool System must be properly grounded and bonded. Input Power for stand-alone operation: Wire the Excelpool System to the LOAD SIDE of the filter pump timer. - Page 23 For Canadian models, the Excelpool System shall be connected to a circuit protected by a class A ground fault interrupter. Be sure to connect the GROUND wire to the green ground screw terminal located on the INSIDE WALL of the enclosure. Note: Wire the pump directly to the time clock—do not use the Excelpool System as a junction box.
- Page 24 Bonding: A lug used for bonding is attached to the bottom of the Excelpool System enclosure (see diagram below). The Excelpool System must be bonded with an 8 AWG copper wire (6 AWG Canada) to the pool bonding system. Electrolytic Cell and Flow Switch: The electrolytic cell and flow switch cables are terminated with connectors that plug into the Excelpool System for easy attachment and removal.
- Page 25 NOTE: There must be only 1 “primary” unit. All other Excelpool System units must be configured as “secondary”. Goldline-Attach wires to proper screw terminals as show below. Pentair-Attach wires to opposite numbered screw terminals as shown below. Note that the colors marked on the Pentair PCB do not match the Excelpool System.
-
Page 26: Troubleshooting
TROUBLESHOOTING Diagnostic Displays Sequential pushes of the small “diagnostic” button next to the LCD display will cause the Excelpool System to display the following information: Pool temperature (xx degrees Fahrenheit or Celsius) Cell voltage (typically 21.0 to 27.0 volts when chlorine is being generated, otherwise 16-25V Cell current (typically... - Page 27 3. "No Flow" LED illuminated or flashing The Excelpool System has sensed a no flow condition and has stopped generating chlorine. Check that the flow switch is plugged into the connector on the bottom of the control unit and that the wire is not cut or damaged. Make sure you have at least 12"...
- Page 28 8. Possible causes of low chlorine or no chlorine • Excelpool System switch in OFF position. • Desired Level % adjustment setting is too low. • Low stabilizer (Cyanuric Acid). Chlorine is being produced but the pool water is unable to hold on to the chlorine, due to low stabilizer.
- Page 29 REPLACEMENT PART LIST Item No. Part description ONE (1) YEAR FULL WARRANTY Excelpool System is warranted to be free from defects in materials and workmanship,under normal use and non- commercial application, for a period of One (1) year,per the schedule below. To obtain service, contact the authorized dealer from which the unit was purchased.
-
Page 30: Warranty
WARRANTY EXCLUSIONS • Problems arising from failure to maintain proper water chemistry levels, per manufacturer’s recommendations, as outlined in the Owner’s Manual. • Problems arising from failure to use Excelpool System in accordance to manufacturer’s recommendations, as outlined in the Owner’s Manual. •... - Page 31 NOTES 30 | P a g e...
- Page 32 excelpoolproducts.com...
Need help?
Do you have a question about the Excelpool Salt System and is the answer not in the manual?
Questions and answers