Advertisement
Quick Links
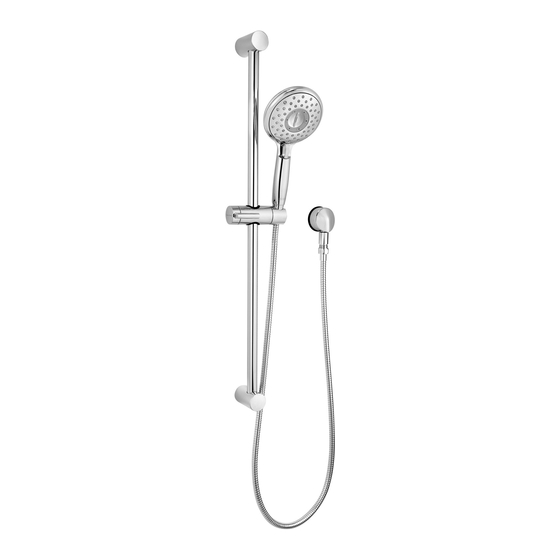
SPECTRA+ HANDHELD
Adjustable Personal
Hand Shower Bar
For all Models
Thank you for selecting American Standard...
the benchmark of fine quality for over 100 years.
To ensure that your installation proceeds smoothly-please read
these instructions carefully before you begin.
RECOMMENDED TOOLS AND MATERIALS
Most of the procedures require the use of common tools and materials, which are available from hardware and plumbing
supply stores. It is essential that the tools and materials be on hand before work is begun.
10'
Tape Measure
CARE AND CLEANING
Do: Simply rinse the product clean with clear water, dry with a soft cotton flannel cloth.
Do Not: Clean the product with soaps, acid, polish, abrasives, harsh cleaners, or a cloth with a coarse surface.
ROUGHING-IN DIMENSIONS:
• For reference
1-3/4"
(43 mm)
Product names listed herein are trademarks of AS America, Inc.
© AS America, Inc. 2017
™
Flat Blade Screwdriver
1/2"
(13 mm)
1/2 N.P.T.
(13 mm)
(48" - 60") (OPTIONAL)
TO FINISHED FLOOR
(1219 - 1524 mm)
9-15/16"
(252 mm)
59"
(1499 mm)
INSTALLATION
INSTRUCTIONS
KIT
Level
1-1/16"
(26 mm)
WALL SUPPLY
WITH BUILT IN
BACK FLOW
PREVENTER
1-7/16"
(37 mm)
1/2" NPSM HOSE
CONNECTION (13 mm)
RUBBER GASKET
FINISHED WALL
- 1 -
Certified to comply with ANSI A112.18.1M
Drill
1-3/4"
(45 mm)
1-9/16" DIA
(40 mm)
30-1/8"
(765 mm)
FINISHED
WALL
M965854 (8/17)
Advertisement

Subscribe to Our Youtube Channel
Related Manuals for American Standard SPECTRA+ HANDHELD


Summary of Contents for American Standard SPECTRA+ HANDHELD
- Page 1 ™ Adjustable Personal Hand Shower Bar For all Models Thank you for selecting American Standard... the benchmark of fine quality for over 100 years. To ensure that your installation proceeds smoothly-please read Certified to comply with ANSI A112.18.1M these instructions carefully before you begin.
- Page 2 INSTALL WALL ANCHORS • The ADJUSTABLE SHOWER BAR works best if secured to a wall stud or cross brace within the wall, using the SCREWS supplied. • If the ADJUSTABLE SHOWER BAR is to be installed on a tile or plaster wall the ANCHORS (1) and SCREWS (2) should be used.
- Page 3 INSTALL ADJUSTABLE SHOWER BAR • Remove CAP (1) from SHOWER RAIL (2). • Secure SHOWER RAIL (2) to the wall using MOUNTING SCREWS (3). Do not fully tighten. After alignment is made, tighten the MOUNTING SCREWS (3) fully. • Instal CAP (1) back onto SHOWER RAIL (2). 30"...
Need help?
Do you have a question about the SPECTRA+ HANDHELD and is the answer not in the manual?
Questions and answers