Advertisement
American Standard is devoted to making life,
in the heart of your home, better every day...
...so, thank you for inviting us in! With the very best in kitchen
and bathroom products, we are here to help make your life
happier, healthier and simpler. Our commitment to quality,
innovation and performance has made us part of your everyday
routine for nearly 150 years, and we look forward to being a
part of your life for many years to come.
Learn more at www.AmericanStandard.com
REGISTER YOUR WARRANTY
Try the easy-scan QR code to quickly enter
your information or find your product's
detailed warranty here:
www.AmericanStandard.com/warranty
Registering allows you to keep your product information
safe, and us the ability to contact you in the event of a
product recall or any news about your purchase.
And if ever you have a question or need help...?
Call us at 1-855-815-0004
756278-100 EN Rev. 2 (12/23)
AM00853400/AM00854400/AM00855400
1
Advertisement
Table of Contents

Subscribe to Our Youtube Channel
Related Manuals for American Standard Aspirations AM00853400


Summary of Contents for American Standard Aspirations AM00853400
- Page 1 American Standard is devoted to making life, in the heart of your home, better every day… …so, thank you for inviting us in! With the very best in kitchen and bathroom products, we are here to help make your life happier, healthier and simpler.
- Page 2 AM00853400 / AM00854400 / AM00855400 INSTALLATION INSTRUCTIONS Thank you for selecting American Standard – the benchmark of fine quality for over 150 years. To ensure this product is installed properly, please read these instructions carefully before you begin. Certain installations may require professional help.
-
Page 3: Inside The Box
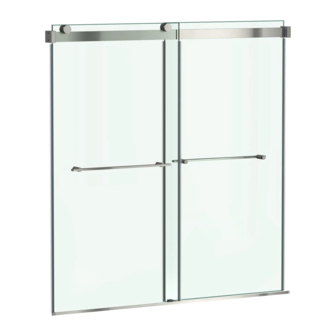
INSIDE THE BOX 48" or 60" Shower Door 60" Tub Door RECOMMENDED TOOLS AND MATERIALS Installation steps will indicate which tools should be used with associated letter Level Hammer Utility Knife Adjustable Wrench Painter’s Phillips Regular Safety Masking Tape Screwdriver Screwdriver Equipment 1/8"... -
Page 4: Box Contents
BOX CONTENTS 1x Installation Instruction [1] 8x Wall Anchors [2] 8x Screws ST5x35 [3] 1x Wall Bracket (Left) [4] 1x Wall Bracket (Right) [5] 2x Exterior Rollers [6] 2x Exterior Roller Caps [7] 1x Wrench [8] 1x 2.5 mm Allen Key [9] 2x Interior Rollers [10] 2x Interior Roller Caps [11] 1x Bottom Guide A... -
Page 5: Assembly Drawing
ASSEMBLY DRAWING [03] [04] [18] [01] [02] [06] [10] [05] [09] [21] [22] [24] [25] [20] [17] [16] [13] [11] [19] [12] [15] [14] [08] [07] [1] 8x Wall Anchors [8] 1 x 2.5 mm Allen Key [17] 1x Interior Handle Set Only use when wood is not [9] 2x Interior Rollers [18] 1x Top Rail... -
Page 6: Installation Instructions
NOTICE: Before drilling into the wall on step 1c, verify the height of the holes a second time utilizing a tape measure. The bottom holes should measure from the top of the tub/base as follows: 60" Door - installation: 56-9/16". 72" Door - installation: 68-9/16". If your measurement does not equal above dimensions, adjust all 4 hole locations up or down accordingly. - Page 7 INSTALLING WALL BRACKETS • In this step, you’ll need following parts: [1] x8, [2] x8, [3] x1, [4] x1, [23] x4, [25] x1 • In this step, you’ll need the following tools: B, F FIGURE Screw ST5x35 [23] 2a. Starting with RIGHT Wall Bracket [4], remove all 4 screws from Wall Bracket. Save to reinstall with Glass Catchers later.
- Page 8 INSTALLING TOP RAIL • In this step, you’ll need following part: [18] x1 • In this step, you’ll need the following tools: A [18] VIEW FROM INSIDE 3a. Slide Top Rail [18] over and into Left [3] and Right Wall Bracket [4], (check for level) then slide metal piece over Top Rail and into the wall bracket as illustrated.
- Page 9 INSTALLING EXTERIOR WHEELS, EXTERIOR DOOR PANEL • In this step, you’ll need following parts:[5] x2, [7] x1, [8] x1, [11] x1, [19] x1, [21] x1 • In this step, you’ll need the following tools: A, D, I, M NOTE: TWO PEOPLE REQUIRED [11] 1"(for tub door installation) or 1/2"...
- Page 10 INSTALLING BOTTOM GUIDE A • In this step, you’ll need following parts: [11] x1, [13] x1 • In this step, you’ll need the following tools: A, F, I, J, K [11] Ø1/8" Screw ST4x25 [13] 5a. Carefully slide Exterior Door Panel [21] over Bottom Guide A [11] and check level of Exterior Door Panel.
- Page 11 INSTALLING INTERIOR WHEELS, INTERIOR DOOR PANEL AND BOTTOM GUIDE B • In this step, you’ll need following parts: [9] x2, [12] x1, [22] x1 • In this step, you’ll need the following tool: D NOTE: TWO PEOPLE REQUIRED [22] [22] [12] [22] View from...
- Page 12 ADJUSTING EXTERIOR AND INTERIOR DOOR PANELS • In this step, you’ll need following parts: [6] x2, [10] x2 • In this step, you’ll need the following tool: D VIEW FROM INSIDE [10] 7a. Once all assembly is completed, it may be necessary to adjust both the Exterior [21] and Interior [22] Door Panels to ensure they are both level and when closed, fit up against the wall to seal properly.
- Page 13 INSTALLING EXTERIOR AND INTERIOR HANDLE SETS • In this step, you’ll need following parts: [8] x1, [16] x1, [17] x1 [17] [16] 8a. Unscrew both threaded nuts from Exterior Handle Set [16] and separate parts as illustrated. Install Exterior Handle on the outside of the Exterior Door Panel [21] and place the threaded nut through hole in glass from inside of door panel, ensuring plastic spacer is over threads of nut and contacting glass.
- Page 14 INSTALLING SIDE GASKETS • In this step, you’ll need following parts: [20] x4 [21] [22] [20] [20] [21] 9a. Install one of the Side Gaskets [20] to the left side of the Exterior Door Panel [21] as illustrated. NOTE: Apply water into groove of Side Gaskets to aid inserting gaskets into edges of glass doors. 9b.
- Page 15 INSTALLING ALUMINUM SEAL AND LEFT & RIGHT END CAPS • In this step, you’ll need following parts: [14] x1, [15] x1, [19] x1 • In this step, you’ll need the following tool: I [19] [11] [15] [14] 10a. Place a bead of adhesive along the entire underside of the Aluminum Seal [19]. 10b.
- Page 16 Painter’s naphtha can be used to remove excess adhesives and/or wet oil-based paint. AFTERCARE AND CLEANING Two primary materials are used to manufacture your new American Standard shower enclosure: tempered glass and anodized aluminum. To assure a long-lasting finish on the enclosure, wipe it down with a towel after each use.
-
Page 17: Tell Us What You Think
Register your sink at www.americanstandard.com. Please save your proof of purchase (sale receipt). If you need assistance or do not have access to our website, please contact American Standard Customer Care at: (800) 442-1902. An American Standard representative will assist in completing the warranty registration.
Need help?
Do you have a question about the Aspirations AM00853400 and is the answer not in the manual?
Questions and answers