Table of Contents
Advertisement
THE BEST BATH OR SHOWER EXPERIENCE?
THE ONE NOBODY INTERRUPTS.
Thank you for buying an American Standard
bath or shower product.
We're so grateful you did, and you will be too. Not just while you're waking
up each morning, but also every time a dirty gardener, sweaty soccer player,
or muddy dog gets cleaned up. How do we know? Just like you, we've lived
with that same beautiful chaos called life for almost 150 years. We believe
that while every home should appreciate in value, we never forget the
sentimental value that grows from enjoying life in the heart of home—
your kitchen and bath. That's why we love your stories and ideas; they help
us innovate with products that make your life easier.
Or, visit americanstandard-us.com/bathroom/tub-and-shower-
doors to watch video, view/download installation manuals
or learn more about your product.
Have a question or need help on install?
For questions or help on installation call us at 800-442-1902.
For a copy of our warranty in additional languages,
please visit Americanstandard.com
Advertisement
Table of Contents

Subscribe to Our Youtube Channel
Related Manuals for American Standard Elevate AM00840400


Summary of Contents for American Standard Elevate AM00840400
- Page 1 THE BEST BATH OR SHOWER EXPERIENCE? THE ONE NOBODY INTERRUPTS. Thank you for buying an American Standard bath or shower product. We’re so grateful you did, and you will be too. Not just while you’re waking up each morning, but also every time a dirty gardener, sweaty soccer player, or muddy dog gets cleaned up.
- Page 2 AM00840400 INSTALLATION INSTRUCTIONS Thank you for selecting American Standard – the benchmark of fine quality for over 150 years. To ensure this product is installed properly, please read these instructions carefully before you begin. Certain installations may require professional help. Also be sure your installation conforms to local codes.
-
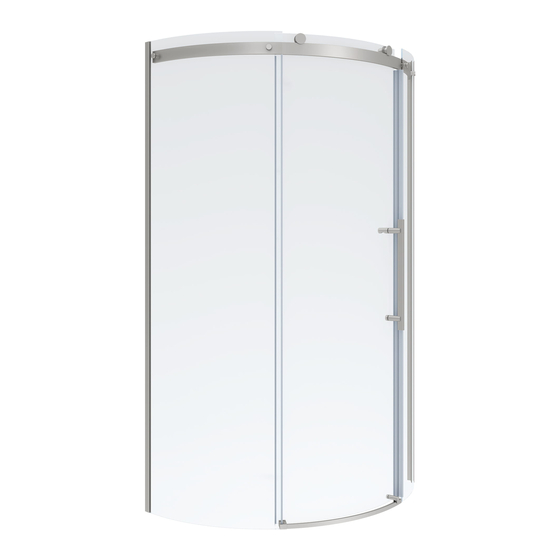
Page 3: Inside The Box
INSIDE THE BOX 36"x 72" Curved Shower Door Image shown may vary from product purchased. RECOMMENDED TOOLS AND MATERIALS Installation steps will indicate which tools should be used with asscociated letter 1/4" (6 mm)) Drill 1/4" (6mm) & 1/8" (3.2mm) Level Drill Drill Bits #2 Square Drive Bit... -
Page 4: Box Contents
BOX CONTENTS 1x Installation Instruction [1] 1x Top Rail [2] 1x Bottom Threshold [3] 2x Wall Posts [4] 2x Inserted Gaskets [5] 1x Side Gasket (Longer) [6] 1x Side Gasket (Shorter) [7] 1x Magnetic Seal (Longer) [8] 1x Magnetic Seal (Shorter) [9] 1x Fixed Panel A. -
Page 5: Assembly Drawing
ASSEMBLY DRAWING [ 27] [ 24] [ 1] [ 26] [ 25] [ 4] [ 14] [ 7] [ 8] [ 13] [ 9] [ 11] [ 15] [ 10] [ 12] [ 3] [ 16] [ 6] [ 17] [ 29] [ 22] [ 20]... -
Page 6: Installation Instructions
INSTALLATION INSTRUCTIONS IMPORTANT GENERAL INFORMATION This unit is best installed by two people. Cover drain with tape prior to installation to prevent the loss of small parts. Unpack your unit carefully and inspect for freight damage. Lay out and identify all parts using Box Contents and Assembly Drawing as a reference. - Page 7 INSTALLING FIXED PANELS • In this step, you’ll need following parts: [1] x1, [4] x2, [9] x1, [11] x1, [14] x4, [17] x1, [28] x1 • In this step, you’ll need the following tool: B NOTE: TWO PEOPLE REQUIRED [17] [14] [11] [14]...
- Page 8 INSTALLING BOTTOM GUIDE/CAP & BOTTOM THRESHOLD • In this step, you’ll need following part: [2] x1, [19] x1, [21] x1, • In this step, you’ll need the following tools: A, B, C, G, I [19] [11] [21] [11] [19] [21] Shower Base 3.2mm...
- Page 9 INSTALLING EXTERNAL/INTERNAL WHEELS & DOOR PANEL-L • In this step, you’ll need following parts: [10] x1, [13] x2, [15] x2, [17] x1, [20] x1, [29] x1 [13] [29] View from inside [15] [17] [10] [13] [10] [17] [13] [29] [10] [13] [10] [17]...
- Page 10 INSTALLING SIDE GASKET/MAGNETIC SEAL AND HANDLE SET • In this step, you’ll need following parts: [5] x1, [6] x1, [7] x1, [8] x1, [12] x1, [18] x1 [10] [10] [12] [11] [12] [10] [10] [18] [10] 5a. Install Longer Side Gasket [5] onto left edge of Door Panel-L [10]. Install Shorter Side Gasket [6] onto right edge of Fixed Panel A [9].
- Page 11 ADJUSTING DOOR PANEL-L • In this step, you’ll need following part: [15] x1 [13] [16] [13] Cover Cap Cover Cap Correct Door Alignment 6a. Slide Door Panel-L [10] closed and observe if the door securely seals against both Magnetic Seals [8] & [7] equally.
- Page 12 Painter’s naphtha can be used to remove excess adhesives and/or wet oil-base paint. AFTERCARE AND CLEANING Two primary materials are used to manufacture your new American Standard shower enclosure: tempered glass and anodized aluminum. To ensure a long lasting finish on the enclosure, wipe it down with a towel after each use.
-
Page 13: Warranty
State to State. OBTAINING WARRANTY SERVICE If you believe that you have a warranty claim, contact American Standard, either through an authorized AS America, Inc. dealer or re-seller, by writing to the addresses below, or visiting the website below:... -
Page 14: Tell Us What You Think
Please leave us a product review or story at americanstandard.com/reviews Great Tub 03/13/2018 06:52:29 CDT American Standard Bathtubs Saver 60 Inch by 34 Inch Integral Apron Bathtub. Left Hand Drain Love the tub. It is very roomy and would definitely buy it again.
Need help?
Do you have a question about the Elevate AM00840400 and is the answer not in the manual?
Questions and answers