Advertisement
Quick Links
11/28/12
Please Note: Please read through all of this documentation before configuring the CPE
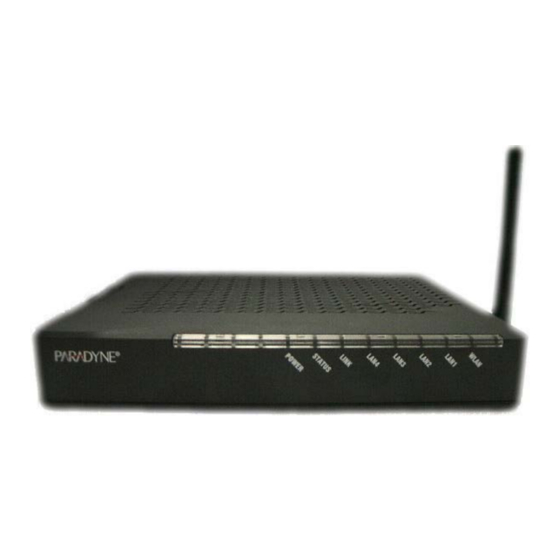
This Document explains how to configure a Paradyne 6218-A1-200 for DHCP if the modem has been defaulted.
Radio Button (option chosen)
�
�Radio Button (option not chosen)
1. First we need to statically assign an IP address and DNS Servers to the customers PC/Laptop if the modem has
been defaulted.
IP Address : 192.168.1.2
Subnet Mask : 255.255.255.0
Gateway : 192.168.1.1
Primary DNS : 12.223.17.4
Secondary DNS : 12.223.18.4
Please Note: Once Modem is correctly configured please change the customer's computer back to obtain an
IP address and DNS server automatically.
2. Pull up the Web browser and type �
ccinf o.clearwav e.com/modems/6218A1200/6218-A1-200.htm
Parady ne 6218-A1-200
Paradyne 6218-A1-200
http://192.168.1.1
Log into the CPE with the below information:
User Name: Admin
Password: Admin
� in the URL field.
1/30
Advertisement

Summary of Contents for Paradyne 6218-A1-200
- Page 1 Parady ne 6218-A1-200 Paradyne 6218-A1-200 Please Note: Please read through all of this documentation before configuring the CPE This Document explains how to configure a Paradyne 6218-A1-200 for DHCP if the modem has been defaulted. Radio Button (option chosen) �...
- Page 2 11/28/12 Parady ne 6218-A1-200 3. The Paradyne Home page will be displayed. ccinf o.clearwav e.com/modems/6218A1200/6218-A1-200.htm...
- Page 3 4. On the top menu click on the �Setup�.
- Page 4 11/28/12 Parady ne 6218-A1-200 5. On the left menu click on �Firewall/Nat Services�. ccinf o.clearwav e.com/modems/6218A1200/6218-A1-200.htm 4/30...
- Page 5 11/28/12 Parady ne 6218-A1-200 6. Click on the �check box� next to Enable Firewall and NAT Service which will insert a tick. Then click on �Apply� at the bottom of the screen ccinf o.clearwav e.com/modems/6218A1200/6218-A1-200.htm 5/30...
- Page 6 11/28/12 Parady ne 6218-A1-200 7. A box will popup stating �You need to login again when you enable Firewall/Nat services� and click on the �OK� button. 6/30...
- Page 7 11/28/12 Parady ne 6218-A1-200 8. Log into the DSL Modem with the below information: User Name: Admin Password: Admin ccinf o.clearwav e.com/modems/6218A1200/6218-A1-200.htm 7/30...
- Page 8 Parady ne 6218-A1-200 9. The Paradyne Home page will be displayed. ccinf o.clearwav e.com/modems/6218A1200/6218-A1-200.htm 8/30...
- Page 9 11/28/12 Parady ne 6218-A1-200 10. On the top menu click on the �Setup�. ccinf o.clearwav e.com/modems/6218A1200/6218-A1-200.htm 9/30...
- Page 10 11/28/12 Parady ne 6218-A1-200 11. On the left menu click on �WAN_Bridge�. ccinf o.clearwav e.com/modems/6218A1200/6218-A1-200.htm...
- Page 11 Parady ne 6218-A1-200 12. You will see the following screen with the default settings. ccinf o.clearwav e.com/modems/6218A1200/6218-A1-200.htm 11/30...
- Page 12 11/28/12 Parady ne 6218-A1-200 13. Enter the following information: 13.1. In the Name: field, type over �WAN_Bridge� with �Clearwave�. 13.2. Choose �DHCP� from the drop down menu of �the Type: section 13.3. Click on the �check box� next to Default Gateway which will insert a tick.
- Page 13 11/28/12 Parady ne 6218-A1-200 14. On the left menu click on �LAN Configuration�. ccinf o.clearwav e.com/modems/6218A1200/6218-A1-200.htm...
- Page 14 11/28/12 Parady ne 6218-A1-200 15. In the Domain: field type over ar7 with clearwave.com ccinf o.clearwav e.com/modems/6218A1200/6218-A1-200.htm 14/30...
- Page 15 11/28/12 Parady ne 6218-A1-200 16. Click on the �radio button� next to Enable DHCP Server which will insert a dot and click on �Apply� at the bottom of the screen ccinf o.clearwav e.com/modems/6218A1200/6218-A1-200.htm 15/30...
- Page 16 11/28/12 Parady ne 6218-A1-200 17. On the top menu click on �Advanced�. ccinf o.clearwav e.com/modems/6218A1200/6218-A1-200.htm...
- Page 17 11/28/12 18. On the left menu click on �LAN Clients�. ccinf o.clearwav e.com/modems/6218A1200/6218-A1-200.htm 17/30...
- Page 18 11/28/12 Parady ne 6218-A1-200 19. In the EnterIP Address: field type 192.168.1.2 in the box then click �Apply at the bottom of the screen. ccinf o.clearwav e.com/modems/6218A1200/6218-A1-200.htm 18/30...
- Page 19 11/28/12 Parady ne 6218-A1-200 20. On the left menu click on �Port Forwarding�. ccinf o.clearwav e.com/modems/6218A1200/6218-A1-200.htm 19/30...
- Page 20 11/28/12 21. Click on the �check box� next to Allow Incoming Ping which will insert a tick and click apply at the bottom of the screen. ccinf o.clearwav e.com/modems/6218A1200/6218-A1-200.htm 20/30...
- Page 21 11/28/12 Parady ne 6218-A1-200 22. Please ask the Customer if they require �Wireless Access� or �intend using the �Wireless Access Point�. If the customer states they will be using Wireless then continue to �step 26�. 23. To disable Wireless, from the top menu, Click on �Wireless�...
- Page 22 11/28/12 Parady ne 6218-A1-200 24. On the left menu click on �Setup�. ccinf o.clearwav e.com/modems/6218A1200/6218-A1-200.htm 22/30...
- Page 23 25. Click on the �check box� next to Enable AP: which will remove a tick and click �Apply� at the bottom of the screen.
- Page 24 11/28/12 Parady ne 6218-A1-200 26. On the top menu click on �Tools�. ccinf o.clearwav e.com/modems/6218A1200/6218-A1-200.htm 24/30...
- Page 25 11/28/12 Parady ne 6218-A1-200 27. On the left menu click on �System Commands�. ccinf o.clearwav e.com/modems/6218A1200/6218-A1-200.htm 25/30...
- Page 26 11/28/12 Parady ne 6218-A1-200 28. Click on the �Save All� button and the screen should refresh. ccinf o.clearwav e.com/modems/6218A1200/6218-A1-200.htm 26/30...
- Page 27 11/28/12 Parady ne 6218-A1-200 29. Click on the �Restart� Button. ccinf o.clearwav e.com/modems/6218A1200/6218-A1-200.htm 27/30...
- Page 28 11/28/12 Parady ne 6218-A1-200 30. Click on the �OK� button and you should see the progress count in the bottom left hand corner. ccinf o.clearwav e.com/modems/6218A1200/6218-A1-200.htm 28/30...
- Page 29 11/28/12 Parady ne 6218-A1-200 31. Once the Progress count has finished you should be right back and the log prompt. ccinf o.clearwav e.com/modems/6218A1200/6218-A1-200.htm 29/30...
- Page 30 11/28/12 Parady ne 6218-A1-200 32. Set the customer back to obtain an IP address automatically configuration for the Ethernet adapter. 33. The Customer should be able to get on line now. ccinf o.clearwav e.com/modems/6218A1200/6218-A1-200.htm 30/30...


Need help?
Do you have a question about the 6218-A1-200 and is the answer not in the manual?
Questions and answers