Advertisement
Table of Contents
- 1 Instruction Manual
- 2 Table of Contents
- 3 General Safety Warnings
- 4 Intended Use
- 5 Warning Symbols
- 6 In the Box
- 7 Assemble the Lawn Mower
- 8 The Engine
- 9 Preparing to Operate the Lawn Mower
- 10 Operation
- 11 Maintenance and Storage
- 12 Troubleshooting
- 13 Technical Data
- 14 Disposal
- 15 Getting Help
- 16 Warranty
- Download this manual
SPP46
Instruction Manual
IMPORTANT! Please read these instructions fully before starting assembly.
These instructions contain important information that will help you get the best
from your product, ensuring it is assembled correctly and safely. If you need help
or have damaged or missing parts, call the Customer Helpline on 01904 727 500.
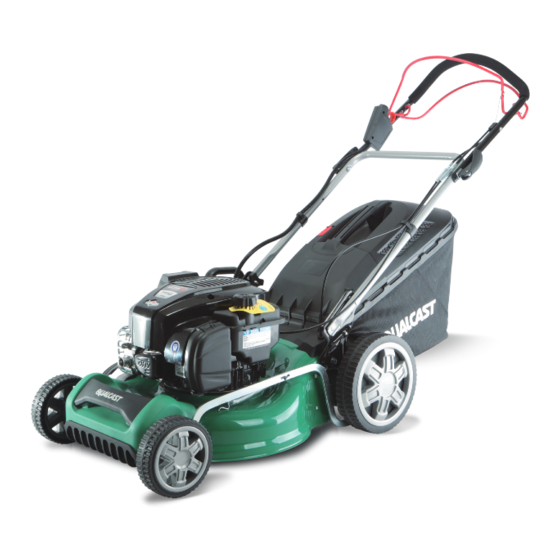
46cm 140cc Self Propelled
Keystart Petrol Rotary
Lawn Mower
542488
Advertisement
Table of Contents

Related Manuals for Qualcast QSPP46


Summary of Contents for Qualcast QSPP46
-
Page 1: Instruction Manual
SPP46 46cm 140cc Self Propelled Keystart Petrol Rotary Lawn Mower 542488 Instruction Manual IMPORTANT! Please read these instructions fully before starting assembly. These instructions contain important information that will help you get the best from your product, ensuring it is assembled correctly and safely. If you need help or have damaged or missing parts, call the Customer Helpline on 01904 727 500. -
Page 2: Table Of Contents
Contents General safety warnings Intended use Warning symbols In the box Assemble the lawn mower Preparing to operate the lawn mower Operation Maintenance and storage Troubleshooting Technical data Disposal Getting help Warranty... -
Page 3: General Safety Warnings
General Safety Warnings Safety warnings WARNING! Read all safety warnings and instructions. Failure to follow the warnings and instructions may result in electric shock, fire and/or serious injury. WARNING! Read all safety warnings and instructions designated by the symbol. Save all warnings and instructions for future reference. - Page 4 General safety • Keep this operating and maintenance manual in a safe place for reference at a later date. • Read the instructions carefully. Be familiar with the controls and the proper use of the equipment. • Never allow children or people unfamiliar with these instructions to use the lawn mower.
- Page 5 a) Refuel outdoors only and do not smoke while refuelling. b) Add fuel before starting the engine. Never remove the cap of the fuel tank or add petrol while the engine is running, or when the engine is hot. c) If petrol is spilled, do not attempt to start the engine but move the machine away from the area of spillage and avoid creating any source of ignition until petrol vapours have dissipated.
- Page 6 • Exercise extreme caution when changing direction on slopes. • Do not mow excessively steep slopes. • Use extreme caution when reversing or pulling the lawn mower towards you. • Stop the blade if the lawn mower has to be tilted for transportation when crossing surfaces other than grass, and when transporting the lawn mower to and from the area to be mowed.
- Page 7 b) Before checking, cleaning or working on the lawn mower. c) After striking a foreign object, inspect the lawn mower for damage and make repairs before restarting and operating the lawn mower. d) If the lawn mower starts to vibrate abnormally, check immediately.
-
Page 8: Intended Use
Intended Use This mower is designed for domestic lawn mowing only. Use in any other way is considered contrary to the intended use. Compliance with the operation, service and repair, as specified in this handbook, also constitutes essential elements of the intended use. Warning Symbols Please read all of the safety and operating instructions carefully before using this machine. - Page 9 Add engine oil. Only refuel with unleaded petrol. Hot surfaces will burn the hands! Warning! The lawn mower’s exhaust gas contains toxic substances. Do not run the engine in closed or poorly-ventilated areas. The blade continues to rotate for a period after the machine is switched off. Do not touch the blade until all the machine components have stopped completely.
-
Page 10: In The Box
In The Box Parts Main mower deck (with upper handle attached) Lower handle C. Grass collection bag D. Bolt and star knob with nut M8 x 2 Cable clip Handle fixing quick clamps x 2 G. Side discharge chute Mulching plug Safety Key Charger Tools... -
Page 11: Assemble The Lawn Mower
Assemble The Lawn Mower WARNING! Always take care when removing the packaging, to prevent damage to you or to the lawn mower. This item requires a two-person lift to remove it from the packaging. Make sure that you have sufficient space to put the lawn mower down. Keep your feet apart so that you have a stable position;... - Page 12 Assemble the upper handle Lift the upper handle, and lock in place using the handle tension knob and tensioning bolts. Ensure the lower and upper handles are firmly connected. Assemble the grass bag IMPORTANT! Make sure the grass collection bag is in place before starting the engine. Attach the grass bag to the frame by fixing all the plastic hooks.
-
Page 13: The Engine
If using the collection function, raise the safety flap and take out the mulching plug, and hook the collection bag onto the mower. Ensure the side discharge chute is not fitted when collecting the grass in the bag. Release the safety flap. Attach cable clips Ensure that the cable clips supplied are used to fix the cable to the lower handle. -
Page 14: Preparing To Operate The Lawn Mower
Preparing to operate the lawn mower Filling with engine oil IMPORTANT! The following procedures and adjustments must be performed before the engine is started. Do not attempt to make any of these adjustments while the engine is running. This engine is shipped without oil or petrol; any oil residue is from testing prior to shipping. The engine must be filled with the correct grade of and petrol before starting the engine. - Page 15 Filling with engine fuel WARNING! Refuel in a well-ventilated area with the engine stopped. Do not smoke or allow flames or sparks in the area where the engine is refuelled or where petrol is stored. Avoid repeated or prolonged contact with skin or inhalation of vapour. CAUTION! Petrol is highly flammable and extreme caution must be taken when handling or working with it.
- Page 16 Charging the battery WARNING! Charge the battery pack only with a Briggs & Stratton battery charger. CAUTION! The Lithium-Ion battery pack will have been partially charged before shipment. To maintain charge and to prevent damage while in storage, the battery pack is programmed to enter a ‘sleep mode’.
-
Page 17: Operation
Operation Setting the cutting height WARNING! The blade can cause serious injury. Before adjusting the mower height, stop the engine and wait for the mower blade to come to a complete stop. Pull the lever towards the wheel, then move it forward or backward to adjust the cutting height. - Page 18 Starting the engine WARNING! Do not operate the machine in enclosed or poorly-ventilated areas, as the exhaust gas contains toxic substances. Keep hands, feet, hair and clothing away from all the moving parts of the machine. The exhaust and other parts of the machine will become hot during use.
- Page 19 2. Pull cord handle With the right hand, slowly but firmly pull the starter handle and rope from the pull cord guide until you feel resistance, then pull briskly. If the engine fails to start after three pulls, repeat the start process. When the engine starts, return the starter rope to the pull cord guide gently.
- Page 20 Mowing with collection bag WARNING! Always observe the strictest safety procedures when using the lawn mower. Start the engine and allow it to run. See ‘Step 2 - Starting the engine’. Keep a firm grip on the upper handle and stop/start bar and clutch the propulsion lever, and walk along with it.
- Page 21 Mowing with mulching When mulching, remove the collection grass bag, and put the plastic mulching plug into the rear discharge chute. Then release the flap, it will close back to cover the mulching plug. NOTE: To ensure that the cut grass can be mulched efficiently, do not cut high or wet grass. Mowing with the side discharge When using the side discharge to throw grass, you first need to remove the grass collection bag and insert the mulching plug:...
-
Page 22: Maintenance And Storage
Maintenance and Storage Storing the lawn mower for short periods After mowing, please follow the actions below prior to placing the lawn mower in storage: - Allow the engine to fully cool. - Ensure the grass bag is empty. - Clean all debris from under the mower deck. Store the lawn mower on a flat and level surface, with all 4 wheels on the ground. - Page 23 Preparation to re-use Check the oil level before starting the engine to ensure there is sufficient oil, see page 14. Check the spark plug is inserted correctly, see page 19. Fill engine with fresh unleaded fuel, see page 15. Follow starting procedure, see page 18. Maintenance schedule WARNING! Before you tip the lawn mower onto its side, completely empty the fuel tank using...
- Page 24 Cleaning or replacing the air filter WARNING! Never run the engine without the air filter element installed: Loosen the fastener that holds the cover. Open the cover and remove the filter. To loosen debris, gently tap the filter on a hard surface. If the filter is excessively dirty, replace with a new filter.
- Page 25 Changing the oil Tilt the lawn mower towards the oil filler, have a container ready to catch the oil, and remove the dipstick. Once the oil has been emptied, wipe clean any spillages. Refill with 500ml SAE 30 oil or equivalent, i.e. SAE 5W/30, SAE 10W/30). When the dipstick is rested on the filler pipe, the oil level must be between the Min.
- Page 26 Tip the machine slightly towards the oil filler pipe and reach under the deck. Hold the blade and unscrew the blade bolt counterclockwise using a spanner wrench. Remove the washer and the blade. Inspect the blade adaptor for any signs of damage. Fit a new blade, locate the blade on the two studs on the blade flange and then replace the washer and bolts.
-
Page 27: Troubleshooting
Troubleshooting WARNING! Always switch off the engine and pull the ignition cable before starting any inspection or adjustment work. If after making an adjustment or repair to the engine you let it run for a few minutes, remember that the exhaust and other parts will get hot. The following table provides solutions to common problems with the lawn mower: Fault Possible cause... -
Page 28: Technical Data
Technical Data Property Value Engine type Single cylinder 4-stroke Engine displacement 140cm Engine power 2.1kW/ 2900/min Max. engine speed 2900/min Cutting width 46cm Grass bag capacity Ignition T.C.I Fuel tank capacity 0.8L Oil tank capacity 0.5L Measured sound power level 93.8 dB(A) Guaranteed sound power level 96 dB(A) K=3dB(A) -
Page 29: Disposal
Disposal The lawn mower and its accessories are made of various recyclable materials. Dispose of the lawn mower in accordance with your local recycling regulations. Getting Help Our dedicated UK-based customer helpline is open 7 days a week to assist you with assembly, parts queries and technical support.
Need help?
Do you have a question about the QSPP46 and is the answer not in the manual?
Questions and answers