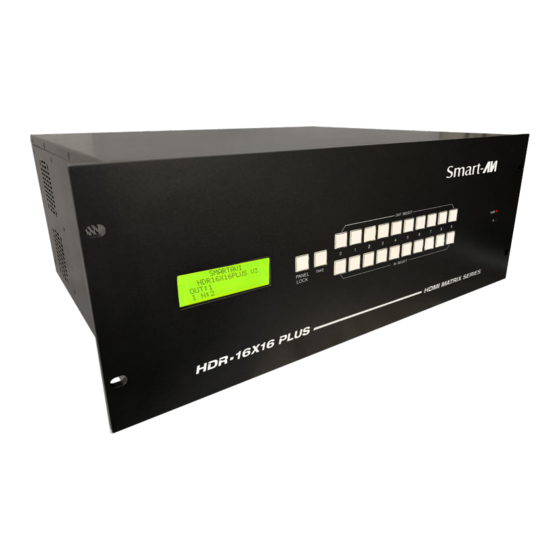
Summary of Contents for SMART-AVI HDR-16x16 Plus V3-S
-
Page 1: User Manual
HDR-16x16 Plus User Manual 16 Port 4K 30Hz HDMI Matrix Switch www.smartavi.com Tel: (800) AVI-2131 (702) 800-0005 2455 W Cheyenne Ave, Suite 112 North Las Vegas, NV 89032... -
Page 2: Table Of Contents
NOTICE: The information contained in this document is subject to change without notice. Smart-AVI makes no warranty of any kind with regard to this material, including but not limited to, implied warranties of merchantability and fitness for any particular purpose. Smart-AVI will not be liable for errors contained herein or for incidental or consequential damages in connection with the furnishing, performance or use of this material. -
Page 3: Introduction
introduction The HDR-16x16 Plus V3 conforms to the HDMI (High Definition Media Interface) standard with HDCP compliance and pro- vides a connection to view any of sixteen HDMI video sources on any combination of sixteen video displays. The HDR-16x16 Plus V3 provides HDMI output up to 40 feet away at resolutions up to 3840x2160 (4k) @30Hz. -
Page 4: Technical Specifications
technical specifications: VIDEO HDTV Resolutions 480p, 720p, 1080i, 1080p and 3840x2160 (4k) @30Hz SDTV Resolutions 480i Input Interface (TX) (16) HDMI Type A 19-pin Female TMDS Output Interface (RX) (16) HDMI Type A 19-pin Female TMDS Input Cable Length Up to 40 ft. Output Cable Length Up to 40 ft. -
Page 5: Hardware Installation
hardware installation 1. Turn off all input devices and displays. 2. Connect male to male HDMI cables to the input devices or sources and the “IN” ports on the HDR-16x16 Plus V3. 3. Connect the displays to the “OUT” ports on the HDR-16x16 Plus V3. 4. -
Page 6: Voltage Warning
The top power-plug is 230V and is intend- ed for use within the EU or countries where 230V is the standard. Please check all volt- ages and inputs before proceeding with powering on the unit. The bottom power-plug is 115V and is in- tended for the United States or countries where 110-115V is the standard. -
Page 7: Front Panel Control
FRONT PANEL CONTROL There are multiple ways to control the HDR-16x16 Plus V3: via the front panel, via RS-232 using the SmartControl software, via RS-232 commands (with AMX, Crestron), and with a TCP-IP module. Input and output are relative to the HDR-16x16 Plus V3. Output refers to displays or monitors. Input re- fers to video sources such as DVD players or computers. -
Page 8: Establishing An Rs-232 Connection
Check the device and your PC to determine if you need a male to male or a male to female cable and how long it needs to be. The Smart-AVI device requires a straight through cable. You can use a Null Modem Adapter to convert a crossed cable to a straight through cable. -
Page 9: Using The Smartcontrol Software
HDR-16x16 Plus V3, using SmartControl allows for customization of all the matrix functions. Download the Smart Control Pro software from the Smart-AVI website. www.smartavi.com • Double click SmartControlPro-v5-0-03_Installer.exe in order to initiate software installation. - Page 10 using the smartcontrol software Main Routing Window The Main Routing Window enables you to control the router(s) connections by means of the Crosspoint panel, the button panel, or with pre-recorded routes called macros. Crosspoint Panel: This is the simplest way to route the connections. Simply click on the cross point itself. The input on the left will then be routed to the output above.
- Page 11 using the smartcontrol software (continued) The Button Panel: Output Options: To select multiple outputs, in the row for any input or source, click the button under the desired outputs or displays. Input Options: To route an input to all the outputs at once, hold the control key down and click on an input. Macros: This section of the window is used to save and play back macros.
- Page 12 LAN (TCP-IP) CONTROL To enable TCP-IP control, connect an ethernet cable to the HDR-16X16-Plus ethernet port. By default, the HDR-16X16-Plus will connect to the network using DHCP. Download Matrix Mate-NetworkAssistant software and execute to locate your IP address. Click the Search button.
-
Page 13: Using Tcp/Ip Control
Command mode Sending Commands WITHOUT CHECKSUM 1) To set a video crosspoint: \\FxxMyyIzz<CR> e.g. to set video input 3 to output 12 on a router with frame address “0” send the command: \\F00M12I03<CR> 5) To query crosspoints from PC: \\FxxU<CR> •... -
Page 14: Limited Warranty Statement
Smart-AVI. Any replacement product could be new or like new, provided that it has functional- ity at least equal to that of the product being replaced. Smart-AVI limited warranty is valid in any country where the covered product is distributed by Smart-AVI.


Need help?
Do you have a question about the HDR-16x16 Plus V3-S and is the answer not in the manual?
Questions and answers