Table of Contents
Advertisement
(120PO) ENGLISH 7.5" X 10.3" PANTONE 295U 10/10/2018
120
English
PO
IMPORTANT
SAFETY RULES
Read, understand, and follow
all instructions carefully before
installing and using this product.
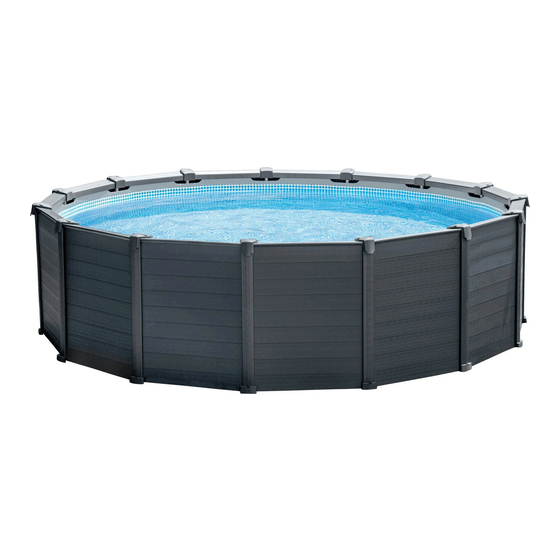
GRAPHITE GRAY PANEL POOL SET
TM
15'8" (478 cm) & 18'8" (569 cm) models
For illustrative purposes only. Accessories may not be provided with pool.
Don't forget to try these other fine Intex products: Pools, Pool
Accessories, Inflatable Pools and In-Home Toys, Airbeds and
Boats available at fine retailers or visit our website listed below.
Due to a policy of continuous product improvement, Intex
reserves the right to change specifications and appearance,
which may result in updates to the instruction manual without
notice.
IMPORTANT!
DO NOT RETURN PRODUCT TO STORE
To purchase parts and accessories or to obtain non-technical assistance, Visit
www.intexcorp.com
For technical assistance and missing parts call us toll-free (for U.S. and Canadian Residents):
1-800-234-6839
Monday through Friday, 8:30am to 5:00pm Pacific Time
120-*PO-R1-1910
Advertisement
Table of Contents

Related Manuals for Intex GRAPHITE GRAY PANEL POOL SET 15'8"


Summary of Contents for Intex GRAPHITE GRAY PANEL POOL SET 15'8"
-
Page 1: Safety Rules
15'8" (478 cm) & 18'8" (569 cm) models For illustrative purposes only. Accessories may not be provided with pool. Don’t forget to try these other fine Intex products: Pools, Pool Accessories, Inflatable Pools and In-Home Toys, Airbeds and Boats available at fine retailers or visit our website listed below. -
Page 2: Table Of Contents
Limited Warranty................25 Special Introductory note: Thanks for buying an Intex pool and enclosure. Please read this manual before setting up your pool and enclosure. This information will help extend the pool life and make the pool safer for your family's enjoyment. A team of 2-3 people is recommended for pool and enclosure set up. -
Page 3: Warnings
(120PO) ENGLISH 7.5” X 10.3” PANTONE 295U 10/10/2018 English IMPORTANT SAFETY RULES Read, Understand and Follow All Instructions Carefully Before Installing and Using this Product. WARNING • Continuous and competent adult supervision of children and the disabled is required at all times. • Secure all doors, windows and safety barriers to prevent unauthorized, unintentional or unsupervised pool entry. • Install a safety barrier that will eliminate access to the pool for young children and pets. • Pool and pool accessories are to be assembled and disassembled by adults only. • Never dive, jump or slide into an above-ground pool or any shallow body of water. • Failure to set up pool on flat, level, compact ground or over filling could result in the pool’s collapse and the possibility that a person lounging in the pool could be swept out/ejected. • Do not lean, straddle, or exert pressure on the inflatable ring or top rim as injury or flooding could occur. Do not allow anyone to sit on, climb, or straddle the sides of the pool. - Page 4 (120PO) ENGLISH 7.5” X 10.3” PANTONE 295U 10/10/2018 English IMPORTANT SAFETY RULES Read and follow all safety information and instructions. Keep for future reference. Failure to follow these warnings and instructions can result in serious injury or death to users, especially children. WARNING NO DIVING OR JUMPING PREVENT DROWNING...
- Page 5 (120PO) ENGLISH 7.5” X 10.3” PANTONE 295U 10/10/2018 English Barriers for Residential Swimming Pool Guidelines: An outdoor swimming pool, including an inground, aboveground, or onground pool, hot tub, or spa, should be provided with a barrier which complies with the following: 1. The top of the barrier should be at least 48 inches above grade measured on the side of the barrier which faces away from the swimming pool. The maximum vertical clearance between grade and the bottom of the barrier should be 4 inches measured on the side of the barrier which faces away from the swimming pool. Where the top of the pool structure is above grade, such as an aboveground pool, the barrier may be at ground level, such as the pool structure, or mounted on top of the pool structure. Where the barrier is mounted on top of the pool structure, the maximum vertical clearance between the top of the pool structure and the bottom of the barrier should be 4 inches.
-
Page 6: Parts References
(120PO) ENGLISH 7.5” X 10.3” PANTONE 295U 10/10/2018 English PARTS REFERENCE Before assembling your product, please take a few minutes to check the contents and become familiar with all the parts. For Pools with Dual Suction Outlets Configuration: In order to comply with the requirement of the Virginia Grahame Baker Act (for USA and Canada), your pool is designed with dual suction outlets and one inlet fittings. Overview of the dual suction outlets configuration is as follow: 34 18 36 35 36... - Page 7 (120PO) ENGLISH 7.5” X 10.3” PANTONE 295U 10/10/2018 English 15’8” x 49” 18’8” x 53” REF. (478 cm x 124 cm) (569 cm x 135 cm) DESCRIPTION QUANTITIES SPARE PART NO. QUANTITIES SPARE PART NO. PIN (WITH 2 EXTRA) 10312 10312 SEAL (WITH 2 EXTRA) 10648 10648 T - JOINT 10861...
- Page 8 (120PO) ENGLISH 7.5” X 10.3” PANTONE 295U 10/10/2018 English PARTS REFERENCE (continued) Before assembling your product, please take a few minutes to check the contents and become familiar with all the parts. Non-USA & Canada: NOTE: Drawings for illustration purpose only. Actual product may vary. Not to scale. SAVE THESE INSTRUCTIONS Page 8...
- Page 9 (120PO) ENGLISH 7.5” X 10.3” PANTONE 295U 10/10/2018 English POOL SIZE & QUANTITIES REF. NO. DESCRIPTION 15’8” x 49” 18’8” x 53” (478 cm x 124 cm) (569 cm x 135 cm) PIN (WITH 2 EXTRA) SEAL (WITH 2 EXTRA) T - JOINT SPRING PIN VERTICAL LEG (SPRING PIN INCLUDED) LEG CAP HORIZONTAL BEAM POOL LINER (DRAIN VALVE CAP INCLUDED) DRAIN CONNECTOR...
-
Page 10: Setup Instructions
(120PO) ENGLISH 7.5” X 10.3” PANTONE 295U 10/10/2018 English POOL SETUP IMPORTANT SITE SELECTION AND GROUND PREPARATION INFORMATION WARNING • The pool location must allow you to secure all doors, windows, and safety barriers to prevent unauthorized, unintentional or unsupervised pool entry. • Install a safety barrier that will eliminate access to the pool for young children and pets. • Failure to set up the pool on flat, level, compact ground and to assemble and fill with water in accordance with the following instructions could result in the pool’s collapse or the possibility that a person lounging in the pool could be swept out/ejected, resulting in serious injury or property damage. -
Page 11: Ground Preparation
(120PO) ENGLISH 7.5” X 10.3” PANTONE 295U 10/10/2018 English POOL SETUP (continued) GROUND PREPARATION Select an outdoor location for the pool which should be on a level concrete pad. If there is no concrete pad available, follow the instructions below to prepare the installation area. It is important you ask a professional (builder or gardener) to perform the following ground preparation. NOTE: Tools are not included. 1. Mark the installation area • Once the location area is chosen, drive stake at center point of where you wish pool to be located. Attach string to center stake. Measure the length A on string, and attach marking stick, paint marker, or funnel with flour to string. - Page 12 (120PO) ENGLISH 7.5” X 10.3” PANTONE 295U 10/10/2018 English POOL SETUP (continued) • Use a large mason rule (aluminum or wood) and a level. Level out the ground by cutting rectangles (or squares), locating this rule in the selected and cleaned area (see drawing 2.2). 4. Finishing • On the cleaned and leveled ground, spread a light coat of sieved dirt to a maximum depth of 1/2 inch (1 cm). Spray water and compact it (with a garden roller). Double check and ensure it is well leveled. The ground has to be perfectly level in order to proceed further. 5. Patio block installation • Purchase 15 pieces of patio block for 15’8” pool or 16 pieces of patio block for 16’8” pool or 18 pieces for 18’8” pool. The minimum dimensions of each block should be 18” x 18” x 2”. Mark the area where the blocks will be buried (see drawing 3.1), then remove 2” (5.08 cm) of soil from the marked area (see drawing 3.2). • For 15’8” (478 cm) pool, where A = 8’3” (251.5 cm) = Radius of grass area need to be removed and leveled. B = 3’5” (104.1 cm) = Distance between each Patio Block. For 16’8” (508 cm) pool, where A = 8’9” (266.7 cm) = Radius of grass area need to be removed and leveled. B = 3’5” (104.1 cm) = Distance between each Patio Block. For 18’8” (569 cm) pool, where A = 9’9” (297.1 cm) B = 3’5” (104.1 cm)
- Page 13 (120PO) ENGLISH 7.5” X 10.3” PANTONE 295U 10/10/2018 English POOL SETUP (continued) You may have purchased this pool with the Intex Krystal Clear™ filter pump. The pump has its own separate set of installation instructions. First assemble your pool unit and then set up the filter pump. Estimated assembly time 120 minutes. (Note the assembly time is only approximate and individual assembly experience may vary.) 1. Liner preparation • Open the carton containing the liner, joints, legs, etc., very carefully as this carton can be used to store the pool during the winter months or when not in use.
- Page 14 (120PO) ENGLISH 7.5” X 10.3” PANTONE 295U 10/10/2018 English POOL SETUP (continued) • Next slide the vertical legs into the belt loop located in the middle of the pool liner. Carefully slide the leg into the belt loop and insert the top of the leg into the bottom of the joint. Snap the leg into the joint’s holes by aligning the holes and the spring-loaded pin. Attach the leg’s end cap (6) to the bottom of the leg (see drawings 6.1 &...
- Page 15 (120PO) ENGLISH 7.5” X 10.3” PANTONE 295U 10/10/2018 English POOL ENCLOSURE SETUP Once the pool has been filled with water, and it has been confirmed that it is completely level and that all vertical legs are positioned in the middle of each patio block, proceed with the assembly of the pool enclosure. 1. Top clamp installation • Fasten a top clamp (16) to the T-joint of the pool frame from the underneath. Ensure the two bolts on top clamp are facing upward. Repeat the procedure until all the top clamps are fastened to the T joints of the pool frame (see drawings 8.1 & 8.2).
- Page 16 (120PO) ENGLISH 7.5” X 10.3” PANTONE 295U 10/10/2018 English POOL ENCLOSURE SETUP (continued) 10.3 10.4 4. Side panel installation The number of the side panels depends of the size of your pool. There are two side panels which need special attention during installation: First, the side panel which needs to be installed outside the pool inlet & outlet holes, and second, the side panel with the warning panel which needs to be installed in a location that the warning display is easily seen by pool users before entering the pool. The side boards for these two special panels are wrapped separately from others.
- Page 17 (120PO) ENGLISH 7.5” X 10.3” PANTONE 295U 10/10/2018 English POOL ENCLOSURE SETUP (continued) 11.7 11.8 15'8" x 49" 18’8” x 53” 4a-2. For Pools with Dual Suction Outlets Configuration: • Place the L-shape o-ring (35) on the lower position of the threaded strainer connectors. In a clockwise motion screw the adaptor A (40) onto the threaded strainer connectors (See drawing 12.1, 12.2 & 12.3). Note: Remove the strainer valve cap (19) from the threaded strainer connectors when connecting filter pump with it.
- Page 18 (120PO) ENGLISH 7.5” X 10.3” PANTONE 295U 10/10/2018 English POOL ENCLOSURE SETUP (continued) • Connect the L-shape o-ring (35) and adaptor A (40) onto the threaded strainer connectors (See drawing 12.6 & 12.7). Note: Remove the strainer valve cap (19) from the threaded strainer connectors when connecting filter pump with it. Then continue to finish the side panel installation by installing the rest of the side boards marked with number “7” and “8” (see drawing 12.8).
- Page 19 (120PO) ENGLISH 7.5” X 10.3” PANTONE 295U 10/10/2018 English POOL ENCLOSURE SETUP (continued) 4c. Other side panel installation • For 49" height pool, install the rest of the side panels by using eight pieces of side boards A (20) each. For 53" height pool, install the rest of the side panels by using one piece of side board B (21) at the bottom plus eight pieces of side boards A (20) each. Install the side boards one by one from bottom to top. Insert the groove of the first side board onto the vertical edge of the bottom rail, and the groove of the other side boards onto the tongue of each previous board. The side boards with wood veins printed need to be faced outward (see drawings 14.1 & 14.2).
-
Page 20: General Aquatic Safety
(120PO) ENGLISH 7.5” X 10.3” PANTONE 295U 10/10/2018 English GENERAL AQUATIC SAFETY Water recreation is both fun and therapeutic. However, it involves inherent risks of injury and death. To reduce your risk of injury, read and follow all product, package and package insert warnings and instructions. -
Page 21: Pool Maintenance And Chemicals
Likewise with liquid chlorine; mix it immediately and thoroughly with the pool water. 2. Never mix chemicals together. Add the chemicals to the pool water separately. Thoroughly dissolve each chemical before adding another one to the water. 3. An Intex pool skimmer and an Intex pool vacuum are available to assist in maintaining clean pool water. See your pool dealer for these pool accessories. 4. D o not use a pressure washer to clean the pool. SAVE THESE INSTRUCTIONS... -
Page 22: Pool Draining
Keep spare filter cartridges on hand. Replace cartridges every two weeks. We recommend the use of a Krystal Clear™ Intex Filter Pump with all of our above-ground-pools. To purchase an Intex Filter Pump or other accessories see your local retailer, visit our website or call the Intex Consumer Services Department listed in the separate "Authorized Service Centers" sheet and have your Visa or Mastercard ready. - Page 23 5. Remove the hoses that connect the pump and filter to the pool. 6. Add the appropriate chemicals for the winter period. Consult your local pool dealer as to which chemicals you should use and how to use them. This can vary greatly by region. 7. Cover pool with Intex Pool Cover. IMPORTANT NOTE: INTEX POOL COVER IS NOT A SAFETY COVER. 8. Clean and drain the pump, filter housing and hoses. Remove and discard the old filter cartridge. Keep a spare cartridge for the next season. 9. Bring pump and filter parts indoors and store in a safe and dry area, preferably between 32 degrees Fahrenheit (0 degrees Celsius) and 104 degrees Fahrenheit (40 degrees Celsius).
-
Page 24: Troubleshooting
WATER LEVEL on previous day. liner or hoses. • Finger tighten all caps. • Replace the hoses. SEDIMENT ON POOL • Dirt or sand on pool • Heavy use, getting in • Use Intex pool vacuum to BOTTOM floor. and out of pool. clean bottom of pool. SURFACE DEBRIS • Leaves, insects etc. • Pool too close to • Use Intex pool skimmer. -
Page 25: Limited Warranty
(120PO) ENGLISH 7.5” X 10.3” PANTONE 295U 10/10/2018 English LIMITED WARRANTY Your Intex Pool has been manufactured using the highest quality materials and workmanship. All Intex products have been inspected and found free of defects prior to leaving the factory. This Limited Warranty applies to the Intex Pool only. The provisions of this Limited Warranty apply only to the original purchaser and is not transferable. This Limited Warranty is valid for a period of 90 days from the date of the initial retail purchase. Keep your original sales receipt with this manual, as proof of purchase will be required and must accompany warranty claims or the Limited Warranty is invalid. If a manufacturing defect is found within this 90-day period, please contact the appropriate Intex Service Center listed in the separate “Authorized Service Centers” sheet.
Need help?
Do you have a question about the GRAPHITE GRAY PANEL POOL SET 15'8" and is the answer not in the manual?
Questions and answers