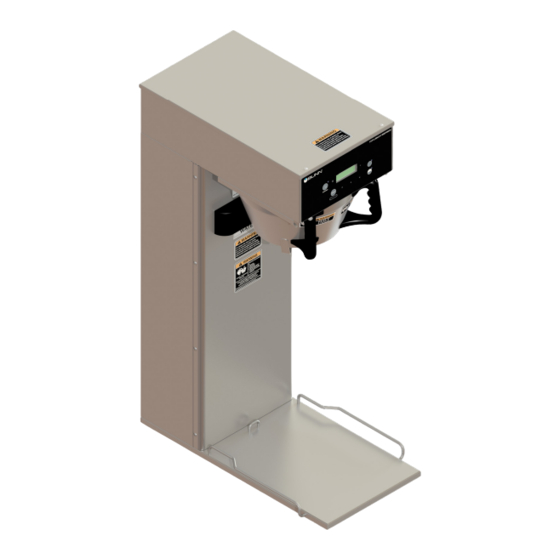
Bunn Infusion Series Installation & Operating Manual
Hide thumbs Also See for Infusion Series:

Advertisement

IC3 DBC
Infusion Series
®
INSTALLATION & OPERATING GUIDE
BUNN-O-MATIC CORPORATION
POST OFFICE BOX 3227
SPRINGFIELD, ILLINOIS 62708-3227
PHONE: (217) 529-6601
FAX: (217) 529-6644
www.bunn.com
To ensure you have the latest revision of the Operating Manual, Illustrated Parts Catalog, Programming Manual, or Service
Manual, please visit the Bunn-O-Matic website, at www.bunn.com. This is absolutely FREE, and the quickest way to obtain
the latest catalog and manual updates. For Technical Service, contact Bunn-O-Matic Corporation at 1-800-286-6070.
48497.0002A
12/17 ©2017 Bunn-O-Matic Corporation

Advertisement

Table of Contents
loading

Summary of Contents for Bunn Infusion Series

  • Page 1 To ensure you have the latest revision of the Operating Manual, Illustrated Parts Catalog, Programming Manual, or Service Manual, please visit the Bunn-O-Matic website, at www.bunn.com. This is absolutely FREE, and the quickest way to obtain the latest catalog and manual updates. For Technical Service, contact Bunn-O-Matic Corporation at 1-800-286-6070.
  • Page 2 AS SPECIFIED HEREIN, TO REPAIR, REPLACEMENT OR REFUND. In no event shall BUNN be liable for any other damage or loss, including, but not limited to, lost profits, lost sales, loss of use of equipment, claims of Buyer’s customers, cost of capital, cost of down time, cost of substitute equipment, facilities or services, or any other special, incidental or consequential damages.
  • Page 3: Table Of Contents

    Please install in an area where there are no water jet devices. The Infusion Series Coffee Brewer is able to brew both tea and coffee with recipe settings and has the fol- lowing features: Pre-Infusion and Pulse Brew, and LCD for digital readout. Other features are Energy Savings mode, BUNNLink compatible, Freshness Timer and Sanitation Alert.
  • Page 4: Warranty

    USER NOTICES Carefully read and follow all notices in this manual and on the equipment. All labels on the equipment should be kept in good condition. Replace any unreadable or damaged labels. As directed in the International Plumbing Code of the International Code Council and the Food Code Manual of the Food and Drug Administration (FDA), this equipment must be installed with adequate...
  • Page 5: North American Requirements

    CE REQUIREMENTS • This appliance must be installed in locations where it can be overseen by trained personnel. • For proper operation, this appliance must be installed where the temperature is between 5°C to 35°C. • Appliance shall not be tilted more than 10° for safe operation. •...
  • Page 6: Plumbing Requirements

    NOTE - Bunn-O-Matic recommends 3⁄8" copper tubing for all installations from the 1⁄2" water supply line. A tight coil of tubing in the water line will facilitate moving the brewer to clean the countertop. Bunn-O-Matic does not recommend the use of a saddle valve to install the brewer. The size and shape of the hole made in the supply line by this type of device may restrict water flow.
  • Page 7: Operating Controls

    OPERATING CONTROLS READY TO BREW WATER TEMP: 200° A. ENABLE BREW ON/OFF SWITCH Pressing the "ENABLE BREW ON/OFF" switch (indicator on) enables the brew circuit, and energizes the tank refill circuit. Pressing the switch again (indicator off) stops tank refilling and brewing. Stopping a brew cycle after it has been started will not stop the flow of water into the server until the funnel is empty.
  • Page 8: Initial Set-Up

    COFFEE BREWING 1. Begin each brew cycle with a clean empty brew funnel. 2. Insert a BUNN filter into the funnel. 3. Pour the fresh coffee into the filter and level the bed of grounds by gently shaking. 4. Slide the funnel into the funnel rails until it stops.
  • Page 9: Cleaning

    3. The use of a damp cloth rinsed in any mild, nonabrasive, liquid detergent is recommended for cleaning all surfaces on Bunn-O-Matic equipment. Do NOT clean this equipment with a water jet device. CAUTION – DO NOT KEEP BREWED ICED TEA OVERNIGHT. THE SERVER MUST BE CLEANED DAILY.
  • Page 10: Programming

    PROGRAMMING The programming of the brewer is divided into two levels. There is one function in Level 1. All other functions are accessed in Level 2. The following function screens are in order of appearance. Each screen will have instructions on how to access and the procedures for programming the various functions of the brewer.
  • Page 11 PROGRAMMING (cont.) PROGRAMMING FUNCTIONS - FLOW CHART BREW LOCKOUT? PROGRAMMING FUNCTIONS - LEVEL I DONE PROGRAMMING FUNCTIONS - LEVEL 2 SET LANGUAGE? UNITS REVIEW RECIPES ASSIGN RECIPE METRIC DONE ENG SET TEMP 200° READY DEGREE 5° ENABLE ADS? ENABLE SANITATION DONE DONE DONE...
  • Page 12 PROGRAMMING (cont.) This function allows the operator to prevent or allow brewing if the water temperature is less than the set READY temperature. The BREW LOCKOUT? YES or NO should be flashing. Select YES to prevent brewing if the DONE water temperature is below the set READY temperature.
  • Page 13 PROGRAMMING (cont.) read 2 BATCHES DONE? 8. If both batch sizes are not correct press and release NO to return to the BREW OZ setup screen and repeat steps #8, 9 and 10. 9. If both batch sizes are correct, press YES. This will advance to the DILUTE OZ. 10.
  • Page 14 PROGRAMMING (cont.) 34. When finished, press the other batch size and repeat step # 33. 35. When finished setting both batch sizes, press and release DONE. 36. The display should now read LAST ON:. Adjust the LAST ON TIME using (-) or (+). If PREINFUSION is desired, set the LAST ON TIME to PreI.
  • Page 15 PROGRAMMING (cont.) Adjusts brew tank temperature. SET TEMP: 200° RANGE: (185 to 205° F) or (85 to 96° C) DONE This function sets the minimum temperature allowable to start a READY DEGREE 5° brew cycle. Range: (2°F to 20°F) or (-16°C to -6°C) below the set DONE temperature.
  • Page 16 PROGRAMMING (cont.) 9. Repeat step 10 until the top line is complete. 10. Press and release "DONE". The display should now read "WRITE BTM LINE?". 11. To write the bottom line of the new ad, press and release "YES". 12. To skip the bottom line, press and release "NO". 13.
  • Page 17 PROGRAMMING (cont.) The BrewLogic system allows the brewer to be calibrated to high mineral ENABLE BrewLOGIC locations and compensate as deposits build up internally. Press YES, then DONE press DONE. Follow the prompts. Go to SPRAY OZ/M: Select a sturdy, level location. PLACE BREWER IN Brewer must not be bumped during calibration! FINAL LOCATION...
  • Page 18 PROGRAMMING (cont.) When the dispensing finishes, empty the decanter/server and place back under CONTAINER READY? brew funnel. QUIT Select YES for calibration. Selecting QUIT will skip to level probe calibration screen. Go to CAL LP1-LP2 Press the "BREW START" button. Will perform the sprayhead flow-rate CALIBRATE SPRAY calibration as well as the level probe calibration.
  • Page 19 PROGRAMMING (cont.) Displays number of pulses counted by flow meter to dilution nozzle. DILUTION CTS 64oz May be adjusted using +/- if you know the flow rate. #### This function provides a 60 second test mode to capture water from the CALIBRATE FLOW? sprayhead or dilution nozzle.
  • Page 20 PROGRAMMING (cont.) This function allows the you to enter in an optional asset number. This can ENTER ASSET # ? be useful for tracking the usage or service of an individual machine within a group. This function allows the operator to enter in the telephone number to call if ENTER SERVICE # service is needed.

This manual is also suitable for:

Ic3 dbc

Table of Contents