
Related Manuals for Mi SCWXCQ01RR


Summary of Contents for Mi SCWXCQ01RR
- Page 1 Mi Handheld Vacuum Cleaner User Manual This version is for private use only and should not be distributed.
-
Page 2: Safety Information
Safety Information Read this manual carefully before use, and retain it for future reference. Usage Restrictions • Do not use this vacuum in outdoor, commercial, or industrial environments. It is intended for home and in-car use only. • Do not store the vacuum anywhere in the car to avoid high or low temperatures affecting its battery life. -
Page 3: Battery And Charging
Battery & Charging WARNING • This product contains batteries that are only replaceable by skilled persons. • This product can only be charged using an ATC01RR or BTC01RR power supply. • Do not use any third-party batteries, power adapters or docking stations. •... - Page 4 We Beijing Roborock Technology Co., Ltd., hereby, declares that this equipment is in compliance with the applicable Directives and European Norms, and amendments. The full text of the EU declaration of conformity is available at the following internet address: http://www.mi.com/global/service/support/declaration.html This version is for private use only and should not be distributed.
-
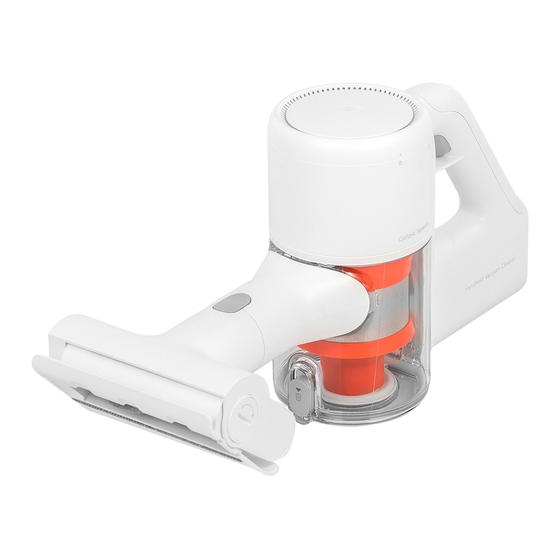
Page 5: Product Overview
Product Overview Vacuum Cleaner MAX Button • Press and hold the switch, then press the Max button to change to the vacuum's MAX mode. Notes: 1. In MAX mode, the fan will run at full speed, battery life will be reduced, and the fan will blow out hot air. -
Page 6: Installation
Accessories Power Supply Crevice Nozzle Brush Nozzle Floor Attachment Bed Attachment Extension Rod Installation Vacuum and Accessories Installation Diagram Method One Insert till it clicks into place Insert till it clicks into place Method Two Push down the quick release switch to remove it Insert till it clicks into place This version is for private use only and should not be distributed. -
Page 7: Station Installation
Mi Handheld Vacuum Cleaner Docking Station Installation * The docking station needs to be purchased separately, please visit: www.mi.com 1. The docking station is an optional accessory, which can be purchased if necessary. 2. The docking station needs to be installed in a cool and dry place that is near a power outlet but not exposed to direct sunlight. - Page 8 Instructions Charging LED Battery Status Indicator Red: Battery level < 20% Orange: Battery level of 20 - 60% White: Battery level > 60% Off: Battery is fully charged or the vacuum is turned off Notes: 1. When the vacuum is used for the first time, it is recommended to fully charge it before use.
-
Page 9: Automatic Turn-Off Feature
Vacuum Usage 1. Some carpets may fluff when vacuumed by the handheld vacuum cleaner or upholstery brush. If this happens, it is recommended to use the brush or crevice nozzle when vacuuming. 2. Before vacuuming highly polished floors (wooden or polished tiles), check the floor brush (especially the brush head) for foreign objects to avoid scratching the floor. - Page 10 Brush Head Usage 3. Bed Attachment: Suitable for vacuuming dust and mites on textile surfaces such as 1. Crevice Nozzle: Suitable for vacuuming beds and curtains. narrow crevices such as around doors, windows, dead corners of stairs. 4. Floor Attachment: Suitable for vacuuming 2.
-
Page 11: Product Maintenance
Maintenance Product Maintenance 1. Always use genuine parts, otherwise Cleaning the Dust Compartment warranty may be voided. * It is recommended to clean the dust 2. If the filter or nozzle is clogged, the fan will compartment at least once a month. stop working shortly after turning on the 1. - Page 12 3. While pushing the switch next to the dust 5. After the dust compartment is completely compartment in the direction of the arrow, dried, follow the steps shown in the figure pull the compartment away from the below to reinstall it. vacuum to rinse it with water.
- Page 13 Steps to Remove the Internal Filter 4. Rinse the filter and cyclone assembly until they are clean. Wring out the filter after and Cyclone Assembly rinsing. 1. Remove the dust compartment as shown in the figure. 5. To thoroughly dry the filter and cyclone assembly, keep them in a ventilated or cool place for at least 24 hours after Dust Compartment...
-
Page 14: Cyclone Assembly
Steps to Install the Internal Filter and 4. Slightly tilt the dust compartment when installing it on the vacuum. Cyclone Assembly 1. Place the filter facing up as shown in the figure. 2. Place the filter on top of the cyclone 5. - Page 15 Rinsing the Top Fan Filter 4. To thoroughly dry the filter, keep it in a ventilated or cool place for at least 24 * Recommended to rinse at least once a hours after cleaning. month. 1. Turn the top fan filter counterclockwise to the unlocked position and remove it from the vacuum.
- Page 16 Cleaning the Floor Attachment 5. After confirming that the end cap is installed in place, put the roller back as 1. Place the floor attachment in the direction shown in the figure. Once the roller is as shown in the figure (facing your installed in place, turn the end cap to the direction).
- Page 17 Cleaning the Bed Attachment 5. After confirming that the roller is completely dry, put the roller back in place. 1. With the side latch of the brush head facing your direction, use a coin to turn the latch counterclockwise until it comes off.
-
Page 18: Specifications
Specifications Vacuum Cleaner Model SCWXCQ01RR Dimensions 322 × 111 × 212 mm Battery 21.6 V/ 2500 mAh (TYP) Lithium Battery Product Weight (incl. accessories) Approx. 1.5 kg Rated Voltage 21.6 V ⎓ Rated Power 350 W Power Supply Model ATC01RR or BTC01RR Dimensions 57 ×... -
Page 19: Troubleshooting
Troubleshooting When the vacuum cleaner does not work properly, please refer to the table below to handle any errors. Error Condition Solutions Slowly Blinking Orange: Temporary protection if the battery temperature is too high or too low, please wait for the battery temperature to return to normal before using or charging the vacuum. -
Page 20: Weee Information
WEEE Information All products bearing this symbol are waste electrical and electronic equipment (WEEE as in directive 2012/19/EU) which should not be mixed with unsorted household waste. Instead, you should protect human health and the environment by handing over your waste equipment to a designated collection point for the recycling of waste electrical and electronic equipment, appointed by the government or local authorities. -
Page 21: Warranty Notice
Unless otherwise stipulated by Xiaomi, this Limited Warranty applies only to the Product manufactured by or for Xiaomi and identifiable by the trademarks, trade name or “Xiaomi” or “Mi” logo. The Limited Warranty does not apply to any (a) Damage due to acts of nature or God, for example, lightning strikes, tornadoes, flood, fire, earthquake or other external causes;... - Page 22 7. XIAOMI CONTACTS For customers, please visit the website: https://www.mi.com/en/service/warranty/ The contact person for the after-sale service may be any person in Xiaomi’ s authorized service network, Xiaomi’...
Need help?
Do you have a question about the SCWXCQ01RR and is the answer not in the manual?
Questions and answers