Table of Contents
Advertisement
Model: TMX1
XM Ready Alarm
Clock Radio
For additional information, online registration, and
exclusive special offers visit our website:
www.timexaudio.com
For questions or comments regarding this or other
products, please call our toll-free number 1-800-888-4491.
Para instruccionese en Espanol, llame al 1-800-888-4491.
Advertisement
Table of Contents

Related Manuals for Timex Satellite Series


Summary of Contents for Timex Satellite Series
- Page 1 Model: TMX1 XM Ready Alarm Clock Radio For additional information, online registration, and exclusive special offers visit our website: www.timexaudio.com For questions or comments regarding this or other products, please call our toll-free number 1-800-888-4491. Para instruccionese en Espanol, llame al 1-800-888-4491.
-
Page 2: A Consumer Guide To Product Safety
A Consumer Guide to Product Safety IMPORTANT SAFETY INSTRUCTIONS When used in the directed manner, this unit has been designed and manufactured to ensure your personal safety. However, improper use can result in potential electrical shock or fire hazards. Please read all safety and operating instructions carefully before installation and use, and keep these instructions handy for future reference. -
Page 3: Fcc Information
Modifying or tampering with your system’s internal components can cause a malfunction and might invalidate the system’s warranty and void your FCC authorization to operate it. If your system is not performing as it should, call SDI Technologies Inc., Timex Audio Products Consumer Services, 1-800-888-4491 for assistance. -
Page 4: Controls And Indicators
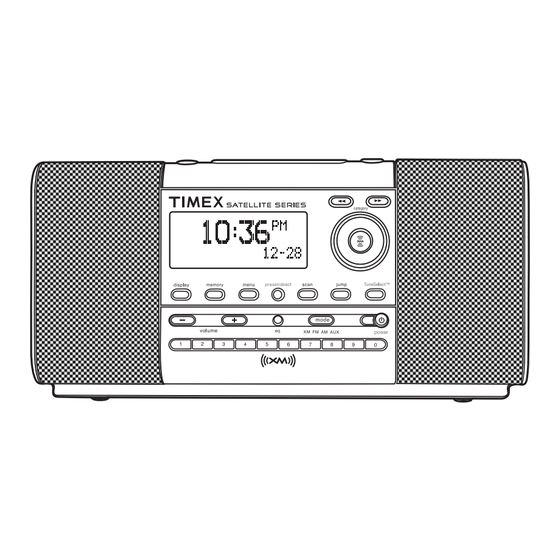
Controls and Indicators Preset/Direct Button 4 5 Scan Button Menu Button 3 6 Category down Button Memory Button 2 7 XM Enter Button Display Button 1 8 Category up Button 9 Rotary Knob J Jump Button K Tune select Button L Mode Button Volume - Button Q M Power ON/Standby Button... -
Page 5: Displays And Indicators
Displays and Indicators XM Category Selection Scan XM/FM/AM Station Indicator XM Preset Bank Indicator XM Display Format XM Signal Indicator XM Direct Entry XM Station Category Time Display XM Mode FM Mode PM Indictor Display Time / Alarm Display Radio Frequency Display Battery Low Indicator Daylight Saving Time Indicator... -
Page 6: Getting Started
Getting Started Install AC Adaptor Connect the AC adaptor cable plug into the jack on the back of the unit, then plug the AC adaptor into wall outlet. Install/Replace Backup Battery The TMX1 uses a backup battery system to provide continuous alarm operation and clock settings in the event of a power failure. If the Backup Battery has been installed and a power failure occurs or the AC cord is accidentally disconnected, the display will remain lit and the current time and alarm time settings will be temporarily maintained. -
Page 7: Using The Remote Control Unit
Using The Remote Control Unit Install/Replace the Remote Control Battery Before using the remote control, make sure to install batteries. 1. Open the battery door located on the back of the unit. 2. Insert 2 “AAA” (R3) batteries. Make sure the polarity ( + and – ends of the batteries) is correct. 3. -
Page 8: Setting Time Zone
Setting Time Zone Please follow these simple steps to match the setting to where you live. 1. Depending on your location and whether or not DST (Daylight Savings Time) is in effect, set the DST Switch located on the back of the unit to ‘+1hr’... - Page 9 If you do not want to auto synch the clock whenever you listen to XM radio (for example, some people prefer to set their clock ahead a few minutes to avoid being late), you can disable this feature. To do so: 1.
- Page 10 Basic XM Operations Selecting Channels You may select channels by using the 9 Rotary Knob, by pressing one of the preset buttons (0-9), or by entering the channel number directly. Similar functions are available on the remote control. Using the Rotary Knob 1.
- Page 11 Selecting Categories XM channels are organized into “neighborhoods” of similar musical or programming content. To tune to channels by categories: Category + button or Category – button until you find the desired category. 1. Press Rotary knob (or Tune down button / Tune up button on the remote) to select the desired channel. 2.
-
Page 12: Auxiliary Input
Auxiliary Input To listen to another audio source such as an MP3 player through TMX1: 1. Connect the audio source’s output to the jack marked “AUX” at the rear of TMX1. 2. While the power is ON, press L MODE button until “Aux input” appears in the display. Line Out Operation Line Out Jack located at You can connect the unit to another line-level device such as an amplifier or recording device through the... -
Page 13: Setting Alarm Time
Setting Alarm Time 1. Press the Alarm set 1 button or Alarm set 2 button and hold for 2 sec. Currently set alarm flashes. Either Alarm 1 or Alarm 2 icon is shown, depending on whether Alarm 1 Set or Alarm 2 Set has been pressed. The currently set Wake To mode is also shown. -
Page 14: Using The Sleep Function
Previewing an Alarm Press and release the Alarm set 1 button or Alarm set 2 button. The currently set alarm time is shown, and the corresponding alarm1 or alarm 2 icon. The currently set Wake To icon and wake to station/channel also appear. The unit returns to previous state after 5 seconds, or if an Alarm set button is pressed again. -
Page 15: Troubleshooting
Troubleshooting Symptom Possible Problem Solution Unit doesn't respond Plug the AC adaptor into a wall outlet and plug the connector AC adaptor isn't plugged into a wall outlet into the supply jack on the unit or the connector is not plugged into the power supply jack on the back of the unit. -
Page 16: Limited 90-Day Warranty Information
Limited 90-Day Warranty Information Timex Products, a division of SDI Technologies Inc. (hereafter referred to as SDI Technologies), warrants this product to be free from defects in workmanship and materials, under normal use and conditions, for a period of 90 days from the date of original purchase.
Need help?
Do you have a question about the Satellite Series and is the answer not in the manual?
Questions and answers
Are remote control, AC plug and antenna available to order