Table of Contents
Advertisement
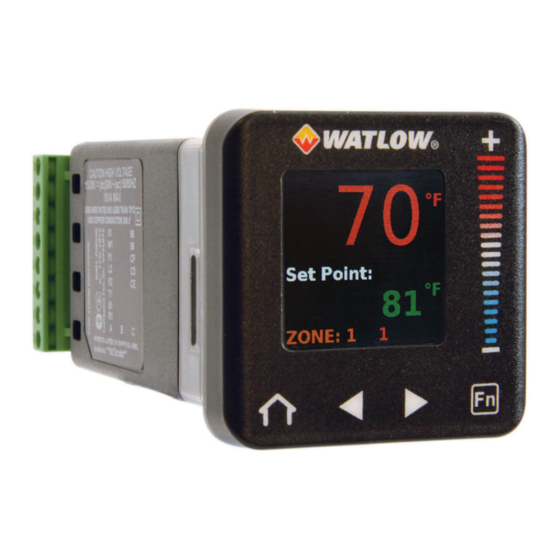
PID/Integrated Controller
10-40670
December, 2019
User's Guide
1241 Bundy Boulevard., Winona, Minnesota USA 55987
Phone: +1 (507) 454-5300, Fax: +1 (507) 452-4507
http://www.watlow.com
6
TOTAL
CUSTOMER
SATISFACTION
3 Y ear Warranty
ISO 9001
Registered Company
Winona, Minnesota USA
Made in the U.S.A.
Advertisement
Table of Contents

Related Manuals for Watlow PM PLUS 6


Summary of Contents for Watlow PM PLUS 6
- Page 1 PID/Integrated Controller User's Guide TOTAL CUSTOMER SATISFACTION 3 Y ear Warranty ISO 9001 1241 Bundy Boulevard., Winona, Minnesota USA 55987 Phone: +1 (507) 454-5300, Fax: +1 (507) 452-4507 http://www.watlow.com Registered Company Winona, Minnesota USA 10-40670 Made in the U.S.A. December, 2019...
- Page 2 Unit is a Listed device per Underwriters Laboratories . It has been evaluated to United States and Canadian requirements for Hazardous Locations Class 1 Division II Groups A, B, C and D. ANSI/ISA 12.12.01-2007. File E184390 QUZW, QUZW7. See: www.ul.com Watlow PM PLUS™ 6 • 2 •...
- Page 3 The PM PLUS is manufactured by ISO 9001-registered processes and is backed by a three-year warranty to the first purchaser for use, providing that the units have not been misapplied. Since Watlow has no control over their use, and sometimes misuse, we cannot guarantee against failure. Watlow's obligations hereunder, at Watlow's option, are limited to replacement, repair or refund of purchase price, and parts which upon examination prove to be defective within the warranty period specified.
- Page 4 "AS IS" BASIS, WITHOUT WARRANTIES or CONDITIONS OF ANY KIND, either express or implied. See the License for the specific language governing permissions and limitations under the License. The PM Plus product firmware contains the Roboto Font. PM Plus product firmware is Copyright (C) 2019 Watlow Electric Controls, Inc.
-
Page 5: Table Of Contents
Configuring Parameters ......... 44 Using Watlow Software to Configure Parameters ..... 44 Setup List . - Page 6 Resetting a Tripped Limit ........87 Watlow PM PLUS™ 6 •...
- Page 7 Example 6: Wet Bulb / Dry Bulb ........109 Watlow PM PLUS™ 6 •...
- Page 8 Specifications ........... 131 Watlow PM PLUS™ 6 •...
-
Page 9: Chapter 1: Overview
Chapter 1: Overview Introduction Watlow’s PM PLUS™ has an intuitive interface with a smooth touch keypad for easy programming and read- ability. This reduces complexity at the front of the control. Using Composer or Configurator is highly desir- able to program the PM. The PM PLUS™ is compatible with legacy EZ-ZONE PM controllers and connects via ®... - Page 10 CSA, CE, RoHS, W.E.E.E., FM, SEMI F47-0200, Class 1, Div. 2 rating on some models Touch-safe package • Increases safety for installer/operator • Complies with IP2X requirements Programmable function key • Enables simple, one-touch operation of user-defined, repetitive activities Watlow PM PLUS™ 6 • 10 • Chapter 1 Overview...
-
Page 11: Pm Plus™ Operational Overview
You can assign outputs to any input, and may assign more than one output to respond to a single instance of a function. For example, alarm 2 could be used to trigger a light connected to output 1 and a siren connected to DIO 5. Watlow PM PLUS™ 6 • 11 • Chapter 1 Overview... -
Page 12: Configuration And Monitoring Of Features Through Lists
Profile. Event Outputs will allow you to turn "On" or "Off", or "leave as is"; in each step of a Profile. Watlow PM PLUS™ 6 • 12 • Chapter 1 Overview... -
Page 13: System Diagrams
Slot B 0.5A SSR (form A) Note: Number of inputs and outputs and various combinations of the same will vary depending upon part number; see ordering matrix for more detail. Watlow PM PLUS™ 6 • 13 • Chapter 1 Overview... - Page 14 0.5A SSR (form A) Slot B Note: Number of inputs and outputs and various combinations of the same will vary depending upon part number; see ordering matrix for more detail. Watlow PM PLUS™ 6 • 14 • Chapter 1 Overview...
- Page 15 If Limit, this output must be Limit Note: Number of inputs and outputs and various combinations of the same will vary depending upon part number; see ordering matrix for more detail. Watlow PM PLUS™ 6 • 15 • Chapter 1 Overview...
- Page 16 - Event inputs EIA-485 Communication Slot C Standard Bus (optional Modbus RTU) RUI, Controllers, PLC, PC or HMI Communications Board Communications EIA 232/485 Modbus RTU/TCP, EtherNet/IP, DeviceNet, Profibus Slot B Watlow PM PLUS™ 6 • 16 • Chapter 1 Overview...
-
Page 17: Chapter 2: Installation
2.10 in. (10.2 mm) (10.2 mm) (53.3 mm) (53.3 mm) 2.10 in. 2.10 in. (53.3 mm) (53.3 mm) 4.164 in. 4.164 in. (105.8 mm) (105.8 mm) Mounting Panel Mounting Panel Watlow PM PLUS™ 6 • 17 • Chapter 2: Installation... -
Page 18: Wiring Your New Pm Plus
RTU EIA-232 to DB9 pin 2 the area is known to be ® Modbus RTU EIA-232 to DB9 pin 3 free of ignitable concen- DeviceNet™ Communications trations of flammable substances. Watlow PM PLUS™ 6 • 18 • Chapter 2: Installation... - Page 19 CLASS I, DIVISION 2. Explosion Hazard - Do not disconnect while the circuit is live or unless the area is known to be free of ignitable concen- trations of flammable substances. Watlow PM PLUS™ 6 • 19 • Chapter 2: Installation...
-
Page 20: Isolation Block Diagram
Explosion Hazard - Do • 10VA maximum power consumption not disconnect while the circuit is live or unless the area is known to be free of ignitable concen- trations of flammable substances. Power Watlow PM PLUS™ 6 • 20 • Chapter 2: Installation... - Page 21 R1 and/or R2 trations of flammable • For accuracy use a 3-wire RTD to compensate for substances. lead-length resistance. All three lead wires must have the same resistance Watlow PM PLUS™ 6 • 21 • Chapter 2: Installation...
- Page 22 • Response time: 1 second maximum not disconnect while the circuit is live or unless • Accuracy +/-1 mA typical the area is known to be free of ignitable concen- trations of flammable substances. Watlow PM PLUS™ 6 • 22 • Chapter 2: Installation...
- Page 23 CLASS I, DIVISION 2. Explosion Hazard - Do not disconnect while the circuit is live or unless the area is known to be free of ignitable concen- trations of flammable substances. Watlow PM PLUS™ 6 • 23 • Chapter 2: Installation...
- Page 24 CLASS I, DIVISION 2. Explosion Hazard - Do not disconnect while the circuit is live or unless the area is known to be free of ignitable concen- trations of flammable substances. Watlow PM PLUS™ 6 • 24 • Chapter 2: Installation...
- Page 25 PM _ _ _ _ _ - _ _ [C] _ _ _ _ Explosion Hazard - Do not disconnect while the circuit is live or unless the area is known to be free of ignitable concen- trations of flammable substances. Watlow PM PLUS™ 6 • 25 • Chapter 2: Installation...
- Page 26 CLASS I, DIVISION 2. Explosion Hazard - Do not disconnect while the circuit is live or unless the area is known to be free of ignitable concen- trations of flammable substances. Watlow PM PLUS™ 6 • 26 • Chapter 2: Installation...
- Page 27 • Output does not supply power Explosion Hazard - Do not disconnect while the circuit is live or unless the area is known to be free of ignitable concen- trations of flammable substances. Watlow PM PLUS™ 6 • 27 • Chapter 2: Installation...
- Page 28 Quencharc Wiring Example ler to a power source, electrical sensors or pe- ripheral devices. Failure In this example the Quencharc circuit (Watlow part# to do so may result in User Load damage to equipment 0804-0147-0000) is used to protect PM internal cir-...
- Page 29 CLASS I, DIVISION 2. Explosion Hazard - Do not disconnect while the circuit is live or unless the area is known to be free of ignitable concen- trations of flammable substances. Watlow PM PLUS™ 6 • 29 • Chapter 2: Installation...
- Page 30 Explosion Hazard - Do not disconnect while the circuit is live or unless the area is known to be free of ignitable concen- trations of flammable substances. Watlow PM PLUS™ 6 • 30 • Chapter 2: Installation...
- Page 31 Device cannot determine link speed or free of ignitable concen- trations of flammable unknown link power is off. substances. speed Green - - - - Cable is wired and connected cor- rectly. Watlow PM PLUS™ 6 • 31 • Chapter 2: Installation...
- Page 32 CLASS I, DIVISION 2. Explosion Hazard - Do not disconnect while the circuit is live or unless the area is known to be free of ignitable concen- trations of flammable substances. Watlow PM PLUS™ 6 • 32 • Chapter 2: Installation...
- Page 33 New CAN frame transmission occurred. circuit is live or unless the area is known to be Flashing Green CAN communications active with J1939 Card. free of ignitable concen- trations of flammable substances. Watlow PM PLUS™ 6 • 33 • Chapter 2: Installation...
- Page 34 Termination resistor B Adjacent terminals may • If using a 150 Ω cable Watlow provides internal termination. Place a 485 T+/R+ be labeled differently jumper across pins trB and B and trA and A. depending on the model 485 T-/R- •...
- Page 35 CLASS I, DIVISION 2. Explosion Hazard - Do not disconnect while the circuit is live or unless the area is known to be free of ignitable concen- trations of flammable substances. Watlow PM PLUS™ 6 • 35 • Chapter 2: Installation...
- Page 36 CLASS I, DIVISION 2. Explosion Hazard - Do not disconnect while the circuit is live or unless the area is known to be free of ignitable concen- trations of flammable substances. Watlow PM PLUS™ 6 • 36 • Chapter 2: Installation...
- Page 37 CLASS I, DIVISION 2. Explosion Hazard - Do not disconnect while the circuit is live or unless the area is known to be free of ignitable concen- trations of flammable substances. Watlow PM PLUS™ 6 • 37 • Chapter 2: Installation...
-
Page 38: Chapter 3: User Interface
The lower dis- play shows the set point or manual power value, or the parameter for the value showing in the upper display. Watlow PM PLUS™ 6 • 38 •... -
Page 39: Active Messages On The Home Screen
2 = Black background; red/green/orange letters; includes output power percentage display next to set point • 3 (High Contrast) = Blue background; white letters; includes output power percentage display next to set point Watlow PM PLUS™ 6 • 39 • Chapter 3: User Interface... -
Page 40: Chapter 4: Operations
31028 Timer Set Point the timer period -1110.555 to 5555.000°C Hours Set the timer period hours. 0 to 99 31025 Minutes Set the timer period minutes. 0 to 59 31026 Watlow PM PLUS™ 6 • 40 • Chapter 4: Operations... - Page 41 Requests any of the range of actions None (61) None 22011 Request Step (89) End (148) Resume (147) Pause (146) Profile (77) Profile Status Currently running step in the profile 1 to 40 ---- 22004 Watlow PM PLUS™ 6 • 41 • Chapter 4: Operations...
-
Page 42: Adding Custom Parameters To The Operations List
Control Mode (Instances 1 or 2) Heat Power (Instances 1 or 2) Cool Power (Instances 1 or 2) Time Integral (Instances 1 or 2) Time Derivative (Instances 1 or 2) Watlow PM PLUS™ 6 • 42 • Chapter 4: Operations... - Page 43 Step Type Target Set Point (Instances 1 or 2) Hour Minute Second Guaranteed Soak Deviation 1 Additional Parameters Available if 9th digit of configuration code is T Load Current RMS Watlow PM PLUS™ 6 • 43 • Chapter 4: Operations...
-
Page 44: Chapter 5: Setup
You can set up all parameters directly from the PM PLUS™ front panel via the List, as explained in this manual, or use Watlow CONFIGURATOR or COMPOSER on a PC. If you choose to use Watlow CONFIGURATOR or COMPOSER software to set up the PM PLUS™ from your PC, you'll need to wire communications (see Chapter 2). -
Page 45: Setup List
D (23) R (80) E (26) S (84) F (30) T (93) J (46) RTD Leads Quantity of leads on the RTD wired to this 2 (1) 4007 input. 3 (2) Watlow PM PLUS™ 6 • 45 • Chapter 5: Setup... - Page 46 Status is no error (61) when reading this value or units using a field bus protocol. If an error exists, -1,128.000 to 5,537.000°C the last known value prior to the error will be returned. Watlow PM PLUS™ 6 • 46 • Chapter 5: Setup...
-
Page 47: Digital Bus List
- - - - 1,2,3,6 = 128, Instance 4,5 Scaling Denominator Digital Bus (1 to 4) 1 to 65,535 Instance - - - - 1,2,3,6 = 4096, Instance 4, 5 = 1 Watlow PM PLUS™ 6 • 47 • Chapter 5: Setup... - Page 48 (217) User Set Restore, edge trig- gered (227) Remote Set Point (216) Function Instance Select which Digital Input will be triggered by 0 to 40 10004 a true state. Watlow PM PLUS™ 6 • 48 • Chapter 5: Setup...
-
Page 49: Linearization List
-1,999.000 to 9,999.000 34014 Output Point 7 Set the value mapped to input 7. -1,999.000 to 9,999.000 34024 Input Point 8 Set the value mapped to output 8. -1,999.000 to 9,999.000 34015 Watlow PM PLUS™ 6 • 49 • Chapter 5: Setup... -
Page 50: Process Value List
26023 put. or units -1,128.000 to 5,537.000°C Output Value View the value of this function block's output. -1,999.000 to 9,999.000°F - - - - 26022 or units -1,128.000 to 5,537.000°C Watlow PM PLUS™ 6 • 50 • Chapter 5: Setup... -
Page 51: Digital Input/Output List
Active Level Select which action will be interpreted as a High (37) High 10001 true state. Low (53) Watlow PM PLUS™ 6 • 51 • Chapter 5: Setup... -
Page 52: Limit List
Limit List Operations — Setup — Limit — Sides Select the side or sides of the process value to Both (13) Both 12005 be monitored. High (37) Low (53) Watlow PM PLUS™ 6 • 52 • Chapter 5: Setup... -
Page 53: Control Loop List
Cool Prop. Band Cool Proportional Band. Set the PID propor- 0.001 to 9,999.000°F or 25.0°F or 8012 tional band for the cool outputs. units units 0.001 to 5,555.000°C 14.0°C Watlow PM PLUS™ 6 • 53 • Chapter 5: Setup... - Page 54 75% and stable, otherwise 0% (14) Fixed Power: sets output power to Fixed Power (54) User: sets output power to last open-loop set point the user entered (100) Watlow PM PLUS™ 6 • 54 • Chapter 5: Setup...
- Page 55 -1,999.000 to 9,999.000°F 75.0°F or 7009 an event state. or units units -1,128.000 to 5,537.000°C 24.0°C Minimum Manual Minimum value of the open-loop set point -100.0 to 100.0% -100 7005 Power range. Watlow PM PLUS™ 6 • 55 • Chapter 5: Setup...
-
Page 56: Output List
1.0 to 60.0 seconds (solid- 1.0 sec. for 6003 fixed-time-base control. state relay or switched dc) SSR or swdc 5.0 to 60.0 seconds (me- 5.0 for relay chanical relay or NO-ARC power control) Watlow PM PLUS™ 6 • 56 • Chapter 5: Setup... -
Page 57: Alarm List
Operations — Setup — Alarm — Alarm [1,2,3,4] — Type Select whether the alarm trigger is a fixed Off (62) 9015 value or will track the set point. Process Alarm (76) Deviation Alarm (24) Watlow PM PLUS™ 6 • 57 • Chapter 5: Setup... - Page 58 Off (62) 9016 active. On (63) Delay Time Set the time that the alarm will be delayed after 0 to 9,999 seconds 9021 the process value exceeds the alarm set point. Watlow PM PLUS™ 6 • 58 • Chapter 5: Setup...
-
Page 59: Current List
Select which input will start or terminate the Function Key (1001) Function Key 31001 timer. None (61) Digital I/O (1142) Source Instance A Select an instance of Function A. 1 to 24 31003 Watlow PM PLUS™ 6 • 59 • Chapter 5: Setup... -
Page 60: Math List
Set an offset to be applied to this function's -1,999.000 to 9,999.000°F 25023 output. or units -1,128.000 to 5,537.000°C Function Set the operator that will be applied to the 25021 sources. Process Scale Deviation Scale Watlow PM PLUS™ 6 • 60 • Chapter 5: Setup... -
Page 61: Special Output Function
35025 level prior to turning on. Time Delay If requested power is 0.0% for longer than the 0 to 9,999 seconds 35026 specified Time Delay, the compressor will shut off. Watlow PM PLUS™ 6 • 61 • Chapter 5: Setup... -
Page 62: Function Key
Set the frequency to the applied ac line power 50 Hz (3) 60 Hz 1034 source. 60 Hz (4) Ramping Type Select the way the profile intervals change the Time (143) Time 22038 ramping set point. Rate (81) Watlow PM PLUS™ 6 • 62 • Chapter 5: Setup... - Page 63 ® Bluetooth Set the Bluetooth radio on or off. The Off (62) 3048 ® Bluetooth radio can only be turned on via On (63) the front panel once turned off. Watlow PM PLUS™ 6 • 63 • Chapter 5: Setup...
-
Page 64: Communications List
500 kb (1353) rial network. DeviceNet Quick Conn DeviceNet™ Quick Connect Enable . Allows for No (59) 17054 Yes (106) immediate communication with the scanner upon power up. Watlow PM PLUS™ 6 • 64 • Chapter 5: Setup... - Page 65 Select DHCP to let a DHCP server assign an DHCP (1281) DHCP 17012 address to this module. Fixed Address (1284) Note: When changing IP address, the control power must be cycled for the new address to take effect. Watlow PM PLUS™ 6 • 65 • Chapter 5: Setup...
- Page 66 EEPROM. The EEPROM allows No (59) for approximately one million writes. Note: When changing IP address, the control power must be cycled for the new address to take effect. Watlow PM PLUS™ 6 • 66 • Chapter 5: Setup...
-
Page 67: Changing Pm Plus™ To Pm Plus™ Express
2. Scroll to select Public Key. 3. Left Back Arrow to the Calibration List and select 4. You will see the number 4999. 2501 5. Change to to switch to EXPRESS. Watlow PM PLUS™ 6 • 67 • Chapter 5: Setup... -
Page 68: Revert From Pm Express To Original Configuration
2. Scroll to and select Factory. The unit will reset after a restore from Factory is selected. This reset only affects available defaults within the current configuration of the device. Watlow PM PLUS™ 6 • 68 • Chapter 5: Setup... -
Page 69: Chapter 6: Profiles
Type. Scroll to the desired Step Type and press right arrow to select. We recommend Time 2. Select as the first Step Type. • Unused; step • Unused; soak • wait for event • wait for process • wait for both Watlow PM PLUS™ 6 • 69 • Chapter 6: Profiles... -
Page 70: Starting A Profile
1. Navigate to menu. 2. Select either Digital I/O 5. 3. Select the Input type - Voltage or Dry Contact. 4. Select Action Function. Start Profile Profile Start/Stop. 5. Select either Watlow PM PLUS™ 6 • 70 • Chapter 6: Profiles... -
Page 71: Profile List
When Step Type is Time or Rate, enter the closed 0.0°F or 21002 Loop 1 loop set point for loop 1 to ramp to for this step. -1,128 to 5,537.000°C units -18°C Watlow PM PLUS™ 6 • 71 • Chapter 6: Profiles... - Page 72 On (63) Off (62) Event 2 When Step Type is not Unused Step, select whether 21008 Event Output 1 or 2 is on or off during this step. On (63) Watlow PM PLUS™ 6 • 72 • Chapter 6: Profiles...
- Page 73 The state of up to 2 Target Set Point Loop 2 event outputs may be set or maintained. Rate Event 1 Event 2 Watlow PM PLUS™ 6 • 73 • Chapter 6: Profiles...
-
Page 74: Chapter 7: Factory List
Produced Set Point 2 Hours Minutes Seconds Guaranteed Soak Deviation 1 Event 1 Event 2 Jump Count Remaining Low Limit Set Point High Limit Set Point Limit Hysteresis Limit Status Control Mode Active Custom Watlow PM PLUS™ 6 Chapter 7: Factory • •... - Page 75 IP Actual Ad- Actual IP address of this module. Note: This is 0 to 255 17044 Operations — Setup — Communi- dress Part 1 read only. Go to cations to change. Watlow PM PLUS™ 6 • 75 • Chapter 7: Factory...
- Page 76 - - - - ber. User Public Key Changes the control to user mode or back to 2501 = User Settings 4999 - - - - original configuration/model number. 606 = Factory model number Watlow PM PLUS™ 6 Chapter 7: Factory • •...
-
Page 77: Chapter 8: Features
±2%. At this point, the process temperature should also be stable, but it will have stabi- lized before reaching the set point. 7. The difference between the set point and actual process value can be eliminated with Integral. Watlow PM PLUS™ 6 • 77 • Chapter 8: Features... -
Page 78: Tru-Tune
Operations — Setup - Control Loop. 1. Navigate to 2. Select TRU-TUNE Enable or Yes. 3. Scroll to select Enable TRU-TUNE+ only after autotune is complete. It should be disabled before autotune is initiated. Watlow PM PLUS™ 6 • 78 • Chapter 8: Features... -
Page 79: Input Features
Next, subtract the displayed value with the known value and compare this difference to the published accuracy range specification for that type of input. Watlow PM PLUS™ 6 • 79 • Chapter 8: Features... - Page 80 IS critical that the actual value of the signal connected to the controller be accurately known to at least four digits. Process Set Point Autotune begins Autotune complete Autotune Set Point (90 percent of Process Set Point) Time Watlow PM PLUS™ 6 • 80 • Chapter 8: Features...
-
Page 81: Calibration Of Analog Inputs
7. Set the Precision Source to the low value on your external calibrator. Read Electrical Measurement value Operations — Factory - Calibration — Electrical Measurement. of controller at This will be referred to as Electrical Measured Low. Watlow PM PLUS™ 6 • 81 • Chapter 8: Features... -
Page 82: Filter Time Constant
Filtering the signal may improve the performance of PID control in a noisy or very dynamic system. Unfiltered Input Signal Time Filtered Input Signal Time Adjust the filter time interval Watlow PM PLUS™ 6 • 82 • Chapter 8: Features... -
Page 83: Sensor Backup
Regardless of scaling values, the measured value will be constrained by the electrical measurements of the hardware. Operations — Setup — Analog Input — Scale Low Scale High. Go to to select the desired values for Watlow PM PLUS™ 6 • 83 • Chapter 8: Features... -
Page 84: Range High And Range Low
When the Function Key is pressed, the Remote Setpoint/Analog Input 2 will be the Active Setpoint. • When the Function Key is pressed, the Closed Loop Setpoint will be the Active Setpoint. Watlow PM PLUS™ 6 • 84 • Chapter 8: Features... -
Page 85: Ten Point Linearization
The Watlow NO-ARC relay is a hybrid that uses a mechanical relay for the current load and a triac (solid- state switch) to carry the turn-on and turn-off currents. NO-ARC relays extend the life of the relay more than Watlow PM PLUS™... -
Page 86: Retransmitting A Process Value Or Set Point
When the retransmit source is at the Range High value, the retransmit output will be at its Scale High value. Retransmit Range High Range Low Scale Low Scale High Retransmit Source Watlow PM PLUS™ 6 • 86 • Chapter 8: Features... -
Page 87: Cool Output Curve
, EtherNet/IP™, etc. and write a value of zero to the associated address (navigate to the Operations List — and look for Clear Limit under the Limit Menu to find appropriate address). 4. Cycle the power to the controller. Watlow PM PLUS™ 6 • 87 • Chapter 8: Features... -
Page 88: Control Methods
Manual Power value into the Integral and Proportional Terms, which will allow for a bumpless transition. The normal PID action will then take over to control the output to the Set Point value. Watlow PM PLUS™ 6 • 88 •... -
Page 89: On-Off Control
Operations — Setup - Control Loop - On/Off Heat Hyster. Operations — Setup - Control Loop - On/Off Cool Hyster.. Input Error failure mode does not function in on-off control mode. The output goes off. Watlow PM PLUS™ 6 • 89 • Chapter 8: Features... -
Page 90: Proportional And (P) Control
Integral determines the speed of the correction, but this may increase the overshoot at startup or when the set point is changed. Too much integral action will make the system unstable. Adjust the integral (Operations — Setup - Control Loop). with Time Integral Watlow PM PLUS™ 6 • 90 • Chapter 8: Features... -
Page 91: Proportional, Integral And Derivative (Pid) Control
When the dead band value is a negative value, both heating and cooling outputs are active when the tem- perature is near the set point. Operations — Setup — Control Loop — Deadband Go to to adjust. Watlow PM PLUS™ 6 • 91 • Chapter 8: Features... -
Page 92: Variable Time Base
Select Ramp Action • ramping not active. Start • ramp at startup. Set Point • ramp at a set point change. both • ramp at startup or when the set point changes. Watlow PM PLUS™ 6 • 92 • Chapter 8: Features... -
Page 93: Compressor Control
% Power Heat 100% 2% Compressor Off Power 0% Compressor On Power -100% Cool Time In Seconds Compressor On Delay = 45 Seconds Compressor Compressor Off Delay = 20 Seconds Watlow PM PLUS™ 6 • 93 • Chapter 8: Features... -
Page 94: Differential Control
Applicable on models with a countdown timer. Check your product label to confirm the configuration code shows T in the 4th digit: PM _ T _ _ _ - _ _ _ _ _ _ _. Watlow PM PLUS™ 6 • 94 •... - Page 95 If None: you can leave this default (It does not matter what number is entered here). • If Digital I/O: Enter the DIO [5 or 6] associated with this timer • If Function Key: enter source instance 1 Watlow PM PLUS™ 6 • 95 • Chapter 8: Features...
-
Page 96: Alarms
A positive set point represents a value above the set point used by the control loop. View or change alarm set points with Low Set Point and High Set Point (Operations Page, Alarm Menu). Watlow PM PLUS™ 6 • 96 • Chapter 8: Features... -
Page 97: Hysteresis
Set Point minus the hysteresis. A Temperature latching alarm could be turned off by the operator at this point. A non-latching alarm would turn off automatically. Set Point Time Alarm Response with Hysteresis Watlow PM PLUS™ 6 • 97 • Chapter 8: Features... -
Page 98: Silencing Alarms
Read and monitor the real-time current level through the Load Current RMS prompt while the most recent faults can be read via the Current Error and Heater Error prompts. All of these prompts can be found in the Operations Page under the Current Menu. Watlow PM PLUS™ 6 • 98 • Chapter 8: Features... -
Page 99: Open Loop Detection
List. Each Lock Level provides access to specific Lists as detailed below. SECURITY LOCK LEVELS Set Lock Levels (Read/Write) Set Lock Set Lock Set Lock Set Lock Set Lock 4 or 5 Factory List Home Screen Watlow PM PLUS™ 6 • 99 • Chapter 8: Features... - Page 100 Lists in which users can set (change) parameters: • 0 = Users can set parameters in the Factory page only* • 1 = Users can set parameters on the Home Screen and Factory List. Watlow PM PLUS™ 6 • 100 • Chapter 8: Features...
-
Page 101: Passwords
9. Use the numeric slider or +/- keys to set the password. The default is 156, which you can keep or change. Watlow PM PLUS™ 6 • 101 •... -
Page 102: Modbus ® - Using Programmable Memory Blocks
® lowed. Multiple register writes (function 16) must be used to modify the assembly. The "Assembly Definition Addresses and Assembly Working Addresses" table reflects the assemblies and their associated addresses. Watlow PM PLUS™ 6 • 102 • Chapter 8: Features... -
Page 103: Cip Communications: Devicenet Or Ethernet/Ip
I/O assembly that would be read or written to. The default assemblies and the as- sembly size is embedded into the firmware of the PM control. Watlow refers to these assemblies as the T to O (Target to Originator) and the O to T (Originator to Target) assemblies where the Target is always the controller and the Originator is the PLC or master on the network. -
Page 104: Compact Assembly Class
CIP to minimize programming effort. Using CIP allows for reads and writes to/from the PLC directly to the desired CIP address within the PM PLUS. All available PM PLUS™ CIP addresses are documented within this user guide for each of the PM PLUS™ Lists/Parameters. Watlow PM PLUS™ 6 • 104 • Chapter 8: Features... -
Page 105: Profibus Dp (Decentralized Peripherals)
Data rates up to 12 Mbit/s on twisted pair cables and/or fiber optics are possible. Profibus versions DP-VO and DP-V1 are supported on Watlow devices that use Profibus DP. DP-V0 provides basic DP functionality, including cyclic data exchange, station, module and channel specific diagnostics and four different interrupt types for diagnostics and process interrupts. -
Page 106: Chapter 9: Applications
Source A Analog Input 2 Source B Output PV Function Output n 0 to 100% Heat Source A Heat Power Cool Power Cool Control Loop 1 0 to 100% Output n Watlow PM PLUS™ 6 • 106 • Chapter 9: Applications... -
Page 107: Example 3: Square Root
Mixing Tank Blending two or more flows to produce a mixture uncontrolled motorized flow of with specified physical properties. valve unmixed paint Maintaining correct air and fuel mixture to combustion. Watlow PM PLUS™ 6 • 107 • Chapter 9: Applications... -
Page 108: Example 5: Differential
Output PV Function Input 1 Output 1 Input 2 Output n 0 to 100% Heat Source A Heat Power Cool Power Cool Control Loop 1 0 to 100% Output n Watlow PM PLUS™ 6 • 108 • Chapter 9: Applications... -
Page 109: Example 6: Wet Bulb / Dry Bulb
Analog Input 2 Source A Output PV Function Output n 0 to 100% Heat Source A Heat Power Cool Power Cool Control Loop 2 0 to 100% Humidity Output n Watlow PM PLUS™ 6 • 109 • Chapter 9: Applications... -
Page 110: Example 8: Motorized Valve Control
Dead Time is the minimum on time that the valve will travel once it is turned on in either the closed or open direction. Dead Time = Valve Dead Band / 100 * Valve Travel Time. Watlow PM PLUS™ 6 • 110 •... - Page 111 When power is applied to the controller, the valve is closed and time is set to 0. Special Output Function 1 is the close signal to the valve. Special Output Function 2 is the open signal to the valve Watlow PM PLUS™ 6 • 111 • Chapter 9: Applications...
-
Page 112: Chapter 10: Appendix
The sensor may be improp- a valid signal to controller • Match setting to sensor used erly wired or open. • Check calibration of controller • Incorrect setting of sensor type • Calibration corrupt Watlow PM PLUS™ 6 • 112 • Chapter 10 Appendix... - Page 113 • Wait until autotune completes or disable autotune feature the control loop • Digital input is set to start autotune • Set digital input to function other than autotune, if desired Watlow PM PLUS™ 6 • 113 • Chapter 10 Appendix...
- Page 114 • Controller defective • Replace or repair controller nal malfunction message • Sensor input over driven • Check sensors for ground loops, reverse wiring or out of range at power up. values. Watlow PM PLUS™ 6 • 114 • Chapter 10 Appendix...
- Page 115 Yes, Parasitic pull-up Reversed Yes, firmware detection Current Source Shorted Range limiting only Open Range limiting only Reversed Range limiting only Voltage Source Open Range limiting only Shorted Range limiting only Watlow PM PLUS™ 6 • 115 • Chapter 10 Appendix...
- Page 116 Yes, pulled up to sensor over range. S1 short to S3 Yes, pulled down to sensor under range. S1 and S3 open Yes, S1 pulled up to sensor over range. Watlow PM PLUS™ 6 • 116 • Chapter 10 Appendix...
-
Page 117: Modbus ® Programmable Memory Blocks
360) into pointer registers 40 and 41, a single multi-write command (0x10 function) would be used writing 360 into register 40 and 361 into register 41. ® The screen shot above was taken from a Watlow application called "Modbus TCP Diagnostic Program for EZ-ZONE PM, RM and ST", which can be found at http://www.watlow.com/en/resources-and-support/Techni- ®... - Page 118 110 & 111 270 & 271 112 & 113 272 & 273 114 & 115 274 & 275 116 & 117 276 & 277 118 & 119 278 & 279 Watlow PM PLUS™ 6 • 118 • Chapter 10 Appendix...
- Page 119 Pointer 20 = 1898 & 1899 Value of Pointer 20 Registers 278 & 279 Registers 118 & 119 Deadband Pointer 40 = 2536 & 2537 Value of Pointer 40 Step Time Remaining Watlow PM PLUS™ 6 • 119 • Chapter 10 Appendix...
-
Page 120: Cip Implicit Assemblies
0x77, 0x02, 0x28 DINT None Specified - - - - - - - - Although 40 members are built into PM controllers, the RUI allows for a maximum of 20. Watlow PM PLUS™ 6 • 120 • Chapter 10 Appendix... - Page 121 41 members. Although 40 members are built into PM controllers, the RUI allows for a maximum of 20. Watlow PM PLUS™ 6 • 121 • Chapter 10 Appendix...
-
Page 122: Compact Class Assembly Structure
The PM PLUS™ Implicit Assembly defaults to a populated assembly structure for the first 20 members. If it is desired to modify any of the given assembly members, visit http://www.watlow.com/en/resources-and- support/Technical-Library/Software-and-Demos, search "implicit," to find "EZ-ZONE Implicit Message As- sembly Programming Application." For help, refer to the document, "Modifying Implicit Assembly Members,"... - Page 123 Bits 16 to 28, Signed 13 bits whole (-4096 to 4095) Bit 29, Clear Latched Input Error (0 = Ignore, 1 = Clear) Bits 30, Limit Clear (0 = Ignore, 1 = Clear) Watlow PM PLUS™ 6 • 123 • Chapter 10 Appendix...
- Page 124 Bits 0 to 12, Signed 13 bits whole (-4096 to 4095) Bit 13, Clear Latched Input Error (0 = Ignore, 1 = Clear) Bit 14, Limit Clear (0 = Ignore, 1 = Clear) Watlow PM PLUS™ 6 • 124 • Chapter 10 Appendix...
- Page 125 Clear Alarm Alarm Alarm Alarm A = 0x0D (13) Read/Write Bits 16 to 31, Paired bits reflecting the state of up to 16 alarms (0 = Ignore, 1 = Clear) Watlow PM PLUS™ 6 • 125 • Chapter 10 Appendix...
- Page 126 Clear Alarm Silence Alarm Clear Alarm Clear Alarm Silence Alarm Alarm Bits 0 to 15, Paired bits reflecting the state of up to 16 alarms (0 = Ignore, 1 = Clear) Watlow PM PLUS™ 6 • 126 • Chapter 10 Appendix...
- Page 127 Error Error Error Error Error Error A = 0x11 (17) Read Bits 16, 18, 20, 22, 24, 26, 28, 30, Analog Input Error Status (0 = None, 1 = Error) Watlow PM PLUS™ 6 • 127 • Chapter 10 Appendix...
- Page 128 Spare Spare Spare Spare Error Error Error Error Error Error Error Error Bits 0, 2, 4, 6, 8, 10, 12, 14, Analog Input Error Status(0 = None, 1 = Error) Watlow PM PLUS™ 6 • 128 • Chapter 10 Appendix...
-
Page 129: Pm Plus™ Integrated Pid Configuration Options
Custom Options DeviceNet™ and Bluetooth® WP = Watlow PM PLUS face plate PROFIBUS DP and Bluetooth® Watlow PM PLUS face plate no logo/no name WN = SAE J1939 CAN bus and Bluetooth® Conformal coating AG = EIA 485 Modbus® RTU 12 = Class 1, Div. -
Page 130: Pm Plus™ Pid Configuration Options
⑭ Custom Options 20 to 28VAC or 12 to 40VDC, plus 2 digital I/O points WP = Watlow PM PLUS face plate Watlow PM PLUS face plate no logo/no name WN = ⑥ ⑦ Output 1 and 2 Hardware Options... -
Page 131: Specifications
• Type S: -58 to 3214°F (-50 to 1767°C) • Type B: 32 to 3300°F (0 to 1816°C) • RTD (DIN): -328 to 1472°F (-200 to 800°C) • Process: -1999 to 9999 units Watlow PM PLUS™ 6 • 131 • Chapter 10 Appendix... - Page 132 • Universal process output: range selectable; 0 to 10VDC ±15mV into a min. 1,000Ω load with 2.5mV nominal resolution; 0 to 20mA ±30μA into max. 800Ω load with 5μA nominal resolution; temperature stability 100ppm/°C Watlow PM PLUS™ 6 • 132 •...
- Page 133 Div. 2, Groups A, B, C and D, Temperature Code T4A, File E184390 (optional) • FM Class 3545 (limit controls) • CE, RoHS by design, W.E.E.E. • EtherNet/IP™ and DeviceNet™ ODVA Conformance Tested displays Watlow PM PLUS™ 6 • 133 • Chapter 10 Appendix...
- Page 134 Watlow PM PLUS™ 6 • 134 • Chapter 10 Appendix...
- Page 135 Watlow PM PLUS™ 6 • 135 • Chapter 10 Appendix...
Need help?
Do you have a question about the PM PLUS 6 and is the answer not in the manual?
Questions and answers