Advertisement
Quick Links
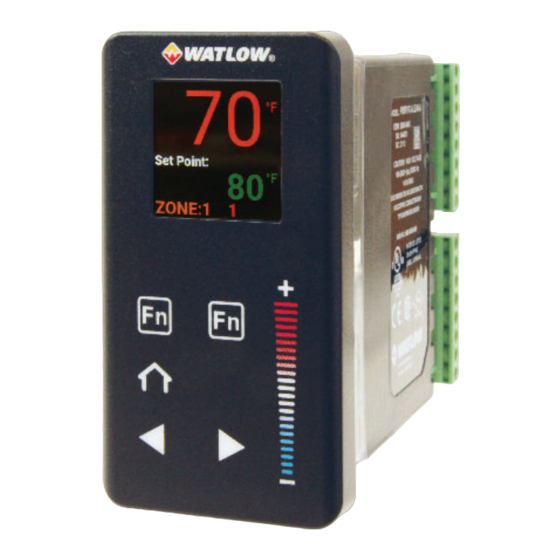
PM Plus
tm
8
QUICK START
Shown
GUIDE
1/8 DIN CONTROLLER
for confi gurations:
(PM8,9) _ _ [E,F,C] [J,C,H] - _ _ _ _ [P,V] _
PM9 PLUS
Shown
PM8 PLUS
Shown
For assistance contact Watlow: www.watlow.com
1-800-WATLOW2 (1-800-928-5692)
wintechsupport@watlow.com
Document #10-46457 Rev. A 2192-2410
December 1, 2021
2 - CONNECT THE SENSOR INPUT
Connect your sensor as indicated in the
PLUS
diagram for your sensor input. Figure 4
Shown
is an example illustrating the connection
shown for a Thermocouple.
PM8 PLUS Wiring Connections Shown. Refer to the User
Guide for PM9 PLUS Wiring Connections.
Thermocouple
–
–
S
S
+
+
R
R
Input 1
Input 2
Process Voltage or Current
Platinum 100Ω or 1000Ω RTD
Voltage: 0 to 50 mV or 0 to 10V@ 20kΩ
20Ω max. round trip lead resistance
Current: 0 to 20 mA @ 100Ω
+
T1
T1
T1
–
–
S3
S1
S1
S1
S1
+
R1
R1
R1
2-wire
amperes
volts
CONTROLLER INTERFACE
F
A
_
B
A
PM8 Plus
E
Shown
D
C
A-Up/Down Increment Key:
Scroll up or down lists using
the + or - keys.
B-Numeric Slider: Increase
or decrease numeric
parameters with the slider.
kk
3 - WIRE OUTPUT 1
(PM8,9)_ _ C _ - _ _ _ _ _ _ _: Switched DC or Open Collector
PM8
Internal Circuit
Common
–
24V(dc)
+
(PM8,9)_ _ E _ - _ _ _ _ _ _ _: Form C Relay
Figure 4: Thermocouple
Wiring Example
Internal Circuit
Normally
Open
L1
K1
S2
T1
J1
S1
Normally
S3
Closed
R1
S1
3-wire
1 - MOUNT TO PANEL
F
1. Make the panel cutout using the
A
2. Remove the green terminal
B
3. Insert the controller into the panel
4. Orient the collar base so the fl at side
A
PM9 PLUS
E
Shown
D
C
C-Forward Select Arrow: Return
5. Slide the mounting bracket over the controller with the
to the previous selection with the
Forward arrow.
D-Back Select Arrow: Select items
6. Tighten the four #6-19 x 1.5 in. screws (two on each side)
or move to lists using the Back
arrow.
E-Home: Return to the home
screen from any screen with the
Home Key.
7. Reinstall the terminal connectors to their original locations.
F-Function Keys: Function Keys
can be programmed for various
tasks.
Refer to the wiring diagram for your confi guration
code and connect to the slots indicated.
Open Collector
X1
+
–
Power Supply
W1
–
+
Load
Y1
+
–
Load
PM8 PLUS Wiring Diagrams
Shown. Refer to the User Guide
Switched DC
for PM9 PLUS Wiring Diagrams.
[5A @240 V(ac) or 30 V (dc)]
F1
PM6_ _ F _ - _ _ _ _ _ _ _: Universal Process
Load
Internal Circuit
AC/DC
Common
F1
–
+
G1
0 to 10 V
+
H1
4 to 20mA
PM PLUS
measurements in fi gure 1.
1.78" W × 3.64" H
(45 mm W × 92mm H)
connectors and the mounting collar
assembly.
PM PLUS
3.64" W × 1.78" H
cutout from the front.
(92 mm W × 45 mm H)
faces front and the screw openings
are on the sides (see fi gure 2), then slide the base over the
back of the controller.
screws aligned to the collar base. Push the bracket gently
but fi rmly until the hooks snap into the slots in the case.
with a Phillips screwdriver until the device is fl ush to the
panel (3 to 4 in-lbs torque). See fi gure 3.
(Only one screw on each side on the PM9 PLUS.)
(Or fi rst connect fi eld wiring as indicated in this guide and
then reinstall the connectors).
(
4 - WIRE OUTPUT 2
(PM8,9)_ _ _ J - _ _ _ _ _ _ _: Form A Relay
PM8 PLUS Shown
Internal Circuit Common
(PM8,9)_ _ _ C - _ _ _ _ _ _ _: Switched DC
Figure 5: Switched DC Output Wiring
0 to 20 mA: 800 Ω max. load
0 to 10V: 1kΩ min. load
Internal Circuit
Voltage Load
or
Current Load
(PM8,9)_ _ _ H - _ _ _ _ _ _ _: No-Arc Relay
Load
Load
Internal Circuit Common
NOTE: Mounting requires access to
the back of the panel.
TM
8
W
H
9
TM
Figure 1
Figure 2
PM8 PLUS
Shown
Figure 3
[5A @ 240 V(ac) or 30 V(dc)]
Normally Open
L2
Load
AC/DC
K2
PM8 PLUS Wiring Diagrams Shown.
Refer to the User Guide for PM9 PLUS
Wiring Diagrams.
Common
–
W2
24V(dc)
Y2
Load
+
Normally Open
L2
AC
Load
K2
Advertisement

Related Manuals for Watlow PM PLUS


Summary of Contents for Watlow PM PLUS
- Page 1 (Only one screw on each side on the PM9 PLUS.) B-Numeric Slider: Increase Home Key. For assistance contact Watlow: www.watlow.com 7. Reinstall the terminal connectors to their original locations. or decrease numeric F-Function Keys: Function Keys 1-800-WATLOW2 (1-800-928-5692) (Or fi...
- Page 2 Control Mode Alarm Type Series EZ-ZONE ® NOTES: Alarm Types By default WATLOW Electric Manufacturing Company 1241 Bundy Blvd. the control loop Heat 1. Press the Home Key to return to the home screen. Winona, MN 55987 USA Process: alarm 1.
Need help?
Do you have a question about the PM PLUS and is the answer not in the manual?
Questions and answers