Advertisement
Table of Contents
- 1 Installation
- 2 Removing/Attaching the Digital Operator and Front Cover
- 3 Wiring between Inverter and Peripheral Devices and Notice
- 4 Standard Connection Diagram
- 5 Description of Terminal Function
- 6 Inverter Output
- 7 Terminal Block Configuration
- 8 Main Circuit Wiring Diagram
- 9 Main Circuit Wiring
- 10 Inverter Specifications
- 11 Basic Specifications
- 12 General Specifications
- 13 Noise Filter
- 14 Dimension : (Unit : MM)
- 15 Fuse Types
- Download this manual
1. 7200 MA Handling Description
1.1 Inspection Procedure upon Receiving
Before delivery, Every 7200 MA inverter has been properly adjusted and passed
the demanding function test. After receiving the inverter, the customer should take it
out and follow the below procedure:
‧Verify that the Type No. of the inverter you've received is the same as the Type No.
listed on your purchase order. (Please read the Nameplate)
‧Observe the condition of the shipping container and report any damage immediately
to the commercial carrier that have delivered your inverter.
■ Inverter nameplate:
JNTMBGBB0001AZSU -
MODEL
440V CLASS INVERTER
AC 3PH 380-480V 50/60Hz
INPUT
OUTPUT
AC 3PH 0-480V 2.2KVA 2.6A
SER. NO.
■ Inverter model number:
JNTMBGBB0001AZSU -
7200MA
SERIES
Enclosure and Mounting
BA: Open Chassis (IP00)
BB: Enclosured, Wall-mounting Type (NEMA1)
BC: NEMA4 Type
Max. Applicable Motor Capacity (HP)
0001:1HP
0075: 75HP
NEMA4 only to 20HP
INVERTER MODEL
INPUT SPECIFICATION
OUTPUT SPECIFICATION
SERIES NO.
UL Information
Hardware Information
- :Standard Type
S :220V/440V, 1/2HP Compact Size Type
A:220/440V 7.5/10HP Ver.2 Type
Rated Voltage
JK :200 ~ 240V
AZ:380 ~ 480V
1-1
Reserved
U :UL / cUL Standard
- :Without UL/cUL Standard
Advertisement
Table of Contents

Related Manuals for TECO 7200 MA Series


Summary of Contents for TECO 7200 MA Series
- Page 1 1. 7200 MA Handling Description 1.1 Inspection Procedure upon Receiving Before delivery, Every 7200 MA inverter has been properly adjusted and passed the demanding function test. After receiving the inverter, the customer should take it out and follow the below procedure: ‧Verify that the Type No.
-
Page 2: Installation
1.2 Installation When installing the inverter, always provide the following space to allow normal heat dissipation. 50 mm min. 120 mm min. ambient temperature -10 ~ + 40 ℃ 30 mm 120 mm 30 mm min. 50 mm min. min. min. -
Page 3: Removing/Attaching The Digital Operator And Front Cover
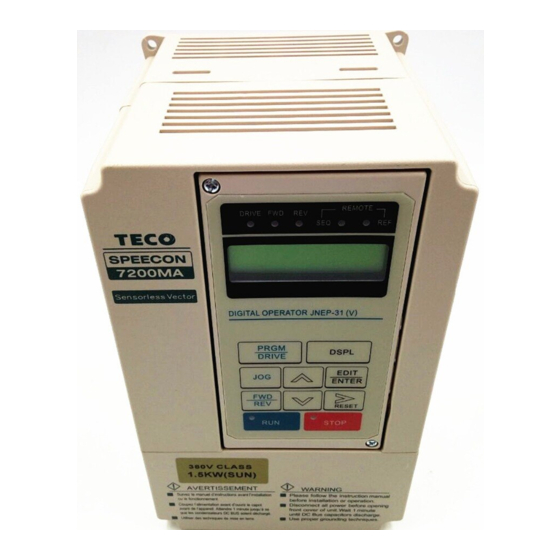
CAUTION Location of equipment is important to achieve proper performance and normal operating life. The 7200MA-model unit should be installed in area where the following conditions exist. ‧Ambient temperature : -10 C~+40 ‧Install 7200MA in a location free from rain, moisture and not in direct sunlight. ‧Install 7200MA in a location free from harmful mist, gases, liquids, dusts and metallic powder. - Page 4 (B) For Standard Type 220V : 3-10HP, 440V : 3-10HP ■ Removing the digital operator Take off the screws in the place a and b. LCD Digital Operator Front Cover Press the lever on the side of the digital operator in the direction of arrow 1 to unlock the digital operator.
- Page 5 (C) For 220V 15~25HP and 440V 15~30HP Series ■ Removing the digital operator : LCD Digital Take off the screws in the place a and b. Operator Disconnect the RS-232 cable connector on the back side of the LCD digital operator and then lift the digital operator upwards.
-
Page 6: Wiring Between Inverter And Peripheral Devices And Notice
1.4 Wiring between Inverter and Peripheral devices and notice Caution 1. After turning OFF the main circuit power supply, do not touch the circuit components or change any circuit components before the “CHARGE” lamps extinguished. (It indicates that there is still some charge in the capacitor). - Page 7 ■ Input noise filter . 7200MA will comply with the EN55011 class A regulation if an 7200MA inverter input noise filter (specified by TECO) is used. . Please refer to the selection guide “1.9 Peripheral device” on page 1-23. ■ 7200MA inverter Zero phase core ....
-
Page 8: Standard Connection Diagram
■ Standard Connection Diagram The standard connection diagram of 7200MA is shown in Fig. 2. The sign ◎ indicates the main circuit terminal and the sign ○ indicates control circuit terminal. The terminal function and arrangement are summarized in Table 1 and Table 2. There are three types of control board, the terminal arrangement is shown as below. - Page 9 (B) 220V : 3-40HP, 440V : 3-75HP (NEMA4 to 20HP) .JNTMBG □□□□ .JNTMBG □□□□ AZ--- Braking Resistor B1/P R/L1 U/T1 Main Ckt S/L2 V/T2 Power Supply T/L3 W/T3 Grounding Lead (<100 Ω ) Analog FWD/STOP ("Close":FWD) Output 1 Analog Monitor 1, 2 Analog REV/STOP ("Close":REV)
-
Page 10: Description Of Terminal Function
1.5 Description of terminal function Table 1 Main circuit terminals Terminal 220V:1~20HP, 440V:1~20HP 220V:25~40HP, 440V:25~75HP R/L1 Main circuit input power supply S/L2 (For single phase power supply, please use R/L1, S/L2 as input terminal) T/L3 B1/P B1/P, B2: External braking resistor B1/P, Θ: DC power supply input •... - Page 11 Table 2 Control circuit terminals Terminal Functions 1(DI1) Forward Operation – Stop Signal 2(DI2) Reverse Operation – Stop Signal 3(DI3) External Fault Input 4(DI4) Fault Reset 5(DI5) Multifunction Input Terminal: 3-Wire Operation, Load/Remote Control, Multi-Speed Select, 6(DI6) FWD/REV Select, ACC/DEC Choice, ACC/DEC Halting, Base Block, Overheat Warn, PID Control, DC Braking, Speed Search, Up/Down Function, PG Feedback Control, External 7(DI7) Fault, Timer function, Multifunction Analog Input Setting...
-
Page 12: Main Circuit Wiring Diagram
Main Circuit Wiring Diagram Main Circuit Wiring Diagram of 7200MA: 1. 220V/440V: 1~20HP 2. 220V : 25HP 440V : 25~30HP 3. 220V : 30~40HP 440V : 40~75HP DC Reactor built-in 1-12... -
Page 13: Main Circuit Wiring
*4 : In Table 3, the specified Part No. of NFB and MC are the item No. of the products of Teco. The customer can use the same rating of similar products from other sources. To decrease the noise interference, be sure to add R-C surge suppressor (R: 10Ω/5W, C: 0.1μF/1000VDC) at the 2 terminals of coils... - Page 14 ■ External circuit wiring precaution: (A) Control circuit wiring: (1) Separate the control circuit wiring from main circuit wiring (R/L1, S/L2, T/L3, U/T1, V/T2, W/T3) and other high-power lines to avoid noise interruption. (2) Separate the wiring for control circuit terminals RA-RB-RC (R1A-R2B-R2C) ~...
- Page 15 (C) GROUNDING: (1) Always use the ground terminal (E) with a ground resistance of less than 100Ω. (2) Do not share the ground wire with other devices, such as welding machines or power tools. (3) Always use a ground wire that complies with the technical standards on electrical equipment and minimize the length of ground wire.
-
Page 16: Inverter Specifications
1.8 Inverter Specifications Basic Specifications (a) 220V Series Inverter (HP) Max. Applicable Motor Output HP (KW) (0.75) (1.5) (2.2) (5.5) (7.5) (11) (15) (18.5) (22) (30) Rated Output 10.1 13.7 20.6 27.4 Capacity (KVA) Rated Output Current 17.5 Max. Output Voltage 3-Phases, 200V~240V Max. -
Page 17: General Specifications
General Specifications Operation Mode Graphic LCD Panel (English and Chinese) with parameters copying (LED: option) Control Mode Sinusoidal PWM Frequency Control Range 0.1Hz ~ 400Hz Frequency Accuracy Digital Command: ±0.01% (-10 ~ +40ºC), (varied with temperature) Analog Command: ±0.1% (25ºC±10ºC), Speed Control Accuracy ±0.1%(V/F with PG feedback), ±0.5%(Sensorless Vector Control) Frequency Command... - Page 18 1.9 Dimensions Inverter Open Chassis Type (IP00) (mm) Weight Enclosed Type (NEMA1) (mm) Weight ACL/ Reference Voltage Capacity(HP) W H (kg) (kg) Figure 220V 132 217 143.5 207 M5 ψ 140 279.5 176.5 140 279.5 176.5 External 211.2 300 286 M6 (option) 220V 265 360...
- Page 19 (b) 220V : 3HP~25HP 440V : 3HP~30HP (c) 220V : 30HP~ 40HP 440V : 40HP~75HP ( - IP00 ) ( - NEMA1 ) Open Chassis Type Enclosed, Wall-mounted Type 1-19...
- Page 20 (d) NEMA4 Type : 1HP~ 20HP Inverter NEMA4 (mm) Weight Voltage Capacity (HP) (kg) 220V ψ 220V ψ 440V ψ 1-20...
- Page 21 1.10 Peripheral Units ■ Braking resistors 7200MA 220V/440V 1~20HP model have built-in braking transistor, and can be connected external braking resistor between B1/P and B2 when lack of braking ability. Above 25HP models, need to connect braking unit (on ⊕ - of inverter) and braking resistors (on B-P0 of braking unit).
- Page 22 ■ AC reactor ‧ An AC reactor can be added on the power supply side if the inverter is connected to a much larger capacity power supply system, or the inverter is within short distance (<10m) from power supply systems, or to increase the power factor on the power supply side.
-
Page 23: Noise Filter
■ Noise filter A. INPUT SIDE NOISE FILTER ‧Installing a noise filter on power supply side to eliminate noise transmitted between the power line and the inverter ‧7200MA has its specified noise filter to meet the EN61800-3 specification Table 6 Noise filter on the input side Inverter Noise Filter Rated... -
Page 24: Dimension : (Unit : Mm)
‧ Dimension : (unit : mm) φ 2 − φ 4 − Dimension (mm) Model KMF370A KMF3100A KMF3150A KMF3180A 1-24... - Page 25 B. EMI SUPPRESSION ZERO PHASE CORE ‧Model : JUNFOC046S ------- ‧Code No. : 4H000D0250001 ‧According to the required power rating and wire size, select the matched ferrite core to suppress EMI noise. ‧The ferrite core can attenuate the frequency response at high frequency range (from 100KHz to 50MHz, as shown below).
- Page 26 ■ LCD operator with extension wire When used for remote control purpose, the LCD operator can have different extension wires based upon the applications. Some extension wires are listed below. 7200MA Cable Length Extension Cable Set *1 Extension Cable *2 Blank Cover *3 4H332D0010000 4H314C0010003...
- Page 27 ■ Analog operator All 7200MA have the digital LCD digital operator. Moreover, an analog operator as JNEP-16 (shown in fig. 7) is also available and can be connected through wire as a portable operator. The wiring diagram is shown below. B1/P BREAKER 7200MA...
-
Page 28: Fuse Types
1.11 FUSE TYPES 220V class 1Φ FUSE 100% CONT. Rated Input 3Φ FUSE MODEL Output AMPS AMPS Rating Rating JNTMBG □□ 0001JK JNTMBG □□ 0002JK JNTMBG □□ 0003JK JNTMBG □□ 0005JK 17.5 JNTMBG □□ 7R50JK 10.1 JNTMBG □□ 0010JK 13.7 JNTMBG □□...
Need help?
Do you have a question about the 7200 MA Series and is the answer not in the manual?
Questions and answers