Advertisement
INSTALLATION, OPERATION AND MAINTENANCE
MAXXAIR
NOTE: Refer to Installation Instructions, Information and Operation Guides regarding the model you have purchased.
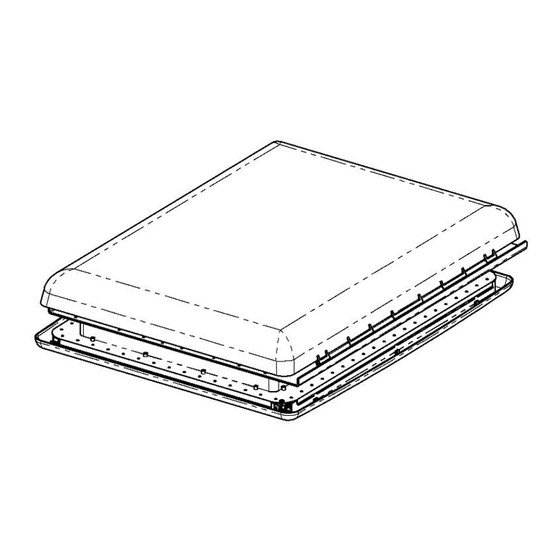
The SKYMAXX Rooflight installs into a roof opening of 27.56 in. x 19.70 in. (700 mm x 500 mm).
To determine if your roof opening is correctly sized, simply remove the interior ceiling garnish trim ring of your existing roof vent and
measure the ceiling opening or verify the opening is large enough by sliding the Rooflight interior ceiling flange into the opening.
The 97010 & 97110 Rooflight is designed for a minimum roof thickness 1.00 inches to 1.65 inches (23 mm to 42 mm maximum).
The 97000 & 97110 Rooflight is designed for a minimum roof thickness 1.65 inches to 2.36 inches (42 mm to 60 mm maximum).
The LED lighted Rooflight requires a minimum 12 Volt DC, 2 amp service. Confirm that the circuit you intend to use will accommodate
the additional load. Circuit must be fused and use appropriate gauge, stranded wire for electrical connections.
NOTE: Wall Control for LED lights must be provided by installer.
NOTE: THE ROOFLIGHT MUST BE CLOSED PRIOR TO TRANSPORTING OR MOVING THE CARAVAN.
WARNING! TO REDUCE THE RISK OF FIRE, ELECTRIC SHOCK, OR INJURY TO PERSONS, OBSERVE THE
FOLLOWING:
a) Use this unit only in the manner intended by AIRXCEL, INC. If you have questions, contact the manufacturer.
b) Before servicing or cleaning the unit, switch power off at service panel and lock the service disconnecting means
to prevent power from being switched on accidentally. When the service disconnecting means cannot be locked,
securely fasten a prominent warning device, such as a tag, to the service panel.
CAUTION! FOR GENERAL VENTILATION USE ONLY. DO NOT USE TO EXHAUST HAZARDOUS OR EXPLOSIVE
MATERIALS OR VAPORS
P/N: 11C90029
INSTRUCTIONS
SKYMAXX LX 97000, 97010, 97100, 97110
®
READ AND SAVE THESE INSTRUCTIONS
.
FOR
10-2019
Advertisement
Table of Contents

Related Manuals for Maxxair SKYMAXX LX 97000


Summary of Contents for Maxxair SKYMAXX LX 97000
- Page 1 INSTALLATION, OPERATION AND MAINTENANCE INSTRUCTIONS MAXXAIR SKYMAXX LX 97000, 97010, 97100, 97110 ® READ AND SAVE THESE INSTRUCTIONS NOTE: Refer to Installation Instructions, Information and Operation Guides regarding the model you have purchased. The SKYMAXX Rooflight installs into a roof opening of 27.56 in. x 19.70 in. (700 mm x 500 mm).
- Page 2 This page intentionally left blank...
-
Page 3: Installation Instructions
(e.g. SikaLastomer-710) to the underside of the flange in the grooved space. CAUTION! When installing your MAXXAIR ROOFLIGHT, only use a caulking/sealant compatible with the flange (plastic product) and the roof surface. DO NOT use materials containing solvents such as or similar to Xylene, Toluene, Methyl Ethyl Ketone (MEK), Acetate or Acetone as they can damage the flange. - Page 4 Ceiling Flange. Secure in place by pressing firmly on the Interior Shroud. This ensures that the clips on the Interior Shroud will engage the channels on the Ceiling Flange to lock it in place. This completes the installation of the MAXXAIR SKYMAXX ROOFLIGHT...
- Page 5 NOTE: THE ROOFLIGHT MUST BE CLOSED PRIOR TO TRANSPORTING OR MOVING THE CARAVAN. USER SERVICING INSTRUCTIONS Cleaning of your MAXXAIR SKYMAXX ROOFLIGHT may be achieved with mild soap and water only. DO NOT USE ABRASIVE CLOTH ON ROOFLIGHT COVER. It is advisable when the Rooflight is open to keep the screen and/or shade covering the Rooflight opening.
- Page 6 Secure in place by pressing firmly on the Interior Shroud. This ensures that the clips on the Interior Shroud will engage the channels on the ceiling flange to lock it in place This completes the installation of the MAXXAIR SKYMAXX Plus ROOFLIGHT.
- Page 7 “Acts of God,” failure due to misuse, improper installation or accidental / incidental damages. Please call your AIRXCEL / MAXXAIR Distributor if you have any questions or need assistance. Please have your original sales receipt readily available. This limited warranty does not cover labor or any freight costs for the return of the product to or from AIRXCEL, INC.
- Page 8 PLACE CONSUMER LABEL HERE For additional product information please visit www.AIRXCEL.com AIRXCEL, INC. - RV Products Division / MAXXAIR 3050 N. St. Francis St. • Wichita, KS 67219 • 316.832.3400...
Need help?
Do you have a question about the SKYMAXX LX 97000 and is the answer not in the manual?
Questions and answers