Table of Contents
Advertisement
Advertisement
Table of Contents

Related Manuals for Aumuller EMB 7300 Series


Summary of Contents for Aumuller EMB 7300 Series
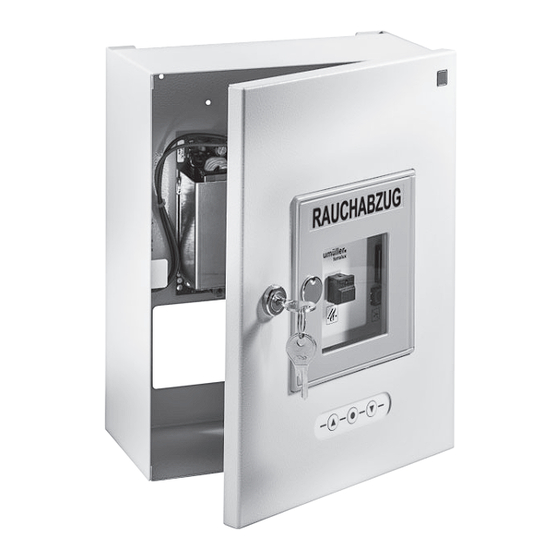
- Page 1 Installation and Commissioning Instructions Power supply according to EN12101-10 and control panel according to prEN12101-9 SHEV - C EMB 7300 - 2,5 A / 5 A / 10 A / 20 A ONTROL tested electrical control device EMB 7300 with recognition number G 514001...
- Page 2 ONTENTS Abbreviations Warning and Safety Symbols Target Groups, Intended Use Safety Instructions 3 - 8 2,5 A Data sheet SHEV Control Unit EMB 7300 - 2,5 A Data sheet SHEV Control Unit EMB 7300 - 10 A Data sheet SHEV Control Unit EMB 7300 - 10 A 20 A Data sheet SHEV Control Unit EMB 7300 - 20 A 9 - 10...
- Page 3 RELIMINARY REMARK BBREVIATIONS Index of abbreviations Scale units These abbreviations are used consistently throughout these °C Degree Celsius assembly & operating instructions. Unless stated differently, all Amps dimensions indicated in this document are in mm. Amp-hours General tolerances in accordance with DIN ISO 2768-m. Kilogram Surface mounting Metres...
-
Page 4: Target Group
RELIMINARY REMARK ARGET GROUP These instructions are intended for personnel trained in This device is not intended for use by per- ARNING electrical engineering and skilled operators of systems sons (including children) with physical, for natural smoke ventilation (NRA / SHEV) (natural smo- sensory or mental limitations or lacking experience and / or ke exhaust system / smoke and heat exhaust system) and knowledge, unless they are supervised by a person who is... - Page 5 RELIMINARY REMARK The need for a risk assessment at the installation site • the installation height of the drive and lower edge due to the reasonably foreseeable misuse. of casement < 2,5 m above the fl oor A risk assessment in accordance with the Machinery and one of the following conditions: Directive 2006 / 42 / EG by activation of the power- •...
-
Page 6: Safety Instructions
AFETY INSTRUCTIONS We recommend using exclusively sys- Basic functions of SHEV (smoke and heat exhaust sys- tem components by A , because tem) control devices: UMÜLLER their compatibility is carefully checked • Control of electromotive window drives for smoke in the factory. A shall not assume and heat exhaust in case of fi re and for “natural UMÜLLER... - Page 7 AFETY INSTRUCTIONS The power line on-site must be secured se- Other persons must be kept away from parately and provided all poles separators. the casement when a hold-to-run switch After opening of the system housing voltage (pushbutton) is operated or when a AUTION carrying parts are exposed.
-
Page 8: Ambient Conditions
AFETY INSTRUCTIONS The prerequisites of the system (see chapter “S Declaration of Conformity YSTEMS CON ”) must be checked prior to the instal- The control device is manufactured and inspected for its FIGURATION OF SOFTWARE lation. The “Software clause for handing over the standard intended use in accordance with the European guidelines. - Page 9 : 2,5 A ATA SHEET 2,5 A SHEV - C EMB 7300 - 2,5 A ATA SHEET ONTROL Feature / Equipment Further settings (e.g. maintenance period) only available with extra cost software license Cable entry from above / below / behind Optional housing for fl ash mounting Prepared for 2 maintanance-free back-up batteries 2x 12 V / 2,3 Ah (Part.
-
Page 10: Data Sheet
: 10 A 20 A ATA SHEET 10 A SHEV - C EMB 7300 - 10 A ATA SHEET ONTROL Feature / Equipment Further settings (e.g. maintenance period) only available with extra cost software license Cable entry from above / below / behind Prepared for 2 maintanance-free backup batteries 2x 12 V / 7 Ah (Part. - Page 11 REPARING ASSEMBLY ECHNICAL The available internal emergency power supply (back-up Electrical data and connected loads batteries), if correctly rated and serviced at regular inter- Operating voltage, primary: 195…..253 V AC vals, ensures that the controller of the Control Unit mo- ves the connected drives open at least twice and close Frequency: 50….60 Hz...
- Page 12 REPARING ASSEMBLY 2,5 A 10 A 20 A ONNECTION ACILITIES ABLING min. 3 x A (see formula) Cable: 5 x 1,5 or 7 x 1,5 Length: max. 200 m Cable: 2 x 2 x 0,8 Length: max. 400 m Stop Stop Cable: 4 x 2 x 0,8 Length: max.
-
Page 13: Installation Step
NSTALLATION STEP ONNECTING DRIVES AND VENTILATION 2,5 A 10 A 20 A NSTALLATION STEP ONNECTING DRIVES AND VENTILATION Only connect when disconnected from the mains power Line length and cross-section A (drives) depend on the type of drive and supply! Switch off power supply and secure against on the number of drives. - Page 14 NSTALLATION STEP ONNECTING DRIVES AND VENTILATION Connecting drives and ventilation: Version EMB 7300 5A-0101, EMB 7300 5A-0101-T, EMB 7300 10A-0101 OPEN CLOSE Ventilation 10 A 1 2 3 Rain Wind Plug-in terminals! Remove for connecting! Terminal SHEV release in case of fi re overrides ventilation. No ventilation in the event of a mains power supply failure (battery operation).
- Page 15 NSTALLATION STEP ONNECTING HERMO AXIMAL DETECTOR IN DRIVE LINE 2,5 A 10 A 20 A NSTALLATION STEP ONNECTING HERMO AXIMAL DETECTOR HEAD SENSITIVE FIRE DETECTOR IN DRIVE LINE Only connect when disconnected from the mains power Line length and cross-section A (drives) depend on the type of drive and supply! Switch off power supply and secure against on the number of drives.
- Page 16 NSTALLATION STEP ONNECTING SMOKE DETECTORS AND BREAKGLASS UNITS 2,5 A 10 A 20 A NSTALLATION STEP ONNECTION OF AUTOMATIC AND MANUAL SMOKE DETECTORS Only connect when disconnected from the mains power The fi re detector connection is closed-circuit monitored supply! Switch off power supply and secure against for line failures.
-
Page 17: Control Indicators
NSTALLATION STEP ONNECTING WIND AND RAIN SENSORS 2,5 A 10 A 20 A NSTALLATION STEP ONNECTING WIND AND RAIN SENSORS Only connect when disconnected from the mains power In case of fi re (EMERGENCY-OPEN) or failure of power supply (batte- supply! Switch off power supply and secure against ry operation) the ventilation control via wind and rain sensors is de- reconnection! - Page 18 NSTALLATION STEP ONNECTING WIND AND RAIN SENSORS 2,5 A 10 A 20 A NSTALLATION STEP NSTALLING RELAY PLUG IN CARD CONNECTION The function of the relay plug-in cards is factory-set: Only installation an connect when disconnected 1. REL 65 = alarm activation / EMERGENCY-OPEN from the mains power supply! Switch off power 2.
-
Page 19: Connecting Power Supply
NSTALLATION STEP ONNECTING POWER SUPPLY 2,5 A 10 A 20 A NSTALLATION STEP ONNECTING POWER SUPPLY Attachment of the batteries with the optio- Route line voltage supply via external fuse and switching component. Only connect supply voltage nal battery holder set (Part.-No.: 683250) and battery set when disconnected from the mains only for compact housing 2,5 A... - Page 20 NSTALLATION STEP ONNECTING POWER SUPPLY Connecting power supply: Version EMB7300 5A-0101, EMB 7300 5A-0101-T, EMB 7300 5A-0102 225 mm V V G G N L Switching power supply 5A Do not remove cover On the version with front-mounted push button the connector may be removed! SMOKE VENT Reset...
-
Page 21: System Requirements
NSTALLATION STEP : „EMB K “ YSTEM CONFIGURATION USING SOFTWARE OMPAKT 2,5 A 10 A 20 A NSTALLATION STEP : EMB K YSTEM CONFIGURATION USING SOFTWARE OMPAKT Installation Connecting the computer with the Control Unit A free version of the system software (version VIEW) can be downloaded from homepage... - Page 22 NSTALLATION STEP NABLING OPERATION COMPLETING INSTALLATION NSTALLATION STEP Functions of the license-free software version NABLING OPERATION COMPLETING INSTALLATION The following overview lists the functions that are available for free on Before the installer is allowed to enable the operation of the Control Unit, version VIEW.
- Page 23 ROUBLSHOOTING AND EPAIR ROUBLSHOOTING AND EPAIR USES All functions and system components that are important for the SHEVS operation are constantly monitored for faults. A fault indication Control Unit version signals the type of fault and, respectively, possible errors when connecting EMB 7300 system components (such as back-up batteries, detectors, drives) during 3,15 AT...
- Page 24 NDICATOR AND ONTROL ELEMENTS NDICATOR AND ONTROL ELEMENTS Position in the Control Unit Meaning of the Displays (overview) The indicators and control elements (switches) are in the Basically, the green indicator „B“ signals that the Con- same position on all EMB 7300 versions. trol Unit works properly.
- Page 25 NDICATOR AND ONTROL ELEMENTS MAINTENANCE AINTENANCE AND ODIFICATION To ensure continuous function and safety of the complete system periodic LED display for breakglass unit (HSE) maintenance by a specialist company is required at least once a year (as mandated by law for smoke and heat exhaust systems). Operational Display State readiness must be checked regularly, at least once a month.
-
Page 26: Important Maintenance Information
ISPOSAL ARRANTY ARRANTY AND USTOMER SERVICE MPORTANT MAINTENANCE INFORMATION • While working in the Control Unit the workplace must be secured In principal apply our: against unauthorized access. „General Terms for the Supply of Products and Services of the • The specialists performing the maintenance work are solely re- Electrical Industry (ZVEI)“. - Page 27 ERTIFICATES Installation instruction SHEV - Control Unit EMB 7300...
- Page 28 ERTIFICATES Installation instruction SHEV - Control Unit EMB 7300...
- Page 29 ERTIFICATES APPROVAL INCLUDES THE FOLLOWING ONTROL NITS EMB 7300 2,5A without SHEV button EMB 7300 2,5A with orange SHEV button EMB 7300 without SHEV button EMB 7300 with orange SHEV button EMB 7300 EMB 7300 Installation instruction SHEV - Control Unit EMB 7300...
- Page 30 VERVIEW ON ALL EXTERNAL CONNECTIONS TO BE COMPLETED VERVIEW ON ALL EXTERNAL CONNECTIONS TO BE COMPLETED Pay regard to the individual connection diagrams in this manual for the position of the respective terminals as detailed for the different Control Unit versions. Terminals Remark CLOSE...
- Page 31 RANSLATION OF THE ORIGINAL INSTRUCTIONS ERMAN Important note: We are aware of our responsibility, which is why we present life-supporting and value-preserving products with greatest possible conscientiousness. Although we make every effort to ensure that the data and information are as correct and up-to-date as possible, we still cannot guarantee that they are free from mistakes and errors.
- Page 32 AUMÜLLER AUMATIC GMBH AUMÜLLER AUMATIC GMBH Tel. +49 8271 8185-0 Tel. +49 8271 8185-0 Gemeindewald 11 Gemeindewald 11 Fax +49 8271 8185-250 Fax +49 8271 8185-250 86672 Thierhaupten 86672 Thierhaupten info@aumueller-gmbh.de info@aumueller-gmbh.de www.aumueller-gmbh.de 9000017000_V0.1_KW05/14 9000007401_V2.3_KW49/18...
Need help?
Do you have a question about the EMB 7300 Series and is the answer not in the manual?
Questions and answers