Table of Contents
Advertisement
Available languages
Available languages
Quick Links
π
H-3480
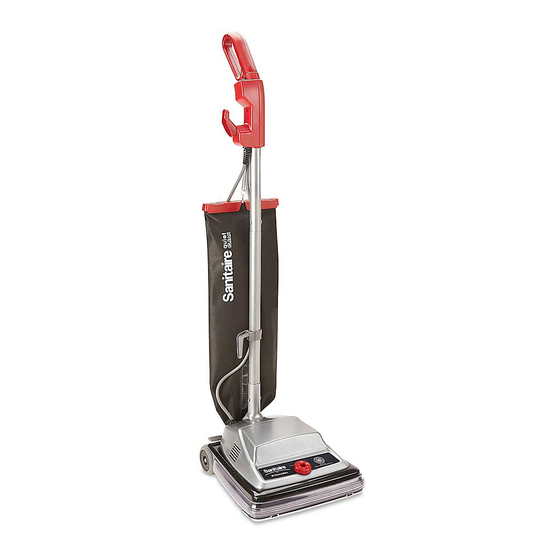
SANITAIRE
®
INDUSTRIAL VACUUM
TOOLS NEEDED
Phillips Screwdriver
3/8" Socket Wrench
NOTE: When using an electrical appliance,
basic precautions should always be followed,
including the following: READ ALL INSTRUCTIONS
BEFORE USING THIS VACUUM CLEANER.
WARNING! To reduce the risk of fire,
electric shock, or injury:
• Do not use outdoors or on wet surfaces.
• Do not leave vacuum cleaner when plugged in.
Turn off the switch and unplug the electrical cord
when not in use and before servicing.
• Do not allow to be used as a toy. Close attention is
necessary when used by or near children.
• Use only as described in this manual. Use only the
manufacturer's recommended attachments.
• Do not use with damaged cord or plug. If vacuum
cleaner is not working as it should, has been
dropped, damaged, left outdoors, or dropped into
water, return it to Uline before using.
• Do not pull or carry by cord, use cord as a handle,
close door on a cord, or pull cord around sharp
edges or corners. Do not run vacuum cleaner over
cord. Keep cord away from heated surfaces.
• Do not use extension cords or outlets with
inadequate current carrying capacity.
• Turn off all controls before unplugging.
• Do not unplug by pulling on cord. To unplug, grasp
the plug, not the cord.
• Do not handle plug or vacuum with wet hands.
• Do not put any object into openings. Do not use with
any opening blocked; keep free of dust, lint, hair or
anything that may reduce airflow.
PAGE 1 OF 22
1-800-295-5510
uline.com
Pliers
SAFETY
• This vacuum cleaner creates suction and contains a
revolving brush roll. Keep hair, loose clothing, fingers
and all parts of the body away from openings and
moving parts.
• Do not place cleaner on furniture or stairs as the
brush roll may cause damage.
• Do not pick up anything that is burning or smoking,
such as cigarettes, matches, or hot ashes.
• Do not use without dust bag or filter(s) in place.
• Belt pulleys can become hot during normal use. To
prevent burns, avoid touching the belt pulley when
servicing the drive belt.
• Use extra care when cleaning on stairs.
• Do not use to pick up flammable or combustible
liquids such as gasoline, or use in areas where they
may be present.
• Store your cleaner indoors in a cool, dry area.
• Keep your work area well lighted.
• Unplug electrical appliances before vacuuming them.
Para Español, vea páginas 8-14.
Pour le français, consulter les pages 15-22.
CAUTION! THIS APPLIANCE MUST BE GROUNDED.
If it should malfunction, or break down,
grounding provides a path of least resistance
for electrical current to reduce the risk of
electric shock.
NOTE: The appliance is equipped with a
cord having an equipment-grounding
conductor and grounding plug. The plug
must be plugged into an appropriate outlet
that is properly installed and grounded
in accordance with all local codes and
ordinances.
0917 IH-3480
Advertisement
Table of Contents

Related Manuals for U-Line SANITAIRE H-3480


Summary of Contents for U-Line SANITAIRE H-3480
- Page 1 Para Español, vea páginas 8-14. Pour le français, consulter les pages 15-22. π H-3480 1-800-295-5510 uline.com SANITAIRE ® INDUSTRIAL VACUUM TOOLS NEEDED Phillips Screwdriver 3/8" Socket Wrench Pliers SAFETY • This vacuum cleaner creates suction and contains a NOTE: When using an electrical appliance, revolving brush roll.
- Page 2 DANGER Improper connection of an equipment-grounding grounded outlet, Figure A, can be installed by a conductor can result in risk of electric shock. Check with qualified electrician. The green colored rigid ear, lug, or a qualified electrician or service person if you are in the like extending from the adapter must be connected doubt as to whether the outlet is properly grounded.
-
Page 3: Handle Adjustment
HANDLE ADJUSTMENT POWER SWITCH Step on handle release (left rear side of vacuum) with tip Power switch is located on left side of looped handle. of foot. Adjust handle to desired position. Hold release (See Figure 4) down to adjust handle flat for cleaning under low Positions: furniture. - Page 4 MAINTENANCE CONTINUED 3. Place new dust bag collar on tabs of dirt tube 4. Pull up on belt and rotate off motor pulley. Lift out interface and rotate up until dirt tube tabs engage brush roll and remove worn belt. (See Figure 11) holes in dust bag collar.
-
Page 5: Routine Maintenance
MAINTENANCE CONTINUED REPLACING BRUSH STRIPS 2. Using rounded end first, slide in new brush strip of equal length. Fit track on either side of brush strip Remove rubber end cap from one end of brush roll. into brush roll slot. Using same procedure, replace Unscrew locknut using socket wrench and remove second strip from opposite end of brush roll. -
Page 6: Problem Solving
PROBLEM SOLVING DIAGNOSE AND CLEAR CLOGS 4. If you can’t see a clog in the motor/fan assembly and the fan spins freely, the clog may be in the dirt Dust bag may be full. Check and replace if full. (See tube that connects the vacuum to the dirt bag. -
Page 7: Troubleshooting
TROUBLESHOOTING OPERATING ISSUE RECOMMENDATIONS There is little or no suction. 1. There may be a clog in the bottom of the vacuum or in the dirt tube. a. Remove bottom metal plate and check for clogs in base and/or brush roll. b. -
Page 8: Herramientas Necesarias
π H-3480 800-295-5510 uline.mx SANITAIRE ® ASPIRADORA INDUSTRIAL HERRAMIENTAS NECESARIAS Desarmador de Cruz Matraca de 3/8" Pinzas de Punta SEGURIDAD NOTA: Hay ciertas medidas básicas de • No coloque ningún objeto en las aberturas. No lo use seguridad que deben seguirse al utilizar un con las aberturas bloqueadas;... - Page 9 PELIGRO La conexión incorrecta de un conductor de aterrizado un contacto de tierra apropiado. El adaptador temporal de equipos puede ocasionar un riesgo de descarga debe utilizarse solamente hasta que un electricista eléctrica. Consulte a un electricista o técnico de calificado instale un contacto de tierra apropiado, servicio calificado si tiene dudas de si el contacto está...
-
Page 10: Cable De Extensión
¡PRECAUCIÓN! No utilice el conector con doble • Posición "I" = Encendido (Modo Quiet Clean) cierre para levantar la aspiradora. • Posición "II" = ON encendido, máxima potencia AJUSTE DEL ASA Diagrama 4 Pise la palanca de liberación del asa (parte posterior izquierda de la aspiradora) con la punta del pie. - Page 11 CONTINUACIÓN DE MANTENIMIENTO 3. Fije la nueva bolsa de polvo a las lengüetas de la 4. Para reemplazar, libere los seguros de levas y retire interfaz del tubo aspirador y gire hacia arriba hasta la placa inferior. Jale la banda para soltarla de la que las lengüetas del tubo encajen con los orificios polea del motor.
-
Page 12: Mantenimiento De Rutina
CONTINUACIÓN DE MANTENIMIENTO REEMPLAZAR LAS TIRAS DEL CEPILLO 2. Utilizando el extremo redondeado primero, inserte una nueva tira de cepillo de la misma longitud. Retire la tapa de hule de uno de los extremos del Encaje el riel de ambos lados de la tira de cepillo rodillo de cepillo. -
Page 13: Solución De Problemas
SOLUCIÓN DE PROBLEMAS DIAGNOSTIQUE Y DESPEJE b. Abra el cierre de la bolsa y retire la bolsa para polvo del tubo de plástico para mugre. LAS OBSTRUCCIONES c. Utilizando un desarmador, retire el lateral exterior La bolsa de polvo puede estar llena. Verifique y de la bolsa de la base de la aspiradora. - Page 14 SOLUCIÓN DE PROBLEMAS PROBLEMA DE FUNCIONAMIENTO RECOMENDACIONES La aspiradora no tiene o tiene poca 1. Puede existir una obstrucción en la parte inferior de la aspiradora o succión. en tubo para mugre. a. Retire la bandeja inferior de metal en busca de obstrucciones en la base y/o el rodillo de cepillo.
-
Page 15: Outils Requis
π H-3480 1-800-295-5510 uline.ca SANITAIRE – ASPIRATEUR INDUSTRIEL OUTILS REQUIS Tournevis cruciforme Clé à douilles Pince de 3/8 po SÉCURITÉ • N'utilisez aucune rallonge ou prise dont l'intensité de REMARQUE : Lorsque vous utilisez un appareil courant admissible est inadéquate. électrique, vous devez toujours prendre des précautions fondamentales, notamment les •... -
Page 16: Montage
SÉCURITÉ SUITE • N'utilisez pas l'aspirateur pour aspirer des liquides MISE EN GARDE! CET APPAREIL DOIT ÊTRE MIS À LA inflammables ou combustibles, tels que de l'essence TERRE. En cas de défaillance ou de panne, la et n'utilisez pas l'aspirateur dans les zones où ces mise à... -
Page 17: Réglage De La Poignée
MONTAGE SUITE 3. Fixez le crochet à cordon d'alimentation inférieur dans 5. Tenez le sac avec la fermeture éclair étant à l'opposé les rainures au bas de la poignée. (Voir Figure 1A) de la poignée. Alignez les trous au bas du collet de sac inférieur sur la base de l'aspirateur, puis fixez-le à... -
Page 18: Entretien
ENTRETIEN 3. Placez le collet du sac à poussière neuf sur les MISE EN GARDE! Éteignez l'aspirateur et débranchez le cordon d'alimentation avant tout languettes de l'interface du tube à poussière et entretien. tournez vers le haut jusqu'à ce que les languettes du tube à... - Page 19 UTILISATION ET ENTRETIEN SUITE 4. Tirez sur la courroie et déroulez-la de la roue du moteur. Réinstallez la plaque de dessous métallique et fixez-la en place avec les verrous à came. La plaque de Soulevez la brosse de battage et retirez la courroie dessous couvrira complètement la courroie.
-
Page 20: Entretien Régulier
ENTRETIEN RÉGULIER QUOTIDIEN 2. Bandes de soies de la brosse de battage – Vérifiez les soies pour toute usure. Les bandes de soies 1. Sac de rechange – Avant chaque utilisation, doivent être remplacées lorsque la longueur des inspectez le sac de rechange et jetez le sac s'il est soies est moins de 1/4 pouce. -
Page 21: Résolution De Problèmes
RÉSOLUTION DE PROBLÈMES DIAGNOSTIC ET NETTOYAGE 4. Si vous ne voyez aucune obstruction dans l'ensemble du moteur/ventilateur et que le ventilateur tourne D'OBSTRUCTIONS librement, l'engorgement peut se trouver dans le tube à poussière qui relie l'aspirateur au sac à poussière. Le sac à... -
Page 22: Dépannage
DÉPANNAGE PROBLÈME DE FONCTIONNEMENT RECOMMANDATIONS Il n'y a que peu ou pas de succion. 1. Le dessous de l'aspirateur ou le tube à poussière est peut- être obstrué. a. Retirez la plaque de dessous métallique et vérifiez si la base de l'aspirateur et/ou la brosse de battage est engorgée.
Need help?
Do you have a question about the SANITAIRE H-3480 and is the answer not in the manual?
Questions and answers