Table of Contents
Advertisement
Available languages
Available languages
Quick Links
DO NOT RETURN YOUR UNIT
TO THE STORE
Contact us first
www.sauder.com
For immediate service,
our website is available
24 hours a day, 7 days a week
to order replacement parts,
access assembly tips,
register your product,
and view Sauder products.
Mon-Fri -- 9am-5:30pm ET
United States and Canada (except holidays)
Consumer Services 1--800--523--3987
Most replacement parts ship from our
facility in one or two business days.
The center pages of this book are French and Spanish
instructions.
Les instructions en français et en espagnol sont situées
dans liencart au milieu de ce manuel. Pour plus de
commodité, celles-ci sont facilement détachables.
Se incluyen las instrucciones en español y francés en el
centro de este folleto. Para facilitar su uso, se puede
desprenderlas fácilmente.
register your new purchase online
register your new purchase online
www.sauder.com
www.sauder.com
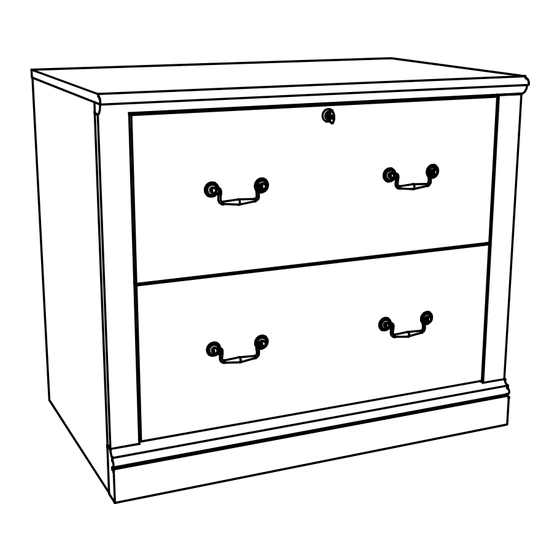
Lateral File
Model # 101702
Assembly Instructions
This instruction booklet contains important safety information.
Please read and keep for future reference.
NOTE
The Camden County Collection
Record the date you purchased this unit and save the booklet
for future reference.
If you ever need to contact Sauder about this unit, refer to the
lot # and the model # when calling our toll-free number. For more
information about our furniture, company, or to order replacement
parts, please visit our web site.
Lot #: 340566
Date Purchased:
09 / 30/ 11
Advertisement
Table of Contents

Related Manuals for Sauder 101702


Summary of Contents for Sauder 101702
- Page 1 Record the date you purchased this unit and save the booklet instructions. for future reference. If you ever need to contact Sauder about this unit, refer to the Les instructions en français et en espagnol sont situées lot # and the model # when calling our toll-free number. For more dans liencart au milieu de ce manuel.
-
Page 2: Parts Identification
MOLDING - - 2 (V) INTERLOCK (W) CABINET (X) DRAWER (Y) TWIST-LOCK (QQ) FILE (AA) LOCK - - 1 TRACK - - 1 ACTUATOR - - 2 ACTUATOR - - 2 FASTENER - - 8 CLIP - - 8 101702... - Page 3 FILE GLIDE - - 4 ROD - - 4 LINK - - 1 (CC) PULL (DD) ANGLE (EE) TOUCH- -UP (FF) SAFETY (BB) PULL - - 4 MOUNT - - 8 BRACKET - - 4 PEN - - 1 BRACKET - - 1 101702...
- Page 4 NPACK PARTS CAREFULLY TO PREVENT SCRATCHING OF THE FINISHED PIECES O NOT BEGIN ASSEMBLY UNTIL YOU ARE FAMILIAR WITH THE PARTS The polystyrene foam used in Sauder packaging contains no CFCs which XTRA TIME SPENT DURING THE ASSEMBLY WILL BE WELL WORTH IT are known to reduce stratospheric ozone layers.
- Page 5 Read each step through completely before beginning the step. This box “-” is provided as a check- -off box. As you complete each task, check it off. - To begin assembly, push a SAUDER TWIST-LOCK FASTENER (Y) into the large holes in the RIGHT END (A3) and LEFT END (B3).
- Page 6 The MOLDINGS should overhang the surface with holes. If the MOLDING overhangs the wrong surface, remove it and slide it on again. Slide the MOLDING off the notched edge in the same direction that it was slid on. * U.S. Pat. No. 5,499,886 www.sauder.com/services 101702...
- Page 7 SCREW (KK) through each BRACKET and into the pre- -drilled holes in the ENDS. NOTE: Be sure to position the BRACKETS as shown. Be sure the edges of the BRACKETS are even with the edges of the ENDS. Follow the enlarged diagrams. www.sauder.com/services 101702...
- Page 8 Follow the diagrams closely for this step. Be sure the parts are positioned as shown. How to use the SAUDER TWIST-LOCK FASTENER (Refer to the enlarged diagram.) 1. Insert the dowel end of the FASTENER into the hole of the adjoining part.
- Page 9 - Fasten the BASE (N) to the RIGHT END (A3) and LEFT END (B3) as shown. Use a 9/16” LARGE HEAD SCREW (KK) through each ANGLE BRACKET and into the pre- -drilled holes in the BASE. NOTE: Be sure the flat edge of the BASE is facing as shown. Follow the diagram. www.sauder.com/services 101702...
- Page 10 - Tap the INTERLOCK TRACK (V) into the groove in the LARGE EXTENSION BLOCK (F2) using your hammer as shown. NOTE: The ends of the INTERLOCK TRACK must be even with both ends of the LARGE EXTENSION BLOCK. www.sauder.com/services 101702...
-
Page 11: Liste De Pièces
Sauder. REMARQUE : Ce manuel d’instructions contient d’importantes informations relatives à la sécurité. À lire et conserver pour Du lundi au vendredi de 9 h 00 à... - Page 12 6. Pour toute question concernant la garantie ou toute demande de réclamation, contactez Sauder en composant le 1- - 800- - 523- - 3987, en adressant un courrier électronique à www.sauder.com ou bien encore en envoyant une télécopie au 419- - 446- - 3444.
- Page 13 48 mm (GG) à travers les gros trous dans le PETIT Utilisation de la FIXATION TWIST- -LOCKR BLOC D’EXTENSION et dans les trous pré--percés SAUDER (Consulter le schéma agrandi.) dans l’EXTRÉMITÉ DROITE. 1. Insérer l’extrémité filetée de la FIXATION dans REMARQUE : NE PAS TROP SERRER LES VIS.
- Page 14 VERROUILLAGE devraient être à fleur des extrémités du GRAND BLOC D’EXTENSION. REMARQUE : Ne pas trop serrer les VIS. S’assurer que la surface comportant six trous du GRAND BLOC D’EXTENSION est dirigée vers le haut. Suivre attentivement les indications du schéma. 101702 Fr...
- Page 15 BLOC D’EXTENSION. Faire tourner une VIS dans ce trou. REMARQUE : Un ACTIONNEUR D’ÉLÉMENT (W) devrait être situé au- -dessus de chaque GLISSIÈRE sur l’EXTRÉMITÉ DROITE (A3). Vérifier l’emplacement des ACTIONNEURS D’ÉLÉMENT avant de fixer les GLISSIÈRES D’EXTENSION aux BLOCS D’EXTENSION. 101702 Fr...
- Page 16 REMARQUE : Pour suspendre les dossiers de format lettre et européen, utiliser les GUIDES DE DOSSIER (PP) et les ARMATURES CRANTÉES POUR DOSSIERS (S). Pour suspendre des dossiers de format légal, utiliser les ARMATURES DROITES POUR DOSSIERS (R). Répéter cette étape pour l’autre tiroir. 101702 Fr...
- Page 17 Ne pas pulvériser de l’encaustique directement sur le meuble. Pulvériser de l’encaustique sur un chiffon et utiliser ensuite le chiffon pour essuyer la surface. 101702 Fr...
- Page 18 Décharger les tiroirs en commençant par celui du haut avant de déplacer le caisson. Ne pas pousser le mobilier, surtout sur la moquette. Se faire aider par une autre personne pour soulever l’élément et le mettre en place. 101702 Fr...
-
Page 19: Lista De Partes
NOTA: Este folleto de instrucciones contiene información ver los productos Sauder. importante sobre la seguridad. Por favor lea y guárdelo para De lunes a viernes de 9 a.m. a 5:30 p.m. (hora del este) referencia en el futuro. - Page 20 6. Para cualquier información o reclamación de Garantía, puede ponerse en contacto con Sauder en EE.UU. al 1- - 800- - 523- - 3987 o enviar un fax al 419- - 446- - 3444 o enviar un correo electrónico al www.sauder.com. Sauder puede solicitar que las reclamaciones sean presentadas por escrito a Sauder Woodworking Co., 502 Middle Street, Archbold, OH 43502...
- Page 21 48 mm (GG) a través de los agujeros grandes del Cómo utilizar el SUJETADOR TWIST- -LOCKR de BLOQUE DE EXTENSIÓN PEQUEÑO y dentro de los SAUDER (Refiérase al diagrama ampliado.) agujeros perforados del EXTREMO DERECHO. 1. Inserte el extremo con cabilla del...
- Page 22 NOTA: Los extremos del CARRIL DE UNIÓN excesivamente. Asegúrese que la superficie con deben estar nivelados con los extremos del seis agujeros del BLOQUE DE EXTENSIÓN BLOQUE DE EXTENSIÓN GRANDE. GRANDE esté colocada hacia arriba. Siga el diagrama atentamente. 101702 Sp...
- Page 23 NOTA: Debe colocar un ACTUADOR DE GABINETE (W) encima de cada RIEL del EXTREMO DERECHO (A3). Asegúrese de verificar la colocación de los ACTUADORES DE GABINETE antes de fijar los RIELES DE EXTENSIÓN a los BLOQUES DE EXTENSIÓN. 101702 Sp...
- Page 24 VARILLAS DE ARCHIVO (S) y los CORRIMIENTOS CON MUESCA DE ARCHIVERO (S). Si desea colgar archivos de tamaño legal, cuelgue los archivos sobre los CORRIMIENTOS RECTOS DE ARCHIVERO (R). Repita este paso para el otro cajón. 101702 Sp...
- Page 25 Esto completa el ensamblaje. Use pulimento de limpieza para muebles en todas las superficies acabadas para realzar la belleza del acabado. No rocíe el limpiador directamente sobre el mueble. Rocíe el producto sobre un paño, y utilice el paño para limpiar la superficie. 101702 Sp...
- Page 26 Evitar el problema: Descargue los cajones desde arriba hacia abajo antes de mover el archivero. No empuje la unidad, especialmente sobre un piso alfombrado. Pide a otra persona su ayuda en levantar la unidad y colocarla en lugar. 101702 Sp...
-
Page 27: Actuator
Slide them up and down the TRACK several times to spread the polish thoroughly. NOTE: The interlock system prevents more than one drawer from opening at a time. Do not use excessive force to open the drawers. www.sauder.com/services 101702... -
Page 28: Block
SCREWS (GG) through the large holes in the LARGE EXTENSION BLOCK and into the pre- -drilled holes in the RIGHT END. NOTE: Do not overtighten the SCREWS. Be sure the surface with six holes on the LARGE EXTENSION BLOCK is facing up. Follow the diagram closely. www.sauder.com/services 101702... -
Page 29: Front
2nd: Be sure there is an equal amount of margin along both side edges of the BACK. This will assure your unit is “square.” 3rd: Then, tap a NAIL into the row of holes along the bottom edge of the BACK. - Continue fastening the BACK (E) to your unit using the NAILS (OO). www.sauder.com/services 101702... - Page 30 EXTENSION BLOCK. Turn a SCREW into this hole. NOTE: There must be a CABINET ACTUATOR (W) above each RAIL on the RIGHT END (A3). Be sure to check the location of the CABINET ACTUATORS before fastening the EXTENSION RAILS to the EXTENSION BLOCKS. www.sauder.com/services 101702...
-
Page 31: File Glide
The letter and European-size files will hang on the FILE RODS (PP) and the NOTCHED FILE GLIDES (S). - If you wish to hang legal-size files, hang the files on the STRAIGHT FILE GLIDES (R). - Repeat this step for the other drawer. www.sauder.com/services 101702... - Page 32 If the key will not turn counter-clockwise, turn it clockwise and fasten the CAM as shown. NOTE: When the drawer is locked, the CAM should be positioned in the groove in the bottom surface of the TOP (C). www.sauder.com/services 101702...
- Page 33 -drilled holes in the DRAWER SIDE. NOTE: Be sure to position the DRAWER ACTUATOR as shown. Be sure to use the two indicated holes. Follow the enlarged diagram closely. Repeat this step for the other drawer. www.sauder.com/services 101702...
-
Page 34: Bracket
Fasten the SAFETY BRACKET (FF) to CABINET the back edge. ACTUATOR (W) RAIL (RR) CAUTION: This Sauder unit 50 lbs. each has been designed for the weights shown in this step. Exceeding these weights could cause excessive “sagging” of the part. -
Page 35: Limited 5-Year Warranty
4. This Warranty applies only to warranted defects that warranty coverage to the original purchaser of this product first arise and are reported to Sauder within the warranty for a period of five years from the date of purchase against coverage period. - Page 36 Have a friend help you lift the item and set it in place. Certificate of Conformity 1. This certificate applies to the Sauder Woodworking Product identified by this Instruction Book. 2. This certificate applies to compliance of this product with the CPSC Ban on Lead--Containing Paint (16 CFR 1303).
Need help?
Do you have a question about the 101702 and is the answer not in the manual?
Questions and answers