Table of Contents
Advertisement
Quick Links
sauder.com
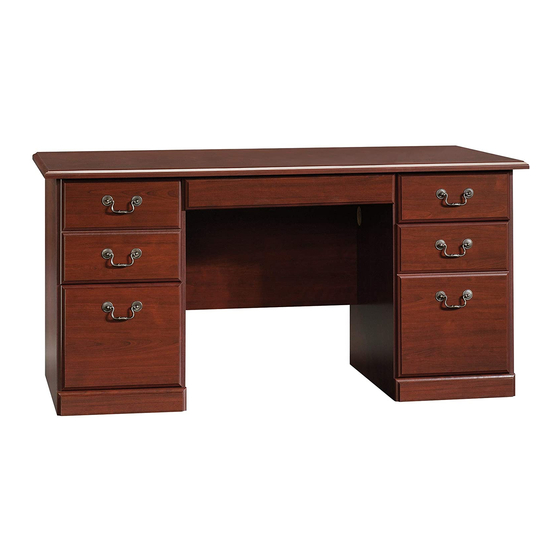
Desk
Heritage Hill Collection | Model 109830
Need help? Visit Sauder.com to view video assembly tips or chat with a live rep.
Prefer the phone? Call 1-800-523-3987.
Share your journey!
The original desktop.
NOTE: THIS INSTRUCTION
BOOKLET CONTAINS IMPORTANT
SAFETY INFORMATION.
PLEASE READ AND KEEP FOR
FUTURE REFERENCE.
English pg 1-24
Français pg 25-28
Español pg 29-32
Lot # 392420
06/23/16
Purchased: __________________
Be sure to give us a ring before
making any returns. 1-800-523-3987
Advertisement
Table of Contents

Related Manuals for Sauder 109830


Summary of Contents for Sauder 109830
- Page 1 Heritage Hill Collection | Model 109830 NOTE: THIS INSTRUCTION BOOKLET CONTAINS IMPORTANT SAFETY INFORMATION. Need help? Visit Sauder.com to view video assembly tips or chat with a live rep. PLEASE READ AND KEEP FOR FUTURE REFERENCE. Prefer the phone? Call 1-800-523-3987.
-
Page 2: Table Of Contents
SMALL RIGHT DRAWER SIDE (1) MODESTY PANEL (1) SMALL DRAWER FRONT (1) SMALL LEFT DRAWER SIDE (1) BOTTOM (1) SKIRT (2) LARGE RIGHT DRAWER SIDE (2) TOP (1) BRACE (1) LARGE LEFT DRAWER SIDE (2) KEYBOARD SHELF (1) Page 2 109830 www.sauder.com/services... -
Page 3: Part Identifi Cation
Now you know Part Identifi cation our ABCs. D109 D716 D716 D716 www.sauder.com/services 109830 Page 3... -
Page 4: Hardware Identifi Cation
FASTENER - 14 SMALL DRAWER LARGE DRAWER ANGLE HINGE - 2 FRONT BRACKET - 1 FRONT BRACKET - 4 BRACKET - 8 PULL 22H HINGE SPACER - 2 40H HINGE - 2 PULL - 6 MOUNT - 12 Page 4 109830 www.sauder.com/services... - Page 5 BROWN 7/16" LARGE HEAD SCREW - 4 15S SILVER 5/8" MACHINE SCREW - 12 18S BROWN 1" FLAT HEAD SCREW - 4 30S BLACK 1-9/16" FLAT HEAD SCREW - 12 SILVER 5/8" FLAT HEAD SCREW - 4 www.sauder.com/services 109830 Page 5...
- Page 6 fl oor. Scan this QR code or go to this address: http://qr.sauder.com/?ID=1667 To begin assembly, push a SAUDER TWIST-LOCK® to watch a video on how to assemble your unit. å FASTENER (10F) into the indicated holes in the RIGHT END (A2).
- Page 7 SCREWS (3S) through holes #1 and #3. GOLD 5/16" FLAT HEAD SCREW (12 used in this step) Edge with TWIST-LOCK® Roller end FASTENERS These holes should be here. This large hole should be here. Roller end www.sauder.com/services 109830 Page 7...
- Page 8 BROWN 7/16" LARGE HEAD SCREW (2 used for the V-CATCH) NOTE: Be sure to position the V-CATCH as shown. Follow å the enlarged diagram. Roller end GOLD 5/16" FLAT HEAD SCREW (4 used for the RAILS) Roller end Page 8 109830 www.sauder.com/services...
- Page 9 Step 4 Fasten the BACKS (E2) to the ENDS (A2 and B2). Tighten å ® How to use the SAUDER TWIST-LOCK FASTENER six MINI TWIST-LOCK® FASTENERS. 1. Insert the dowel end of the FASTENER into the hole of the adjoining part.
- Page 10 Fasten the LEFT UPRIGHT (D2) to the BACK (E2) å and BRACE (U2). Tighten three MINI TWIST-LOCK® FASTENERS and one TWIST-LOCK® FASTENER. Fasten the RIGHT UPRIGHT (C2) to the BACK (E2) å and BOTTOM (G2). Tighten three MINI TWIST-LOCK® FASTENERS and two TWIST-LOCK® FASTENERS. Page 10 109830 www.sauder.com/services...
- Page 11 Meet Part (H3). This component has been engineered to be lighter, stronger, faster… well ok. Not technically faster. But defi nitely makes for a sturdier desk that’ s easier to assemble and friendlier to the environment. www.sauder.com/services 109830 Page 11...
- Page 12 TOP (H3). Tighten four TWIST-LOCK® FASTENERS and one MINI TWIST-LOCK® FASTENER. Fasten the MODESTY PANEL (F) to the LEFT UPRIGHT (D2). å Use two BLACK 1-7/8" FLAT HEAD SCREWS (2S). BLACK 1-7/8" FLAT HEAD SCREW (2 used for the MODESTY PANEL) Page 12 109830 www.sauder.com/services...
- Page 13 D2), BOTTOM (G2), and BRACE (U2). Use eight GOLD 9/16" LARGE HEAD SCREWS (5S) through the ANGLE BRACKETS GOLD 9/16" LARGE HEAD SCREW and into the SKIRTS. (16 used in this step) (8 used) Flat edge Flat edge www.sauder.com/services 109830 Page 13...
- Page 14 Step Step 9 Fasten the HINGE SPACERS (22H) and HINGES (40H) to å the DOOR (K2). Use four SILVER 5/8" FLAT HEAD SCREWS (23S). SILVER 5/8" FLAT HEAD SCREW (4 used in this step) Page 14 109830 www.sauder.com/services...
- Page 15 Insert two PULLS (77K) into four PULL MOUNTS (78K) and fasten them å to the DOOR (K2). Use four SILVER 5/8" MACHINE SCREWS (15S). Stop See the next step for DOOR adjustments. å Mounting screw Hinge SILVER 5/8" MACHINE SCREW (4 used for the PULLS and MOUNTS) www.sauder.com/services 109830 Page 15...
- Page 16 To adjust the DOOR in or out (depth), loosen the mounting screw å one turn and move the DOOR in or out, as needed. Tighten the mounting screw after making adjustments. Mounting screw (depth) Adjusting screw (horizontal) (vertical adjustment) Page 16 109830 www.sauder.com/services...
- Page 17 GOLD 9/16" LARGE HEAD SCREW (8 used for the BRACKETS) D716 Be sure the DRAWER BOTTOM inserts into the DRAWER BACK groove. BLACK 1-9/16" FLAT HEAD SCREW (8 used for the DRAWER BACKS) www.sauder.com/services 109830 Page 17...
- Page 18 GOLD 9/16" LARGE HEAD SCREW (2 used for the BRACKETS) D716 Be sure the DRAWER D109 BOTTOM inserts into the DRAWER BACK groove. BLACK 1-9/16" FLAT HEAD SCREW (4 used for the DRAWER BACK) Page 18 109830 www.sauder.com/services...
- Page 19 FLAT HEAD SCREWS (3S) through holes #1 and #3. Repeat this step for the SMALL DRAWER and other å LARGE DRAWER. Roller end Roller end (4 screws per drawer) GOLD 5/16" FLAT HEAD SCREW (12 used in this step) www.sauder.com/services 109830 Page 19...
- Page 20 SIDES (D48 and D49) on the upper drawer. The FILE GLIDES are necessary to hang fi les. NOTE: The drawers are designed to hold letter-size fi les. å Repeat this step for the lower drawer. å Page 20 109830 www.sauder.com/services...
- Page 21 UPPER DRAWER FRONT (L2). Use four SILVER 5/8" MACHINE SCREWS (15S). Repeat this step for the lower large drawer and the å small drawer. SILVER 5/8" MACHINE SCREW (8 used in this step) www.sauder.com/services 109830 Page 21...
- Page 22 Fasten the DRAWER RIGHT (40AY) and DRAWER LEFT (40AZ) å to the KEYBOARD SHELF (I2). Use four BROWN 1" FLAT HEAD SCREWS (18S). Roller end BROWN 1" FLAT HEAD SCREW (4 used in this step) Roller end Long fi nished edge Page 22 109830 www.sauder.com/services...
- Page 23 Use four GOLD 9/16" LARGE HEAD SCREWS (5S) through the HINGES and into the KEYBOARD FRONT. BROWN 7/16" LARGE HEAD SCREW (2 used for the STRIKE CATCH) GOLD 9/16" LARGE HEAD SCREW (8 used for the HINGES) www.sauder.com/services 109830 Page 23...
-
Page 24: Safety
This completes assembly. Clean with your favorite furniture polish or a damp cloth. Wipe dry. å And to celebrate, why not share your success story? 75 lbs. 15 lbs. 40 lbs. 25 lbs. 30 lbs. each Page 24 109830 www.sauder.com/services... -
Page 25: Français
Modèle 109830 Bureau Utilisez les instructions d’ a ssemblage en français avec les NOUS SOMMES LA POUR VOUS AIDER! schémas étape par étape du manuel d’instruction en anglais. Nous faisons de notre mieux pour nous assurer que votre meuble Chaque étape en français correspond à la même étape arrive dans d’excellentes conditions. - Page 26 Utilisation de la FIXATION TWIST-LOCK® SAUDER Pour commencer l'assemblage, enfoncer une FIXATION 1. Insérer l'extrémité fi letée de la FIXATION dans le trou de la pièce TWIST-LOCK® SAUDER (10F) dans les trous indiqués dans attenante. l'EXTRÉMITÉ DROITE (A2). REMARQUE : L'extrémité fi letée de la FIXATION doit rester Répéter cette étape pour l'EXTRÉMITÉ...
- Page 27 REMARQUE : S'assurer que le FOND DE TIROIR s'encastre dans la rainure du DEVANT DE PETIT TIROIR (P). Fixer l'ARRIÈRE DE PETIT TIROIR (D109) aux CÔTÉS DE PETIT TIROIR (D42 et D43). Utiliser quatre VIS TÊTE PLATE 40 mm NOIRES (30S). www.sauder.com/services 109830 Page 27...
- Page 28 Ceci complète l'assemblage. Nettoyer à l’ a ide d’une encaustique pour meubles ou d’un chiff on humide. Essuyer. ÉTAPE 17 Fixer le TIROIR DROIT (40AY) et le TIROIR GAUCHE (40AZ) à la TABLETTE DE CLAVIER (I2). Utiliser quatre VIS TÊTE PLATE 25 mm MARRON (18S). Page 28 109830 www.sauder.com/services...
-
Page 29: Español
Modelo 109830 Escritorio Use estas instrucciones de ensamblaje en español junto con las ESTAMOS AQUI PARA AYUDAR! fi guras paso-a-paso provistas en el folleto inglés. Cada paso Tratamos de asegurar que su mueble llega en condición excelente. en español corresponde al mismo paso en inglés. Se destacan Nuestros representantes de Servicio al Cliente son amables y las fi... - Page 30 1. Inserte el extremo con cabilla del SUJETADOR en el agujero de Para comenzar el ensamblaje, empuje un SUJETADOR la parte adjunta. TWIST-LOCK® SAUDER (10F) dentro de los agujeros indicados NOTA: El extremo con cabilla del SUJETADOR debe quedarse del EXTREMO DERECHO (A2).
- Page 31 CARA DE CAJÓN PEQUEÑO (P). Fije el DORSO DE CAJÓN PEQUEÑO (D109) a los LADOS DE CAJÓN PEQUEÑO (D42 y D43). Utilice cuatro TORNILLOS NEGROS DE CABEZA PERDIDA de 40 mm (30S). www.sauder.com/services 109830 Page 31...
- Page 32 Seque con un paño. PASO 17 Fije la CAJÓN DERECHO (40AY) y la CAJÓN IZQUIERDO (40AZ) al ESTANTE DE TECLADO (I2). Utilice cuatro TORNILLOS MARRONES DE CABEZA PERDIDA de 25 mm (18S). Page 32 109830 www.sauder.com/services...
- Page 33 à Les téléviseurs peuvent être particulièrement un téléviseur. cet eff et. lourds. De plus, le poids et l’emplacement du tube image ont tendance à rendre les téléviseurs instables et enclins à tomber vers l’ a vant. www.sauder.com/services 109830 Page 33...
- Page 34 Además, el peso y la ubicación del tubo de imagen tienden a causar la inestabilidad de televisores y propensa a volcarse hacia adelante. Page 34 109830 www.sauder.com/services...
- Page 35 à compter de la date d'achat la première fois et qui sont signalés à Sauder dans les limites de couverture de la contre tout défaut de matériaux ou de fabrication des composantes de mobilier Sauder.
- Page 36 Dear Valued Customer: So, how did it go? Thanks so much for choosing Sauder® furniture. I hope the Set a world record for speed? purchase and assembly process was a positive experience Feeling good about yourself? and you feel good about the furniture you just built. If you Nice.
Need help?
Do you have a question about the 109830 and is the answer not in the manual?
Questions and answers