Table of Contents
Advertisement
Advertisement
Table of Contents

Related Manuals for Jasic TIG315PACDC(E202)


Summary of Contents for Jasic TIG315PACDC(E202)
- Page 1 TIG315PACDC(E202) E202 SC-A1...
- Page 3 3. Though contents in this manual have been carefully checked, inaccuracies might have occurred. For any inaccuracy, please contact us. 4. Any copy, record, reprint or spread of the contents in this manual without preauthorization of JASIC is prohibited. 5. This manual was released in Aug , 2018.
-
Page 4: Table Of Contents
Contents 1. SAFETY..................................5 2. Description of Symbols............................... 6 3. Product Overview................................8 4. Function Overview..............................9 5. Features..................................10 6. Welder Output Volt-ampere Characteristic Curve....................12 7. Product Technical Parameters...........................12 8. Block Diagram................................14 9. Product Appearance Overview..........................16 10. About the Control Panel............................17 11. - Page 5 15. Basic knowledge of MMA............................44 15.1 MMA................................44 15.2 Welding Process of MMA..........................44 15.3 Tools for MMA...............................45 15.4 Basic Operation of MMA..........................45 16. Basics of Argon Arc Welding........................... 48 16.1 General description of argon arc welding....................48 16.2 Characteristics of argon arc welding......................
-
Page 6: Safety
1. SAFETY Warning! During the welding process, it may cause damage to you and others, please do well the protection. For the details, please refer to the safety protection guide to the operators that accord with the manufacturer accident prevention requirements. -
Page 7: Description Of Symbols
If you still cannot understand fully, or you still cannot solve the problem, please contact the dealer or the service center of JASIC to obtain professional support. 2. Description of Symbols Reminder to be noted during Power switch in “on”... - Page 8 Arc strike mode Spot welding time Tungsten needle diameter selection Current unit Parameter setting warning Frequency unit protection warning Remote control mode or torch Percentage control mode Argon welding mode Time unit Manual welding mode Voltage unit Welding gas related parameters AC frequency Pulse frequency, mixed argon welding pulse Cleaning width...
-
Page 9: Product Overview
Can be used in the environment Do not use outdoors which has high risk of electric shock Symbol of manual metal arc welding Symbol of Tungsten inert-gas welding with covered electrodes Output load Insulation class No-load voltage Rated AC input voltage Open circuit voltage of secondary winding Maximum effective input current Rated maximum input current... -
Page 10: Function Overview
dissipation efficiency, the damage to the power device and the control circuit caused by the dust sucked by the fan can be effectively avoided, thus greatly improving the reliability of the machine. The overall shape of the machine is streamlined and the front and rear panels use a large arc of transition to make the panels congruent naturally and seamless. -
Page 11: Features
Advanced arc starting function: Argon arc welding supports contact arc strike and non-contact arc strike. Non-contact built-in high-voltage arc ignition circuit improves the success rate of high-frequency arc striking. Intelligent fan temperature control: Increases the life of the fan. ... - Page 12 Excellent insulation performance. Good “three proofings” design, good anti-static performance and corrosion resistance. Perfect automatic protection The machine has a perfect protection function, and there is a corresponding code hint when protection is enabled. The machine integrates under-voltage and over-voltage protection. When the input grid voltage is unstable, and the voltage is too high or too low, the welder protection disables output and prevents damage to the welder.
-
Page 13: Welder Output Volt-Ampere Characteristic Curve
The machine can count the data such as the cumulative number of start-ups, cumulative start-up time, cumulative welding time, cumulative argon arc welding time, cumulative manual welding time, cumulative number of alarms, cumulative number of overheating, cumulative number of undervoltage and cumulative number of overvoltage, store in FLASH memory for long-term and provide the basis for maintenance 6. - Page 14 Power capacity 9.0@TIG 10.0@MMA Output current adjustment range (TIG) 10~315 Output current adjustment range 10~270 (MMA) Thrust current adjustment range 0~100 Hot arc current adjustment range 0~80 No-load voltage VRD voltage 12.4 Rated operating voltage 22.6@TIG 30.8@MMA AC output frequency 50~200 Cleaning width 20~60...
-
Page 15: Block Diagram
Note: Duty cycle(%): The ratio of given duration time/the full-cycle time This ratio shall be within 0~1, and can be indicated by percentage. In this standard, the full-cycle time are 10minutes. For example, if the duty cycle is 30%, the load-applying time shall be 3 minutes and the following. 8. -
Page 17: Product Appearance Overview
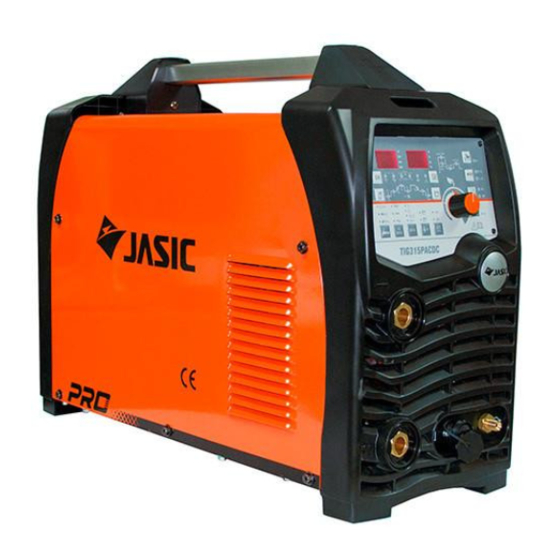
9. Product Appearance Overview Handle Rotary encoder Control panel Company logo Negative output Positive output Argon welding gas connector Torch switch aviation outlet Water tank connector Power switch Argon inlet Power input line Water tank fuse Cooling fan Connect the negative electrode output to the argon torch. Connect positive output terminal to ground clamp. -
Page 18: About The Control Panel
10. About the Control Panel Data display MMA section Water tank Remote TIG parameter TIG function Rotary switch selection indicator section encoder... -
Page 19: Control Panel Features
11. Control Panel Features 11.1 Header display Voltage unit indicator Display voltage value Channel status indicator of selected Display “C+ storage storage parameters channel” Display “Err” Channel status indicator save/saved parameters Ventilation indicator Display current Current unit indicator ... -
Page 20: Save And Call Parameter Settings
11.2 Save and Call Parameter Settings Confirm saving Channel +/Exit parameters to the channel Channel - Call the stored parameters Press the Channel button to enter the parameter storage channel mode. In channel mode, select the corresponding channel by pressing the Channel button turning pages up and down. -
Page 21: Safe Vrd Mode
indicates the hot arc striking current for manual welding work. indicates the time of hot arc striking. indicates the welding current of manual welding work. indicates the thrust current of manual welding work. Press Manual welding to enter manual welding selection interface, and select desired DC or AC mode. -
Page 22: Classification Of Tig Modes
11.5 Classification of TIG Modes Press the TIG button to enter the TIG welding selection interface, switch among DC, AC and MIX mode, and select the mode as needs. When the DC mode is selected, the indicator lights up,DC-TIG is applied to carbon steel welding ,copper welding and stainless steel welding. -
Page 23: Classification Of Welding Torch Control Modes
11.7 Classification of Welding Torch Control Modes Press the Mode control button to switch among 2T, 4T, cycle, and spot welding, and select the mode as needed. When 2T is selected, the indicator lights up; when 4T is selected, the indicator lights up;... -
Page 24: Arc Striking Mode
11.8 Arc Striking Mode Two arc striking modes are available: high frequency oscillation arc striking and contact arc striking. Press the arc strike control button to switch between high frequency oscillation arc striking and contact arc striking. When the indicator lights up, it indicates the high-frequency oscillation arc striking mode. -
Page 25: Remote Control Mode
11.10 Remote Control Mode 1. When torch indicator lights, it means machine gets into torch control mode. Using analog torch, can only adjust the output current. Using digital torch, can adjust multiple parameters and output current. Machine can detect analog or digital torch you use automatically. -
Page 26: Air Intake Detection
Rotate the rotary encoder clockwise or counterclockwise and the indicator lights up. Press the rotary encoder and the indicator flashes. Set the actual size of the tungsten electrode, and press the rotary encoder again after setting the parameters to exit. When setting parameters, turn the rotary encoder clockwise to increase the parameter value, turn the rotary encoder... -
Page 27: Tig Parameter Settings
11.14 TIG Parameter Settings 1. Meaning of symbols Pre-feed time indicates the time for pre-feeding of shielding gas. Arc striking current indicates the current at arc striking. Up time indicates the time from arc striking current to peak current. Peak current indicates the welding current during operation. -
Page 28: Welding Function
parameter position and parameter selection state. 3. When a parameter is selected, the corresponding indicator lights up; when a parameter is being adjusted, the corresponding indicator flashes. 4. When setting the parameters, rotate the rotary encoder clockwise to increase the parameter value, and rotate the rotary encoder counterclockwise to decreases the parameter value;... - Page 29 stri Torch Welding switch mode mode esis cycl ecti ● ● ● ● ● ● ● × × × × × × × ● ● ● ● ● ● ● × × × × × × × ● ● ● ●...
-
Page 30: Mma
Note: 1. “●” indicates that the parameter is valid, and “X” indicates that the parameter is invalid 2. Press and hold the knob for 2 seconds to enter the linkage mode. If the indicator is not at the peak current and knob rotation is stopped, it will automatically return to the peak current position after 10 seconds. - Page 31 Current and Voltage Changes in AC Manual Welding Process Note:t0 - standby section, no welding current, output no-load voltage. t1 - Arc striking section, the length adjusted according to hot arc striking time. t2 - Arcing section t3 - Short-circuit transition section I1 - Arc strike current I2 - Operating current I3 - Thrust current...
-
Page 32: Dc Argon Arc Welding
Arc striking current: It is beneficial to arc striking and reduces the tendency of welding rod and weldment to stick. The size of the hot arc striking current is generally determined according to rod type, the specifications and welding current. Rods with better arc striking performance and small diameter generally need smaller hot arc striking current;... - Page 33 Note: I1- Arc striking current I2 - Current corresponding to up time I3 - Set current I4 - Current corresponding to down time I5 - Arc stopping current Tr - Upslope time Td - Downslope time ● Arc striking current I1: The initial current is the current after arcing by pressing the torch switch. It should be determined according to the process requirements.
-
Page 34: Dc Pulsed Argon Arc Welding
12.4 DC Pulsed Argon Arc Welding DC Pulse TIG Current Change Waveform Note: I1 - Arc striking current Ip - Set peak current Ib - Set base current I5 - Arc stopping current Tp - Peak width Tb - Base width T - Pulse period Pulsed argon-arc welding contains all the parameters of DC argon arc welding and only the parameters of the setting segment are different. -
Page 35: Ac Argon Arc Welding
12.5 AC Argon Arc Welding Current Variation Waveform of AC Square Wave Argon Arc Welding Note: I0 - Initial current. I1 - Welding current. I2 - Arc stopping current. tu - Upslope time. td - Downslope time. tp - AC cycle. tc - Current clearing time. -
Page 36: Ac Pulsed Argon Arc Welding
12.6 AC Pulsed Argon Arc Welding Current Change Waveform of AC Pulsed Argon Arc Welding Note: tc- Current clearing time. tp - AC cycle Tp - Pulse peak time T - Pulse cycle tu - Upslope time td - Downslope time Ip - Peak current Ib - Base current ●... -
Page 37: Hybrid Argon Arc Welding
frequency division factor is 100/5 = 20. When the AC frequency changes to 70Hz, the frequency division factor is 70/5 = 14, that is, the frequency division factor is variable, and the pulse frequency is unchanged. In other words, the AC frequency affects the pulse frequency range. When the pulse frequency is determined, the change of the AC frequency no longer affects the pulse frequency. -
Page 38: Description Of Argon Arc Welding Mode
frequency is set to 100Hz and the hybrid argon arc welding frequency is 5Hz, the current frequency division factor is 100/5 = 20; when the AC frequency changes to 70Hz, the frequency division factor is 70/5 =14, that is, the frequency division factor is variable, and the hybrid argon arc welding frequency is unchanged. -
Page 39: Installation And Operation
Standard four-step method: 1. Arc strikes to the initial value when the torch switch is pressed down 2. Arc rises to the peak when the torch switch is released 3. Arc drops until stopping when the torch switch is pressed down 4. -
Page 40: Electric Input Connection
Connect to the appropriate voltage level according to the input voltage of the welder. Do not mismatch the voltage level. The input power cable should be in good contact with the corresponding power terminal or socket to prevent poor contact. Use a multimeter to measure if the input voltage is within the fluctuation range. -
Page 41: Operation Method
When long cable is necessary to be used, the larger section cable is advised to be used to decrease voltage drop;when the connecting cable is overlong, it may impose great affect on arc starting performance of welding machine and other performance of system, so we advice you use the recommended cable length. 4 )... - Page 42 Manual welding diagram 3) Before argon arc welding, clamp the ground wire to the positive electrode of the welder, clamp the welding torch joint to the negative electrode of the welder. Otherwise, welding can’t be performed. Connect the welding torch control line is to the control interface. Select the appropriate welding mode according to the workpiece material, and check if the selected tungsten electrode matches the tungsten electrode parameters on the panel and if the current parameters match;...
-
Page 43: Argon Arc Welding Torch
13.4 Argon arc welding torch Standard welding torch parameters Long-handled Torch type: Water cooling WP-18 (5M) Maximum current: 350A Rated current: 315A Cooling method: Water cooling Tungsten needle Gas fitting: M10×1.0 Rated load duration: 40% Connecting needle Torch tip insulator Torch tip Tungsten electrode clip... -
Page 44: Safety Tips
the operator unable to step aside the current-carrying conductor. 3) Don’t use the machine in humid environment, where the operators easy to sweat which make them in great electric shock risks. 4) Don’t conduct the welding in the sun or rain or snow; don’t make water or rainwater seep into the welding machine. -
Page 45: Basic Knowledge Of Mma
The welder is operated according to allowable duty circle (refer to the corresponding duty cycle). Make sure that the welding current should not exceed the max load current. Overload could obviously shorten the machine's lifespan, or even damage the machine. 3) Over-voltage is forbidden., Please refer to “Technical Parameters”... -
Page 46: Tools For Mma
the joint welding is finished. 15.3 Tools for MMA a) electrode holder b) welding mask c) slag hammer d) wire brush Common tools for MMA include electrode holder, welding mask, slag hammer, wire brush, welding cable and labor protection supplies. a) Electrode holder: a tool for clamping electrode and conducting current, mainly including 300A type and 500A type. - Page 47 condition with low requirement on dust removal; grinding wheel can be used for condition with high requirement on dust removal. 2) Posture in operating Take flat welding of butt joint and T-shaped joint from left to right as an example. (See Fig. 13.2) The operator should stand at the right side of the working direction of weld joint with mask in the left hand and electrode holder in the right hand.
- Page 48 5) Electrode manipulation The electrode manipulation actually is a resultant movement in which the electrode simultaneously moves in three basic directions: the electrode gradually moves along the welding direction; the electrode gradually moves toward the weld crater; and the electrode transversely swings. (See Fig.13.4) Electrode should be correctly manipulated in three movement directions after arc is ignited.
-
Page 49: Basics Of Argon Arc Welding
a) arc extinguishing at the outside of weld b) arc extinguishing on the weld bead bead 7. Weldment cleaning Clean welding slag and spatter with wire brush and tools the like after welding. 16. Basics of Argon Arc Welding Warning! During welding, it is forbidden to pull off any plug or cable in use, or it will lead to life-threatening danger and severe damage of the machine. -
Page 50: Gas Tungsten Arc Welding (Gtaw)
1) Argon has excellent protective performance, so corresponding flux is not needed when welding. It is basically a simple process of metal melting and crystallization, and pure weld bead of high quality can be obtained. 2) Due to the compression and cooling effect of argon flow, the heat of arc is concentrated with high temperature. -
Page 51: Gtaw Process
16.4 GTAW process Preweld cleaning Clean the electrode and the zone near the weld joint of the workpiece, and remove impurities such as oil pollution and the oxidized film on the surface of the metal before carrying out argon arc welding to ensure good quality of weld bead. -
Page 52: Welding Process Parameters
Otherwise, satisfactory welding quality is hard to obtain. Welding process factors such as gas flow, shape and diameter of nozzle, distance between nozzle and workpiece, welding speed and weld joint form may affect the gas protective effect, so all these should be fully considered and chosen correctly. -
Page 53: General Requirements For Argon Arc Welding
different current types and polarities and different allowable current ranges for the tungsten electrode. Improper tungsten diameter will lead to unstable arc, serious burn and tungsten in weld bead. C. Select proper welding current after the tungsten diameter is determined. Overly high or overly low welding current will cause poor weld bead or welding defects. -
Page 54: Accessories Instructions
mode. It is required that there should be high voltage when igniting arc and there should be no high voltage after arc is successfully ignited. 4) Protection from interference: The high voltage for arc ignition in argon arc welding is accompanied with high frequency, which produces serious interference to the machine circuit. -
Page 55: Use Of Wire Control Welding Torch
resistance of Pin1 and Pin2 is 10 KΩ, the resistance of Pin2 and Pin3 is 0Ω. When the pedal is pressed to the end and the current is the maximum, the resistance of Pin1 and Pin2 is 0Ω, and the resistance of Pin2 and Pin3 is 10KΩ. -
Page 56: Water Tank Connector
6. When using digital adjustable welding torch, the adjustment parameter can be switched through the “Parameter selection ” button on the welding torch, and the parameters can be adjusted through the “Para+” and “Para-” button, the “Torch switch” of the welding torch controls the output mode. -
Page 57: Troubleshooting
connection. If there is oxidization, remove it with sandpaper and then reconnect. 2) Keep hands, hair and tools away from the moving parts such as the fan to avoid personal injury or machine damage. 3) Clean the dust periodically with dry and clean compressed air. If welding environment with heavy smoke and pollution, the machine should be cleaned daily. - Page 58 Easy to break arc Grid voltage is low Wait until the grid power is normal Other failures Please contact the service personnel of JASIC Argon arc welding troubleshooting Phenomena Causes User measures When the temperature is too low, let the machine...
-
Page 59: Alarms And Processing Methods
(2) Connect a power cord separately from the Severe interference from equipment with interference. Other electrical equipment Other failures Please contact the service personnel of JASIC 19.2 Alarms and Processing Methods Alarm Error Welder Category Causes... - Page 60 loss code, turn off the input isn’t accompanied main circuit; connected by alarm need to properly sound, restart Indicator light Display error Please turn off the machine and restart it. code, If the problem can’t be eliminated and accompanied Grid the grid voltage is still too low, ask an by alarm Temporarily...
- Page 61 Display error Reassemble thermistor Thermistor code, symmetrically as possible. Plug in the has large accompanied Permanently drive line properly if it isn’t Secondar temperature by alarm turn off the y inverter difference or sound, Err 7 main circuit; board drive line Indicator need to abnormal...
-
Page 62: List Of Parts Available For Repair
19.3 List of parts available for repair... - Page 63 Material Material name Material Material name code code 10041712 Trademark cover 10066434 Cover bracket 10066345 Aviation outlet 10068082 EMC board 10042337 Gas fitting (front panel) 10066937 Switch power board 10066398 Front support 10058227 Handle bar 10066723 Reactor 10064706 Power frequency transformer 10050722 Ø30 coil 10066731...
- Page 64 10065285 Rear fixing plate 10066511 Secondary side radiator 10060838 Plastic rear panel 10066512 Primary side radiator 10060835 Plastic handle seat 10065284 Rear support plate 10058239 Handle seat bracket 10066395 Secondary side connector...
-
Page 65: Appendix A Packaging, Transport And Storage
Appendix A Packaging, Transport and Storage A.1 Packaging Name Unit Qty. E202 User Manual Product certificate Warranty card Desiccant Ground wire clamp: 500A-32mm2-DKJ35-50(3M) Argon arc torch: WP-18(5M) split, vacant Tungsten needle: 2.4*150MM (non-red) lead-free Note: * indicates that not all products include this part A.2 Transport In the transport process, handle the equipment gently, avoid severe impact, and prevent moisture and rain. -
Page 66: Appendix B Revision History
Appendix B Revision History Description Version Date Initial release E202 SC-A0 2018.05.30 Add warning E202 SC-A1 2018.08.15...
Need help?
Do you have a question about the TIG315PACDC(E202) and is the answer not in the manual?
Questions and answers