Table of Contents
Advertisement
Quick Links
Installation instructions
Heat pump dryer
Multi-family building
The appliance should be installed by qualified personnel only. Each step must be carried out and checked in full in the order
specified.
Validity
These installation instructions apply to the model: 173
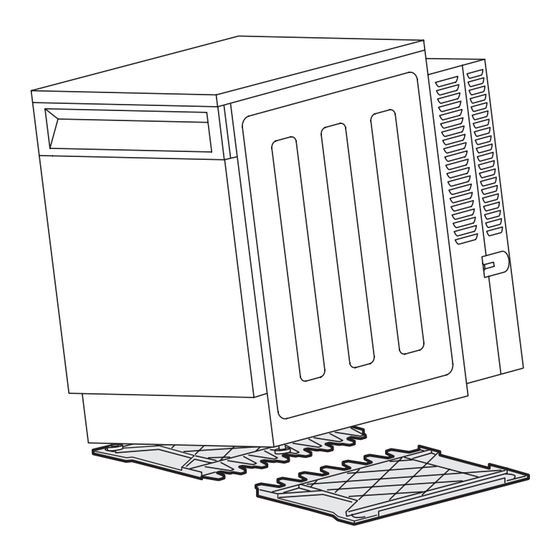
Transport
The appliance is only to be transported in the upright position! Transporting it in any other position will result in damage to the
appliance! When carried carefully, without being shaken, the appliance may be tilted to the left by a maximum of 90° (viewed
from the front).
The appliance must be allowed to stand in the standard operating position for about 2 hours before using the heat pump. Failure
to observe this can result in damage to the appliance.
upside down
Front
Front
Front,
Use a stairclimber
to avoid knocks!
1
J173.113-0
6.4.11 ITH
Back
Side
Advertisement
Table of Contents

Related Manuals for V-ZUG 173


Summary of Contents for V-ZUG 173
- Page 1 The appliance should be installed by qualified personnel only. Each step must be carried out and checked in full in the order specified. Validity These installation instructions apply to the model: 173 Transport The appliance is only to be transported in the upright position! Transporting it in any other position will result in damage to the appliance! When carried carefully, without being shaken, the appliance may be tilted to the left by a maximum of 90°...
- Page 2 Installation instructions J173.113-0 Heat pump dryer 6.4.11 ITH Multi-family building Identification plate Open the appliance door. ➤ – The identification plate is located on the top of the front panel. Installation accessories supplied The necessary installation accessories are located in the drum. Designation Article no.
- Page 3 Installation instructions J173.113-0 Heat pump dryer 6.4.11 ITH Multi-family building Installation Work steps 1–5 must be carried out in full in the order specified. 1. Positioning the installation plate Use the installation plate to install the appliance. This plate fixes the appliance in position. The minimum distances to walls and distances to adjacent appliances must be observed (see table).
- Page 4 Installation instructions J173.113-0 Heat pump dryer 6.4.11 ITH Multi-family building 2. Levelling 1. Roughly level the appliance using the rear adjustable feet. Set the adjustable feet using counter nuts. 2. To ensure smooth, fault-free operation, the appliance must be perfectly vertical. Use a spirit level to position the appliance. 3.
- Page 5 Installation instructions J173.113-0 Heat pump dryer 6.4.11 ITH Multi-family building 3. Connecting the condensate drain When installing the drain hose, protect it against damage and bending! To ensure proper drainage, do not extend the drain hose. Drain into fixed Connection to upright outflow pipe sink drain trap Set W5.3070...
- Page 6 Installation instructions J173.113-0 Heat pump dryer 6.4.11 ITH Multi-family building 4. Using for the first time When the appliance is connected to the power supply for the first time, it is possible to select a function test. The purpose of the function test is to check the installation and it lasts about 3 minutes.
Need help?
Do you have a question about the 173 and is the answer not in the manual?
Questions and answers