Table of Contents
Advertisement
Available languages
Available languages
Series:
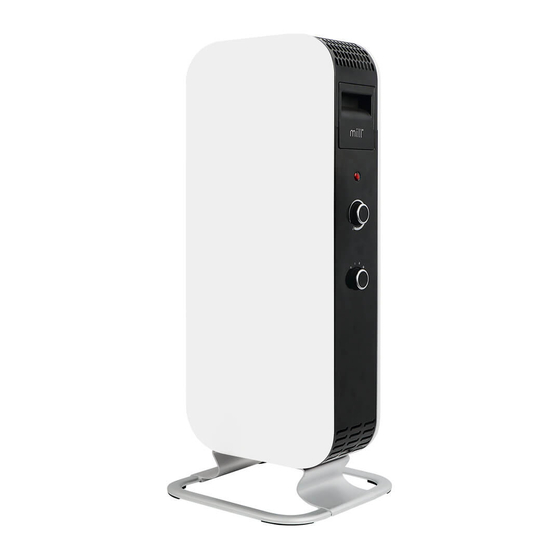
Oil Premium
This product is only suitable for well insulated spaces or occasional
EN
use.
Ta izdelek je primeren samo za dobro izolirane prostore
SLO
ali občasno uporabo.
IT
Questo prodotto è adatto solo per spazi ben isolati o uso occasionale
Please read the instructions carefully before use.
Take good care of this manual for later use.
Advertisement
Table of Contents

Related Manuals for MILL Oil Premium Series


Summary of Contents for MILL Oil Premium Series
- Page 1 Series: Oil Premium This product is only suitable for well insulated spaces or occasional use. Ta izdelek je primeren samo za dobro izolirane prostore ali občasno uporabo. Questo prodotto è adatto solo per spazi ben isolati o uso occasionale Please read the instructions carefully before use. Take good care of this manual for later use.
- Page 2 Prospering on our success in the Nordics we decided to promote Mill at some of the world’s largest electronic fairs and home shows in 2015 and 2016 - the feedback from retailers and distributors all over the world were amazing.
-
Page 3: Table Of Contents
millheat.com Content P. 2-3 Important safety information P. 4 P. 4 P. 4 First use P. 4 Description of heater P. 5 Parts P. 5 Assembly P. 5 Instructions mechanical thermostat P. 6 Usage mechanical thermostat P. 6 Instructions day/night thermostat P. -
Page 4: Important Safety Information
Important safety information You must obey common safety guidelines when using electrical products, especially in the presence of children. WARNING! To avoid electric shock or damage due to the heat, always make sure the plug is pulled out before the heater is moved or cleaned. - Page 5 millheat.com • The heater should not be installed in close proximity to • The heater must never be used in rooms where gasoline, paint or • Never touch an electric heater with wet hands. The heater should be installed so a person showering or taking a bath cannot come into direct contact with it.
-
Page 6: First Use
Power Mill Heat Model Thermostat Color Amperage Boost AB-H1000MEC Mechanical White 220-240V ~ , 50-60Hz 1000 AB-H1000DN Day/night White 220-240V ~ , 50-60Hz 1000 AB-H1500DN Day/night White 220-240V ~ , 50-60Hz 1500 AB-H2000DN Day/night White 220-240V ~ , 50-60Hz 2000... -
Page 7: Parts
millheat.com Parts 1. 2 rails for the feet 2. 2 foot brackets 3. 8 screws (pre-mounted) Assembly 1. Remove the pre-mounted screws on both legs before you insert them into the brackets, so that you get a stable foot. 2. Attach the legs to the brackets by tightening 2 screws into each bracket. 3. -
Page 8: | Usage Mechanical Thermostat
Usage mechanical thermostat Usage mechanical the 1. Set the output selector to the OFF position (0) and the thermostat to minimum. Plug the heater into a grounded outlet. 2. Set the output selector to position |, || or |||. Turn the thermostat up to the maximum position. -
Page 9: | Usage Day/Night Thermostat
millheat.com rmostat Usage day/night thermostat 1. Plug the heater into a grounded outlet. 2. Press OFF/ON button. 3. Choose the desired power |, || or |||, by pressing the output selector. Turn the thermostat to the desired temperature while looking at the display. As soon as the room temperature drops below this level, the heater will automatically start again. -
Page 10: How To Activate Daytime Setback
How to activate daytime setback 1. Tuesday 7.30 am you go to the heater and press on the heater’s control panel. 2. “d” will be visible in the display. Use the wheel to set what day it is today when you are programming the heater (1= Monday, 2 = Tuesday etc.) You are not programming the heater for the various days. -
Page 11: Change Setback Temperature - Daytime
millheat.com Change setback temperature – daytime Press and hold and press 3 times. Enter the desired temperature for daytime setback. Save by pressing or wait for Change setback temperature – nighttime Press and hold and press 3 times. Enter the desired temperature for nighttime setback. Save by pressing or wait Change number of hours –... -
Page 12: Temperature Calibration
To adjust this, all Mill heaters are equipped with a calibration function, which enables you to adjust the temperature registered by the heater. N.B! The room must have achieved a stable temperature before any calibration. -
Page 13: Maintenance
Local businesses (or the environmental station in your neighborhood) are required by law to accept and recycle such products, as a means of environmentally sound disposal. Mill International B.V. De Giesel 5 6081 PG Haelen... - Page 14 Vsebina S. 2-3 Pomembni varnostni podatki S. 4 Specifikacije S. 4 Pred prvo uporabo S. 4 Prva uporaba S. 4 Opis grelnika S. 5 Deli S. 5 Montaža S. 5 Navodila za mehanski termostat S. 6 Uporaba mehanskega termostata S. 6 Navodila za dnevni/nočni termostat S.
- Page 15 millheat.com Pomembni varnostni podatki Pri uporabi elektronskih aparatov je potrebno upoštevati splošne varnostne smernice, še posebej v prisotnosti otrok. OPOZORILO! Za preprečevanje električnega udara in škode zaradi vročine, je potrebno vedno izključiti vtič pred premikanjem ali čiščenjem grelnika. SKRBNO PREBERITE NAVODILA •...
- Page 16 • Grelnika ni dovoljeno namestiti v bližini vnetljivih materialov, saj obstaja nevarnost požara. • Grelnika ni dovoljeno uporabljati v prostorih, kjer se hranijo bencin, laki, barvila ali druge vnetljive snovi, npr. v garaži. • Nikoli se ne dotikajte električnega grelnika z mokrimi rokami. Namestite ga tako, da se ga ne more dotakniti osebe med tuširanjem ali v kadi.
- Page 17 Specifikacije Moč Mill Heat Model Termostat Barva Jakost toka Boost AB-H1000MEC Mehanski Beta 220-240V ~ , 50-60Hz 1000 AB-H1000DN Dan/noč Beta 220-240V ~ , 50-60Hz 1000 AB-H1500DN Dan/noč Beta 220-240V ~ , 50-60Hz 1500 AB-H2000DN Dan/noč Beta 220-240V ~ , 50-60Hz...
- Page 18 Deli Deler Glej sliko 2 na posebnem listu z diagramom 1. 2 tirnici za nožice 2. 2 nosilca nožic 3. 8 vijakov (prednameščenih) Montaža Montering Glej sliko 3 na posebnem listu z diagramom 1. Odstranite prednameščene vijake z obeh nožic, preden le-te vstavite v nosilce, da dobite stabilno oporo.
- Page 19 millheat.com Uporaba mehanskega termostata 1. Izhodni izbirnik premaknite v izklopljeni položaj (0), termostat pa na minimum. Priključite grelnik v ozemljeno vtičnico. 2. Izhodni izbirnik premaknite v položaj |, || ali |||. Premaknite termostat na maksimum. Ko je dosežena želena sobna temperatura, počasi premaknite termostat navzdol, dokler ne zaslišite klika.
- Page 20 Uporaba dnevnega/nocnega termostata Glej sliko 6 na posebnem listu z diagramom 1. Vtaknite vtič v ozemljeno vtičnico. 2. Pritisnite gumb za vklop/izklop. 3. Izhodni izbirnik premaknite v položaj |, || ali |||, za izbiranje želene moči. Zavrtite termostat do želene temperature ter opazujte zaslonski prikaz. Takoj, ko sobna temperatura pade pod to raven, se bo grelnik samodejno ponovno vključil.
- Page 21 millheat.com Kako aktivirati dnevni zamik Glej sliko 8 na posebnem listu z diagramom 1. V torek ob 7.30 pritisnete na nadzorni plošči 2. Na zaslonskem prikazu se pojavi »d«. Uporabite kolo za nastavitev trenutnega dneva, ko nastavljate grelnik (1= ponedeljek, 2 = torek, itd.) Grelnika ne nastavljate za različne dni.
- Page 22 Spreminjanje temperature zamika – podnevi Glej sliko 10 na posebnem listu z diagramom Držite gumb ter pritisnite trikrat gumb Vnesite želeno temperaturo za dnevni zamik. Shranite z gumbom ali počakajte 15 sekund za samodejno potrditev. Spreminjanje temperature zamika – ponoči Glej sliko 11 na posebnem listu z diagramom Držite gumb ter pritisnite trikrat gumb...
- Page 23 Vendar pa je temperaturni senzor nameščen na sam proizvod, zato lahko pride do odstopanj v temperaturi. Za odpravo tega so vsi grelniki Mill opremljeni s funkcijo umerjanja, ki vam omogoča nastavitev temperature, ki jo zaznava grelnik.
- Page 24 To je pomembno za preprečevanje nevarnosti za zdravje in onesnaževanja okolja. Lokalna podjetja (ali okoljska središča v vaši soseščini) morajo po zakonu sprejeti in reciklirati takšne proizvode, kot okolju prijazno odlaganje odpadkov. Mill International B.V. De Giesel 5 6081 PG Haelen The Netherlands Tlf: +47 22 13 32 00 www.millheat.com...
- Page 25 millheat.com Indice S. 2-3 Informazioni importanti sulla sicurezza S. 4 S. 4 Prima del primo utilizzo S. 4 Primo utilizzo S. 4 Descrizione del riscaldatore S. 5 Parti S. 5 montaggio S. 5 Istruzioni termostato meccanico S. 6 Utilizzo del termostato meccanico S.
- Page 26 Informazioni importanti sulla Sicurezza È necessario rispettare le linee guida di sicurezza generali quando si utilizzano prodotti elettrici, soprattutto in presenza di bambini. ATTENZIONE! PER EVITARE SCOSSE ELETTRICHE O DANNI DOVU- TI AL CALORE, ASSICURARSI SEMPRE CHE LA SPINA SIA ESTRATTA PRIMA CHE IL RISCALDATORE VENGA SPOSTATO O PULITO.
- Page 27 millheat.com • z i l i • Non toccare mai un riscaldatore elettrico con le mani bagnate. Il riscaldatore dovrebbe essere installato in modo che una persona che fa la doccia o il bagno non possa entrarne in contatto diretto. •...
- Page 28 Tipo di Energia Mill Heat Modello Termostato Colore Amperaggio Boost Meccanico AB-H1000MEC Bianco 220-240V ~ , 50-60Hz 1000 Elettronico AB-H1000DN Bianco 220-240V ~ , 50-60Hz 1000 Elettronico AB-H1500DN Bianco 220-240V ~ , 50-60Hz 1500 Elettronico AB-H2000DN Bianco 220-240V ~ , 50-60Hz...
- Page 29 millheat.com Parti • 2 binari per i piedi • 8 viti (premontate) Montaggio modo da ottenere stabilità. 3. Rimuovere le viti premontate dal fondo del riscaldatore e capovolgere il riscaldare delicatamente per montare i piedi. 5. NON UTILIZZARE MAI IL RISCALDATORE PRIMA CHE LE GAMBE SIANO STATE FISSATE. Istruzioni termostato meccanico Vedere la tabella a pagina 4 per i modelli con termostato meccanico Pannello di controllo...
- Page 30 Usage mechanical th Utilizzo del termostato meccanico 1. Impostare il selettore di uscita sulla posizione OFF (0) e il termostato sul minimo. Collegare il riscaldatore a una presa con messa a terra. alla massima posizione. Quando è stata raggiunta la temperatura ambiente diversa nell’...
- Page 31 millheat.com ermostat Utilizzo del termostato day/night 1. Collegare il riscaldatore a una presa di corrente con messa a terra. 2. Premere il pulsante OFF / ON. 3. Scegli la potenza desiderata |, || o |||, premendo il selettore di uscita. Seleziona la temperatura desiderata dal display.
- Page 32 Come attivare setback diurno 1. Martedì 7.30 am si attiva il riscaldamento e premere sul pannello di controllo del riscaldatore. 2. “d” sarà visibile sul display. Usare la ruota per impostare il giorno in cui si sta program- mando il riscaldatore (1 = lunedì, 2 = martedì ecc.) In questo momento non si sta programmando il riscaldatore per i vari giorni.
- Page 33 millheat.com Cambiare la temperatura di setback diurna Premere e tenere premuto poi premere 3 volte. Immettere la temperatura desiderata per Setback diurno . Salvare premendo o attendere 15 secondi per la conferma automatica. Cambiare la temperatura di setback notturna Premere e tenere premuto poi premere 3 volte.
- Page 34 Cancellare il programma del periodo di setback Premere e tenere premuto poi premere (dipende da quale setback volete cancellare) per 3 secondi. Temperature calibration Calibrazione della temperatura dotati di una funzione di calibrazione , che consente di regolare la temperatura registrata dal riscaldatore.
- Page 35 Questo è fatto per evitare rischi per la salute e prevenire danni all’ambiente. Le imprese locali (o la stazione ambientale del tuo quartiere) sono obbligate per legge ad accettare e Mill International B.V. De Giesel 5 6081 PG Haelen...
- Page 36 Mill International B.V. De Giesel 5 6081 PG Haelen The Netherlands Tel: +47 22 13 32 00 www.millheat.com post@millheat.com...
Need help?
Do you have a question about the Oil Premium Series and is the answer not in the manual?
Questions and answers