Table of Contents
Advertisement
Advertisement
Table of Contents

Related Manuals for Unitech HT650


Summary of Contents for Unitech HT650
- Page 1 HT650 Rugged Handheld Terminal - HT650 - User’s Manual 400992G Version 0.1...
-
Page 3: Preface
Preface About This Manual This manual explains how to install, operate and maintain the HT650 Rugged Enterprise Terminal. No part of this publication may be reproduced or used in any form, or by any electrical or mechanical means, without permission in writing from the manufacturer. This includes electronic or mechanical means, such as photocopying, recording, or information storage and retrieval systems. -
Page 4: Fcc Label Statement
–Reorient or relocate the receiving antenna. –Increase the separation between the equipment and receiver. –Connect the equipment into an outlet on a circuit different from that to which the receiver is connected. –Consult the dealer or an experienced radio/TV technician for help. This Transmitter must not be co-located or operating in conjunction with any other antenna or transmitter. -
Page 5: European Conformity Statement
Laser Information The Unitech HT650 series is certified in the U.S. to conform to the requirements of DHHS/CDRH 21CFR Subchapter J and to the requirements of IEC 825-1. Class II and Class 2 products are not considered to be hazardous. The HT650 series contains internally a Visible Laser Diode (VLD) whose emissions do not exceed the maximum limits as set forth in the above regulations. -
Page 6: Battery Notices
If the main battery is removed, the backup battery ensures the data on SDRAM is safe for up to 0.5 hour. To prevent data loss, do not leave the HT650 uncharged with the main battery removed for an extended period. See First Time to Charge the Main Battery &... -
Page 7: Battery Charge Notice
60°C, however they may deplete more rapidly at the higher temperature ranges. It is recommended to store batteries within normal room temperature ranges. Warranty The following items covered under Unitech Limited Warranty are free from defects during normal use: HT650 – 1-year limited warranty. -
Page 8: Table Of Contents
Storage and safety notice .................... v Warranty..........................v Chapter 1 Getting Started ...........................1 Introducing the HT650......................1 Notice..........................1 Warranty ........................2 HT650 Model Specification ....................3 HT650 Accessories ......................5 Communication and Charging Cradle ................5 Communication and Charging Cable Kits ..............5... - Page 9 HT650 Rear View........................ 6 First Step with HT650......................7 Install the Battery Pack ....................... 8 Supply Power to the HT650 ....................9 Charging the battery pack with Power Adapter ............9 Charging the battery pack with Single Dock..............9 First Time to Charge the Main Battery & Backup Battery ..........10 Protective Screen Film ......................
- Page 10 Chapter 3 Power system...........................19 Charging the Lithium-Ion Battery Pack................19 Charging the Main and Backup Battery for the First Time..........19 Environment Consideration for Charging ..............19 Power Status Indication .....................20 “Backup Battery Low” Icon ..................20 Charging the Lithium-Ion Battery Pack................20 Storage and Safety Precautions..................
- Page 11 Bluetooth Setup ......................30 Bluetooth ActiveSync ....................31 WiFi Connection........................ 32 Using the Summit Utility .................... 32 Admin Login ......................32 Scan Available AP ..................... 33 Commit and Activate....................34 Bluetooth Connection....................38 Chapter 5 Useful Utilities ..........................41 Introduction ........................41 Barcode Setting ......................41 Scan2Key........................44 Registry Backup/Restore ...................44 UniPing ........................44...
-
Page 13: Getting Started
This unit is equipped with a battery pack and backup battery. It is possible that the Unitech HT650 may not be powered ON due to battery discharge as a result of storage. In the above situation and the first-time use, plug the HT650 to the charging cable or charging cradle (with 5V/3A AC-DC adapter), and charge the unused unit for over 4 hours in order to fully charge its backup battery as well. -
Page 14: Warranty
Warranty Unitech's Limited Warranty provides for different warranty periods for different parts and accessories: Terminal is covered by 1-year limit warranty. Docking Station is covered by 1-year limit warranty. Cable is covered by 1-year limit warranty. Battery is covered by 6-month warranty. -
Page 15: Ht650 Model Specification
HT650 Model Specification Operation System Marvell PXA270 312 MHz 64MB SDRAM Memory 64MB Flash ROM + 2GB Flash Storage Operation System Microsoft Windows CE 5.0 Core Version Display Trans-missive 2.4” TFT 240 x 320 Color QVGA LCD with high brightness LED touch panel... - Page 16 Drop test to Concrete 1.2 meter Environmental Sealing IP54 Software Microsoft Visual Studio 2005 / 2008 Unitech Handheld terminal SDK Accessories Single Slot USB Cradle 1100mAH standard Battery 1830mAH Extension Battery USB communication and charging cable Power adaptor with universal plugs...
-
Page 17: Ht650 Accessories
Communication and Charging Cable Kits An included USB cable or an optional serial cable connects the HT650 terminal directly to a peripheral device for communication and a power source for charging. Universal Adaptor This power supplier adaptor plugs the terminal directly into a switch to power the terminal and charge the battery pack. -
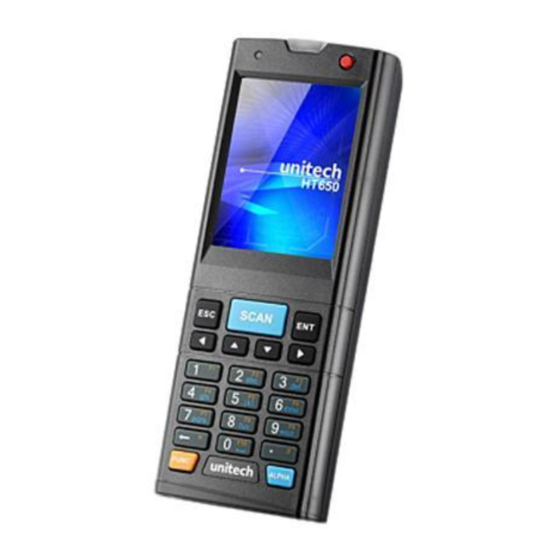
Page 18: Ht650 Front View
HT650 Front View HT650 Rear View... -
Page 19: First Step With Ht650
The Alpha key toggles Alpha mode on and off and Caps mode on and off. One press of the Alpha key causes the keys to input alpha characters. First Step with HT650 Before first using the HT650, please ensure the battery is fully charged. There are three ways to charge your HT650: Docking Station... -
Page 20: Install The Battery Pack
Install the Battery Pack 1. Turn the switch cover latch and lift the battery cover away from the Handy Terminal. 2. Insert the battery pack into the battery compartment with the label facing out, and ensuring the battery snaps into place. 3. -
Page 21: Supply Power To The Ht650
Supply Power to the HT650 Charging the battery pack with Power Adapter 1. Plug in the DC-IN Converter to the Handy Terminal bottom connector. 2. Connect the Power cord to the Power adapter. 3. Plug in the connector of the power adapter with DC-IN Converter. -
Page 22: First Time To Charge The Main Battery & Backup Battery
Thus, fully charge the backup battery within 2 hours. Protective Screen Film To protect screen, the HT650 has been provided with a protective plastic film. You may remove it (if required). The screen will be more susceptible to scratching without the film, but will be... -
Page 23: Starting The Ht650
Starting the HT650 Pressing the Power ON/OFF Key Press the Power/Backlight key briefly. The Unitech HT650 welcome screen appears. The Windows CE screen will appear shortly thereafter. If the Handy Terminal does not power on, please perform the cold boot. -
Page 24: Navigating The Display
To adjust the original default setting of the screen brightness, the backlight setting will be required. Setting Time Zone/ Date Before using the HT650 please take a few minutes to set the time and date so that data can be properly time-stamped. -
Page 25: The Task Bar
The Task Bar The Task bar at the bottom of the screen displays the icon, an icon for the active program, the current time, and system icons for utilities loaded in memory. The Task bar includes menu names, buttons, and the keyboard icon, which opens and closes the soft input panel (SIP). The Task bar allows you to select and close programs. -
Page 26: Setting Date/Time
Setting Date/Time Tap the Left or Right arrows to scroll the year and month you desire. Or, directly tap location of year or month to change the year or month setting. To set up time, tap on the Hr/Min/Sec AM/PM to input the Hr/Min/Sec Control Panel From the Desktop, double click the “My Device”... -
Page 27: Using The Keypad And Scanner
Chapter 2 Using the Keypad and Scanner HT650 HotKey The HT650 provides hotkeys for frequently used functions. Press the Function key and the appropriate numeric key for the following functions listed below: Func 6 = Task Manager Func 7 = Scanner Setting... -
Page 28: Other Character Support From Wince Keyboard
[áü] key on the touch screen keyboard to display the available characters. Bar Code Scanner The HT650 has an integrated 1D laser bar code scanner (depending on model number) capable of reading all major bar code labels. To use the scanning function, complete the following steps: 1. - Page 29 5. Bad Scanning Position a) Make sure that the bars enter the laser beam when scanning large barcodes. b) Scanning operations may fail if the laser beam position as below. Note: This product scans using laser light. Do NOT look directly into the laser light or shine the laser light into the eyes.
-
Page 31: Power System
Charging the Main and Backup Battery for the First Time When first charging the HT650, please allow at least 16 hours to fully charge both the main and backup batteries. Data loss can occur if the backup battery is not adequately charged. -
Page 32: Power Status Indication
Automatic shutdown of the HT650 The HT650 will enter idle mode when there is no task, or all tasks are waiting for input. In default setting, the HT650 will automatically turn itself off if it remains idle for 3 minutes and when there is no external charging power applied. -
Page 33: Storage And Safety Precautions
Warm Boot / Cold Boot Warm Boot Warm Boot is a reset to re-boot the HT650 without losing saved data. Perform a warm boot when: The terminal fails to respond. After installing some software applications... -
Page 34: Warm Boot Via Software
Warm Boot via Software Tap Start → Programs → Utilities → BootMode. Tap “Warm Boot”. The system will be warm started. Note: After Warm Boot: The desktop appears with the application shortcuts on the screen. The custom settings in the registry are persistent. The wireless will reconnects to the network system. -
Page 35: Cold Boot Via Software
Cold Boot via Software Tap Start → Programs → Utilities → BootMode. Tap “Cold Boot”. The system is reset and you will lose all data including all files in the RAM memory. You will need to recalibrate the screen and reset the date and time. -
Page 37: Data Communication
Connection Serial or USB Cable Plug the USB end of the HT650 communication cable into your PC's USB port, and the other end into the HT650's communication port. To simultaneously charge the HT650, plug the AC power adaptor into the power receptacle on the USB plug.Docking Station. -
Page 38: Using Activesync
Because you will be restarting your computer during installation, save your work and quit all programs before you begin. To set up your communication settings, the HT650 serial cable is required to connect the HT650 to your host computer. If you run the Windows NT® operating system with a service pack, you will be informed during setup that you may need to reinstall the service pack. -
Page 39: Installing Microsoft Activesync
Installing Microsoft ActiveSync Follow the installation procedure below to install Microsoft ActiveSync, connect your HT650 to your desktop computer, and establish a partnership for synchronization, if required. Download the executable program “msasync. exe” from the Microsoft web site at: http://www.microsoft.com/mobile/pocketpc/ downloads/activesync35.asp. - Page 40 PC. When ActiveSync displays the following screen, assign each terminal its own unique name. Click the Next button and follow the instructions to set up a partnership between the HT650 and your desktop computer. This partnership allows you to synchronize information between the two computers.
-
Page 41: Using The Mobile Devices Window
Microsoft ActiveSync uses the specified communication ports to connect to the HT650. Make sure these resources are available for Microsoft ActiveSync to connect to the HT650. Other programs cannot use them while the HT650 and your desktop computer are connected. -
Page 42: Wireless Communication
Change Connection… button. For more information see Microsoft ActiveSync Help. Wireless Communication Your HT650 is equipped with built-in Bluetooth for wireless communication. Bluetooth Setup Tap Start → Programs → Bluetooth → BTPowerON. Select Bluetooth Module Power On and tap... -
Page 43: Bluetooth Activesync
Choose Inquiry. The inquiry process might take a few seconds. Then select the device to synchronize and tap OK. Tap the Bluetooth icon on the task bar again. Click Sync. The message “Connecting to Bluetooth” will appear on your HT650. -
Page 44: Wifi Connection
HT650 when prompted. When prompted by your HT650, enter the same PIN code that you’d entered on your PC. Once it is successfully entered, your synchronization is complete. WiFi Connection Unitech terminals come with built-in RF facility. -
Page 45: Scan Available Ap
Enter the Admin Password. (Default pass-word: SUMMIT Scan Available AP Under Profile tab, tap Scan for available You may select a desired AP to create a new profile. Tap Configure. -
Page 46: Commit And Activate
Tap Yes to create the new profile. Enter the WEP key or network key. Tap OK. Commit and Activate Tap Commit to activate the setting. - Page 47 Under Main tab, select the profile you want to activate. A pop-up window appears “A Power Cycle is required to make settings activate properly.” Tap OK, and then tap OK to exit the Summit Client Utility. Tap Start → Programs → Utilities → Boot-Mode. Tap Warm Boot to warm start the terminal and load the previous settings.
- Page 48 Using the Microsoft Wireless Networking Tool Alternatively, you may use the built-in Microsoft wireless networking tool to connect to an access point. Tap Start → Programs → Summit → scu. The Summit Client Utility window appears. Select Third Party Config from the drop down menu of Active Profile.
- Page 49 Tap Start → Programs → Utilities → Boot-Mode. Tap Warm Boot to warm start the terminal and load the previous settings. Tap the wireless network icon as a shortcut on the desktop. Tap Add New or double tap a preferred network.
-
Page 50: Bluetooth Connection
Enter a Network Name (SSID) and a Network Key. For the detailed instruction on wireless network encryption setting, please visit Microsoft website. The network icon appears on the taskbar when the RF is connected. Bluetooth Connection Your device is provided with Bluetooth wireless technology that you can use to synchronize information with a computer equipped with a Bluetooth adapter or access point. - Page 51 Check Bluetooth Module Power ON, and tap OK.
-
Page 53: Useful Utilities
Chapter 5 Useful Utilities Introduction Unitech has been developing some of useful utilities for user’s application. The followings are Unitech Utilities introduction. Barcode Setting Double click the “BC Settings” icon from control panel to open the barcode setting. The system administrator can enable /disable the barcode type from the “barcode”... - Page 54 Tap the “Data Options” page, you can set another option for all barcode type. Tap the “Barcode ID” page, you can set display barcode Id for all barcode type. Code ID Description Symbol Code ID define: Symbol Code A: UPC-A, UPC-E, UPC-E1, EAN-8 , EAN-13 ID character B: Code39 , Code32 C: Codabar...
- Page 55 Barcode Symbologies Transmit Leading Enable/ Barcode Char Check / Check Digit Others Symbology Disable Digit verification Char/digit Transmit Bookland Codabar Transmit Start/Stop bits, CLSI format, *data length Code 11 * check digits, *data length Code 128 *data length Code 32 Transmit Tailing digit Code 39...
-
Page 56: Scan2Key
Registry Backup. Registry Restore allows the user to restore the HT650s registry to a previously saved version. \Start\Program\Utilities\Registry Backup UniPing This Unitech program enables the user to ping their IP to determine the status of the connection. -
Page 57: Appendix
Appendix Worldwide Support Unitech’s professional support team is available to quickly answer questions or technical-related issues. Should an equipment problem occur, please contact the nearest Unitech regional service representative. For complete contact information please visit the Web sites listed below:...
Need help?
Do you have a question about the HT650 and is the answer not in the manual?
Questions and answers