
Subscribe to Our Youtube Channel
Related Manuals for Clarke DIGICAR 600


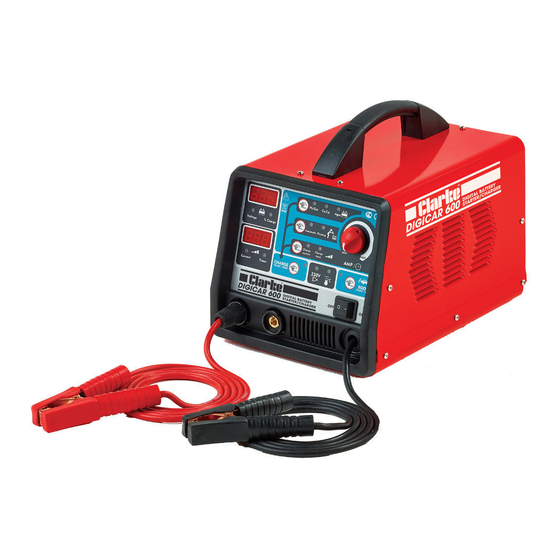
Summary of Contents for Clarke DIGICAR 600
- Page 1 BATTERY BOOSTER/CHARGER MODEL NO: DIGICAR 600 PART NO: 6261200 OPERATION & MAINTENANCE INSTRUCTIONS LS0815...
-
Page 2: Environmental Recycling Policy
INTRODUCTION Thank you for purchasing this CLARKE Battery booster / charger which is suitable for charging and boosting 12 + 24 Volt batteries. Please read this manual thoroughly, before attempting to operate, and carefully follow all instructions given. It is vitally important that ALL precautions are taken, as specified, which will not only provide protection for yourself and that of others around you, but will also ensure that the Battery Charger will give you long and satisfactory service. -
Page 3: Safety Precautions
SAFETY PRECAUTIONS WARNING: BECAUSE HIGHLY FLAMMABLE HYDROGEN GAS IS RELEASED IN THE PROCESS OF BATTERY CHARGING, ALWAYS REMEMBER TO SWITCH OFF FIRST TO AVOID SPARKING, WHICH CAN OCCUR WHEN CONNECTING OR DISCONNECTING LIVE LEADS. WARNING: CERTAIN TYPES OF SEALED OR MAINTENANCE-FREE BATTERIES NEED EXTRA CARE WHEN CHARGING. -
Page 4: Electrical Connections
ELECTRICAL CONNECTIONS WARNING: READ THESE ELECTRICAL SAFETY INSTRUCTIONS THOROUGHLY. Connect the three core mains lead to a suitable industrial supply isolator, or heavy duty plug. These chargers must be connected to a supply having a rated capacity of greater than 13 Amps. WARNING: A 13 AMP (BS1363) PLUG IS NOT SUITABLE. - Page 5 ASSEMBLY FITTING THE HANDLE 1. Place the handle into position as shown. 2. Secure using the two screws provided. 3. Fix the screw caps in the screw holes. NOTES ON CHARGING PROCEDURE WARNING: NEVER ATTEMPT TO RE-CHARGE NON-RECHARGEABLE BATTERIES. LOCATION •...
- Page 6 CHARGING MORE THAN ONE BATTERY AT THE SAME TIME WARNING: DO NOT CHARGE BATTERIES WITH DIFFERENT CAPACITIES OR DIFFERENT TYPES OF BATTERIES AT THE SAME TIME. If it is necessary to charge more than one battery at the same time, they can be connected in series or in parallel.
- Page 7 OVERVIEW ON/OFF Switch Green LED Lights up when the battery charger is connected to the mains supply Yellow LED Lights up when the “Over- temperature” protection activates Battery Type Selector Pb/Gel, Ca/Ca or AGM Charge Process Selector Automatic or Floating Charge Current / Charge Time selector Charge Current / Time Adjustment knob Charge Start / Stop button...
-
Page 8: Battery Charging
BATTERY CHARGING NOTE: The charging process only activates if the battery connected has a minimum voltage of 7.5V for 12V batteries or 18V for 24V batteries. If the voltages are lower then this, or if you want to charge a fully discharged battery or, See “FORCED CHARGING”... - Page 9 FLOATING: • This mode will perform a full charge (at the set current) until the set time has elapsed. • The charging current will decrease to a lower fixed current. A buzzer will signal the transition from full charge to floating charge. SELECT THE CHARGE CURRENT 5.
- Page 10 11. Connect the clamp on the black cable to the negative terminal of the battery. • If all connections are correct, the top display will show the battery voltage and the charge status of the battery (expressed in %. 99% means that the battery is full).
- Page 11 FORCED CHARGING Use forced charging if the battery voltage is below 7.5V for 12V batteries or 18V for 24V batteries. WARNING: WHEN YOU FOLLOW THE PROCEDURE BELOW, CERTAIN SAFETY CHECKS ARE DISABLED (CHECK FOR SHORT-CIRCUITED BATTERY AND CORRECT CONNECTION). PAY EXTRA ATTENTION TO THE POLARITY OF THE CONNECTIONS AND THE BATTERY VOLTAGE.
- Page 12 OPERATION AS BOOST STARTER This battery charger is equipped with a boosting system that will let you start your vehicle without damaging the electronics on board your vehicle. WARNING: BOOST STARTS MUST BE PERFORMED WHEN THE BATTERY IS STILL MOUNTED ON THE VEHICLE. IT IS SUGGESTED TO PERFORM A NORMAL CHARGE AT THE MAXIMUM CURRENT FOR 10/15 MINUTES BEFORE YOU TRY TO BOOST YOUR VEHICLE.
- Page 13 7. Push the boost start/stop button (9) and then try to start the vehicle. • The battery charger will start to supply energy to the battery. • If the boost is not successful, wait a few minutes and try again. •...
-
Page 14: Specifications
SPECIFICATIONS Input Voltage 230V @ 50-60Hz Input Power 800W Output Voltages (Battery Voltages) 12V, 24V Max charging current Charging current according to EN norms Max boosting current 500A Boost Start with 1V/cell 350A (12V) , 310A (24V) Max battery size to be charged in 15 hours 375Ah Product Dimensions 345 x 250 x 280 mm... -
Page 15: Wiring Diagram
WIRING DIAGRAM Parts & Service: 020 8988 7400 / E-mail: Parts@clarkeinternational.com or Service@clarkeinternational.com... -
Page 16: Parts Diagram
PARTS DIAGRAM Parts & Service: 020 8988 7400 / E-mail: Parts@clarkeinternational.com or Service@clarkeinternational.com... - Page 17 PARTS LIST No DESCRIPTION PART NUMBER FRONTAL-CONTROL PC BOARD EM22700019 THERMOSTAT EM22210014 PLASTIC HANDLE EM21600030 UPPER PANEL EM33705380 3020 THERMOSTAT VEBE EM04600276 CABLE CLAMP FOR CABLE EM04600233 INPUT CABLE EM20220016 FRONT FRAME EM21690326 FRONT PANEL EM33710437 9005 POLYCARBONATE PLATE EM77650281 RED KNOB EM04600332 DOUBLE POLE SWITCH...
- Page 18 Parts & Service: 020 8988 7400 / E-mail: Parts@clarkeinternational.com or Service@clarkeinternational.com...
- Page 19 Parts & Service: 020 8988 7400 / E-mail: Parts@clarkeinternational.com or Service@clarkeinternational.com...
Need help?
Do you have a question about the DIGICAR 600 and is the answer not in the manual?
Questions and answers