Table of Contents
Advertisement
Advertisement
Table of Contents

Related Manuals for ADEEPT RaspTank


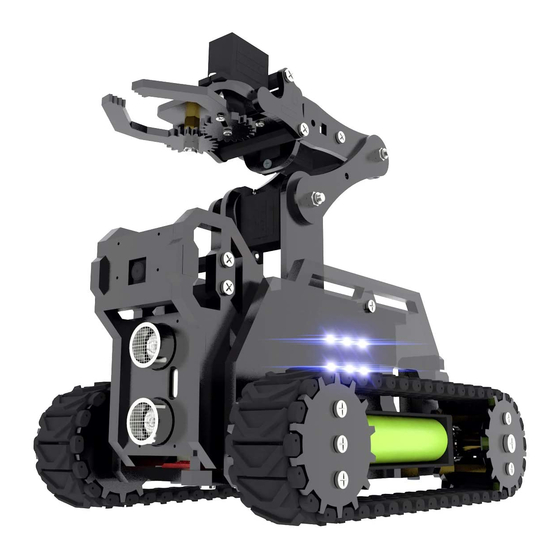
Summary of Contents for ADEEPT RaspTank
- Page 1 www.adeept.com...
- Page 2 Please place and put the product gently. Do not smash or shock it. About Adeept is a technical service team of open source software and hardware. Dedicated to applying the Internet and the latest industrial technology in open source area, we strive to provide the best hardware support and software service for general makers and electronic enthusiasts around the world.
- Page 3 This user manual and code can be used for learning, DIY, refitting, etc., except for commercial purpose. The Adeept Company owns all rights of contents in the manual, including but not limited to texts, images, data, etc. Any distribution or printing should be implemented with the...
-
Page 4: Table Of Contents
2.2. Servo debugging........................9 2.3. Rocker arm assembly......................16 2.4. Body part assembly......................28 2.5. Track assembly........................49 3. Software & Hardware........................53 3.1. Software Installation......................53 3.2. Download Program......................58 3.3. Install Python3.7 in the PC....................59 3.4. Run the RaspTank....................... 61 4.Afterword............................64... -
Page 5: Components List
1.Components List 1.1.Acrylic Plates 1pcs 1pcs 1pcs 1pcs 1pcs 1pcs 2pcs 1pcs 1pcs 1pcs 1pcs 6pcs 1pcs 2pcs 4pcs 1pcs 1pcs... - Page 6 1pcs 1pcs 1pcs 3pcs 1pcs 2pcs 1pcs 1pcs 1pcs 1pcs 1pcs The acrylic plates are fragile, so please be careful when assembling them in case of breaking. The acrylic plate is covered with a layer of protective film. You need to remove it first.
-
Page 7: Machinery Parts
1.2.Machinery Parts M2.5 M2*10 Lock Screw www.adeept.com www.adeept.com www.adeept.com www.adeept.com www.adeept.com M2.5*4 M2.5*8 M3*8 M3*12 M3*18 Screw Screw Screw Screw Screw www.adeept.com www.adeept.com www.adeept.com www.adeept.com www.adeept.com M3*30 M4*6 M3*10 M1.4*6 M2.5*4+6 Screw Screw Countersunk Self-tapping Copper Head Screw Standoff Screw www.adeept.com... -
Page 8: Transmission Parts
1.3.Transmission Parts Servo x5 GA12-N20 Gear Motor x2 Motor Seat Set x2 M2*10 Screw-B N20 Motor Seat M2 Nut-B S12D3 Coupling Set x2 M4*4 Locking Screw x2 S12D3 Coupling Track x2 1.4.Electronic Parts Adeept Motor HAT X1 Raspberry Pi Camera X1... - Page 9 Adeept Ultrasonic Module X1 18650 Battery Holder Set X1 Car Light X4 3 Tracking Module X1 Raspberry P1 Camera Ribbon X1 3-Pin Wire -A X3 3-Pin Wire -B X1 4-Pin Wire X1 5-Pin Wire X1 Servo Extension Cable X1...
-
Page 10: Tools
1.5.Tools Cross Screwdriver X1 Hex Wrench-2.0mm X1 Cross Socket Wrench X1 Large Cross-head Screwdriver X1 Winding Pipe X1 Ribbon X1 1.6.Self-prepared Parts 18650 Battery X2 Raspberry Pi X1 18650 battery specification: It is recommended to use lithium battery above 3000mAh and without overcurrent protection. -
Page 11: Assembly
Assemble the following components Raspberry Pi Camera x1 Raspberry Pi Camera Ribbon x1 Effect diagram after assembling 2.Connect the Adeept Ultrasonic Module with 4-Pin wire. Assemble the following components Adeept Ultrasonic Module x1 4-Pin wire x1 Effect diagram after assembling... - Page 12 The connection diagrams of the remaining modules and wires are as follows: 3 Tracking Module+5-Pin wire 1 set The two plugs of 3-Pin Wire-A are small plugs, 3-Pin Wire-B has a small plug at one end and a large plug at the other end. To prevent confusion between the following two components when reading the manual, we define the following two components as Car Light-A and Car Light-B.
-
Page 13: Servo Debugging
2.2. Servo debugging. 1. Fix four M2.5x4+6 Copper Standoffs on Raspberry Pi. Assemble the following components M2.5x4+6 Copper Standoff x4 Raspberry Pi x1 M2.5x4 Screw x4 Effect diagram after assembling... - Page 14 2. Fix A06 to Raspberry Pi. Assemble the following components For continence to read, the acrylic sheets in the document are available in a variety of colors. The color of them is subject to actual conditions, and their number is differentiated by shape.
- Page 15 3. Insert the Adeept Motor HAT into Raspberry Pi. Assemble the following components Adeept Motor HAT Effect diagram after assembling...
- Page 16 4. Connect the 18650 Battery Holder Set to the Adeept Motor HAT. 示意图 Note that the switch is "OFF".
- Page 17 5. Put two 18650 batteries in 18650 Battery Holder Set according to the following method. Take out 1 ribbons and 1 batteries. Roll one end of the ribbon to let through a battery and fix. Insert the batteries into the rings - ribbon closer to the anode.
- Page 18 6. Connect five servos to Adeept Motor HAT. The color of the servo wire corresponds to the color of the port. Only the servo terminals are shown here. Connect the 5 servos to port 11, 12, 13, 14, 15...
- Page 19 7. Turn on the power and debug the servo. Before switching on, you need to insert the configured SD card into the Raspberry Pi. For details, please refer to the third chapter of the document. That in the next operation, the Pi Camera of the Raspberry Pi should always be connected to the Raspberry Pi, and do not reverse the wires of the Raspberry Pi.
-
Page 20: Rocker Arm Assembly
2.3. Rocker arm assembly. 1. Take two rocker arms as in the illustration and connect them to A18. Effect diagram after assembling Assemble the following components A18 x1 Rocker arm x2 At this time, the rocker arm hasn’t been fixed. - Page 21 3. Then fix one end of A18 to the servo on A17. First install the rocker arm on the A18 into the servo. When installing, the mounting hole of the rocker arm should be aligned with the round hole on the A18. Install it at the angle shown below.
- Page 22 5. Then fix the other end of the A18 to the servo on the A20. First install the rocker arm on the A18 into the servo. When installing, the mounting hole of the rocker arm should be aligned with the round hole on the A18. Install it at the angle shown below.
- Page 23 6. Then fix A17 to A02. Assemble the following components A02 x1 M3 Nut x1 M3*12 Screw x1 Effect diagram after assembling...
- Page 24 7. Connect A16 with A19 and A21. Assemble the following components M3 Lock Nut x2 A19 x1 A21 x1 A16 x1 M3*12 Screw x2 Do not tighten between M3 Lock Nut and M3*12 Screw. Allow rotation between A16 and A19, also A19 and A21.
- Page 25 8. Fix A16 to A02. Assemble the following components M3 Nut x1 M3*12 Screw x1 Effect diagram after assembling...
- Page 26 9. Fix one M3*8 Copper Standoff to A24. Assemble the following components Effect diagram after assembling M3*8 Copper Standoff x1 A15 x1 Install it in strict accordance with the position shown in the figure. Do not M3*18 Screw mount the M3*8 Copper Standoff on the other side of the A15.
- Page 27 11. Fix one rocker arm of the servo to A27. Effect diagram after assembling Assemble the following components Rocker arm x1 A27 x1 Self-tapping screw packaged with servo 12. Assemble A27 and A28. Install A27 and A28 as shown below.
- Page 28 13.Fix a debugged servo to A23. Assemble the following components Effect diagram after assembling M2*10 Screw x2 A23 x1 Servo x1 M2 Nut 14.Fix a rocker arm to A26. Assemble the following components Effect diagram after assembling Rocker arm x1...
- Page 29 15. Fix the rocker arm on the A26 to the servo on the A23. Install as shown below. Assemble the following components Effect diagram after assembling Fixing screw packaged with servo x1...
- Page 30 16. Fix one A25 with two M3*40 Nylon Standoffs. Assemble the following components Effect diagram after assembling M3*8 Screw x2 A25 x1 M3*40 Nylon Standoff x2 17. Complete assembly of the clamp section. Assemble the following components A25 x1...
- Page 31 18.Install the clamp section on the robotic arm. Assemble the following components M3*30 Nylon Standoff x1 M3*8 Screw x2 Effect diagram after assembling...
-
Page 32: Body Part Assembly
2.4. Body part assembly. 1. Fix two Car Lights on A07. Assemble the following components M1.4*6 Self-tapping Screw x4 Defined as Car Light-A x1 Defined as Car Light-B x1 The end already connected A07 x1 with wire of the Car Light faces to the left. - Page 33 Effect diagram after assembling 3. Connect the Car Light as shown below. 4. Fix S12D3 Coupling on GA12-N20 Gear Motor (2 sets). Assemble the following components M4x4 Locking Screw x2 GA12-N20 Gear S12D3 Coupling x1 Motor x1 Effect diagram after assembling...
- Page 34 5. Put the GA12-N20 Gear Motor on N20 Motor Seat (2 sets). Assemble the following components N20 Motor Seat The metal plate pointed by the arrow and the groove of the motor seat should be fitted together. Effect diagram after assembling Here the metal plate with a notch is on the outside.
- Page 35 N20 Motor Seat on A11. 6. Fix Assemble the following components A11 x1 M2*10 Screw x2 Here the side with URL faces up M2 Nut x2 Effect diagram after assembling Fix the other N20 Motor Seat on A11. Effect diagram after assembling...
- Page 36 7. Fix one M3*6 Copper Standoff on A04. Assemble the following components Effect diagram after assembling M3*6 Copper A04 x1 Standoff x1 Do not reverse the A04. M3*8 Screw x1 8. Fix one section of the 18650 Battery Holder Set to A04.
- Page 37 9. Fix one M3*6 Copper Standoff on A03. Assemble the following components Effect diagram after assembling M3*6 Copper A04 x1 Standoff x1 Do not reverse the A03. M3*8 Screw x1 10. Fix the other section of the 18650 Battery Holder Set to A04.
- Page 38 11. Fix 3 Tracking Module on A01. Assemble the following components At this point, the 3 Tracking Module has been plugged M3 Nut x1 into the wiring. For the convenience to read, only one end of the wiring is shown here. Same as bellow.
- Page 39 13. Fix Adeept Ultrasonic Module on A10. Assemble the following components Effect diagram after assembling (When the screw is obstructed or cannot be M1.4*6 Self-tapping screwed in, turn over the plate and Screw x4 screw in the other side.)
- Page 40 16. Fix the rocker arm on A09 to the servo on A05. Buckle the rocker arm into the servo at the angle shown in the figure below. Assemble the following components Effect diagram after assembling M2.5*8 Screw x1 17. Fix two M3*35 Copper Standoffs on A09.
- Page 41 18. Fix A10 and A12 between A08 and A09. Assemble the following components A08 x1 M3*8 Screw Effect diagram after assembling...
- Page 42 19. Fix A05 on A01. Assemble the following components M3 Nut x1 M3*12 Screw x1 Effect diagram after assembling...
- Page 43 20. Connect the other end of Raspberry Pi Camera Ribbon with Raspberry Pi. Assemble the following components Raspberry Pi Camera Ribbon M2.5 Nut x4 The Raspberry Pi Camera Ribbon is connected to the port of Raspberry Pi here via the Adeept Motor HAT. Effect diagram after assembling...
- Page 44 21. Insert A06 to A01. Assemble the following components Effect diagram after assembling...
- Page 45 22. Connect the circuit. Connect the servo with GA12-N20 Gear Motor. Number the previously installed servos and GA12-N20 Gear Motor according to the port number on the Adeept Motor HAT for the convenience to connect the circuit. Motor A Motor B...
- Page 46 Connect the servo and the GA12-N20 Gear Motor to the corresponding port numbers of Adeept Motor HAT.
- Page 47 Connect the Adeept Ultrasonic Module, Car Light, 3 Tracking Module and 18650 Battery Holder Set as shown below.
- Page 48 23. Insert A07 to A01. Assemble the following components Effect diagram after assembling...
- Page 49 24. Insert A03, A04 and A11 on A01. Assemble the following components The wiring of the battery holder can be passed through the gap on A03, A04. First clamp A11 with A03, A04, and then insert it on A01.
- Page 50 25. Fix A04 with M3*12Screw. Assemble the following components M3 Nut x2 M3*12 Screw x2 Effect diagram after assembling Fix A03 with M3*12Screw.
- Page 51 26. Fix A02 to A03 and A04. Assemble the following components M3 Nut x2 M3*12 Screw...
- Page 52 Effect diagram after assembling...
-
Page 53: Track Assembly
2.5. Track assembly. 1. Fix A13 to A15 (4 sets). Assemble the following components Effect diagram after assembling M3*18 Copper Standoff X2 A15 X1 A13 X1 M3*8 Screw 2. Assemble driving wheel (2 sets). Assemble the following components Effect diagram after assembling... - Page 54 . Install the driving wheel on the S12D4 Coupling. Assemble the following components M4*6 Screw X1 Effect diagram after assembling...
- Page 55 5. Install the left track of the tank. Assemble the following components First put the track on the driving wheel and the driven wheel, then pass the M3*30 Screw through the driven wheel and fix it with the M3*6 Copper Standoff.
- Page 56 6. Install the track of the other side as described above. Effect diagram after assembling...
-
Page 57: Software & Hardware
3. Software & Hardware 3.1. Software Installation The software installation video is as follows https://www.adeept.com/video/detail-70.html Install the Raspbian Operating System First, install the operating system for the Raspberry Pi. The official system, Raspbian, is recommended. If you've finished the installation and the system works well, you may skip this step. - Page 58 After it's downloaded, unzip it for later SD card system creation. Write Raspberry Pi Operating System to SD Card First, insert the SD card into the card reader and connect it to the USB port of the computer. Click open the Win32 Disk Imager and choose the path of the SD card (here it's Disk G).
- Page 59 In the code above, replace WIFI with your own WiFi SSID name and PASSWORD with your password for the WiFi network. Save the file and change the name of the file wpa_supplicant.txt into wpa_supplicant.conf.
- Page 60 Acquire Raspberry Pi’s IP Address Install the 18650 batteries and switch on the car. Method A: Log in to the router management page on the computer to check the address of the Raspberry Pi. Method B: Download the Network Scanner App to check the address.
- Page 61 If a warning window prompts, click Yes.
-
Page 62: Download Program
Setting up in a Raspberry Pi may take you a lot of time, and there are too many libraries needed, so we write a python program to do the most of works for you. Download the program of the rasptank. Note that the following two commands are all lowercase. -
Page 63: Install Python3.7 In The Pc
3.3. Install Python3.7 in the PC The software installation video is as follows https://www.adeept.com/video/detail-70.html Install Python3.7 So far there are two versions of Python: 2.X and 3.X. The graphical UI of the terminal control is written in Python 3.7 and it supports multiple platforms. Here we'll focus on the installation of Python 3.7 under Windows. - Page 64 Type in: pip3 install numpy to Install numpy. NOTE: If Python3.7 is the only version in your PC, you can use both pip3 to install software, but when you also have Python2.x installed, you must use pip3 to install it in your Python3.7 library.
-
Page 65: Run The Rasptank
3.4. Run the RaspTank Start Switch on the car. After a while, if the LEDs turn red, it means the car’s server is connected to a Wi-Fi waiting for the PC client to join. If there is no Wi-Fi for the car to connect with, the LEDs turn blue, it means the car has set up an AP-Hotspot, you can use your PC to search it, the RPi Car’s AP-Hotspot’s SSID... - Page 66 After connection, the program will save the IP address. For the next use, if the IP address of the Raspberry Pi has not changed, you may press Enter directly next time to connect. After the connection is made successfully, the Video window shows up.
- Page 67 Line Following Mode The robot can track lines and follow them, proceeding along a preset path that can be altered by moving the lines, and this part of Python program is easy to understand. You can open findline.py and learn to write it yourself.
-
Page 68: Afterword
After completing all projects in the guide, you should have some knowledge of the Raspberry Pi and Robot, thus you can try to change the robot into other projects by adding more Adeept modules or changing the code for extended functions. - Page 69 www.adeept.com...
Need help?
Do you have a question about the RaspTank and is the answer not in the manual?
Questions and answers