
Related Manuals for Toro 24


Summary of Contents for Toro 24
- Page 1 User’s Guide Intelli-Sense Professional Controllers 12-, 24-, 36-, and 48-Station Models TIS-PRO...
- Page 2 The Toro Company Technical Support (877) 345-8676 WeatherTRAK ® ET Everywhere Subscription & Technical Support (800) 362-8774...
-
Page 3: Table Of Contents
Select Station ........24... - Page 4 Chapter 4 (continued) Select Soil Type ........27 Select Plant Type .
- Page 5 Connecting the Station Wires (includes Pump Relay)..74 Toro Rain Sensor Connection ......76 Flow Sensor Connection .
- Page 6 Notes:...
-
Page 7: Introduction
WeatherTRAK technology are #1 in saving water, protecting landscapes, reducing runoff, and satisfying customers. The Toro Intelli-Sense Professional controller series, available in 12, 24, 36 and 48 station-count models, dynamically adjust irrigation based on current ET (evapotranspiration) conditions, received each day via radio transmission from... - Page 8 How the ET Everywhere Service Works 1 - The WeatherTRAK ET Everywhere service collects data from over 25,000 monitoring stations including the National Oceanic and Atmospheric Administration (NOAA) network, state and county networks, and private weather stations. 2 - Proven scientific modeling techniques are then used to calculate and validate specific ET data down to one square kilometer.
-
Page 9: Chapter 1 Getting Started
Chapter 1 Getting Started The following checklist provides the basic steps required for Intelli-Sense Professional Controller installation, setup, programming and operation. Thoroughly inspect the irrigation system for proper design, installation and operating condition, leaks, as well as broken heads and pipes. The performance of your new controller depends on the integrity of the irrigation system design and installation. -
Page 10: Controller Hardware Overview
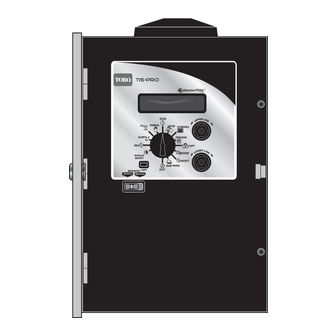
Controller Hardware Overview 1 - Intelli-Sense Control Module - (See page 6 for details.) 2 - Enclosure - Weather- and vandel- resistant heavy-gauge steel cabinet with locking cover. 3 - Weatherproof External Anatenna - Provides exceptional reception in most locations. 4 - Hinged Access Panel Fasteners - Thumbscrew fasteners secure hinged control panel for ease of access without tools. - Page 11 11 - Earth-ground Lug - Heavy-duty ground lug accepts 10 AWG solid-copper wire from earth ground device. 12 - Hot Post - Provides a constant 24 VAC power source to assist in valve identification for initial installation, system service and troublshooting procedures.
-
Page 12: Control Module Overview
Control Module Overview 14 - Function dia l - Turn this dial in either direction to select controller setup and operational functions: RUN - The normal position for automatic operation. Current time/date and controller activity is displayed. SETUP - Select and define specific controller setup and operating parameters. - Page 13 ADJUST - Adjust station watering by 5% increase or decrease of run time and/or watering days. ALERTS - Display system problems and operationalconflicts. FLOW - Set flow meter attributes and operational partameters. REPORTS - Access and review station run time and flow data by day, week or month time periods.
- Page 14 Notes...
-
Page 15: Chapter 2 Controller Setup
Chapter 2 Controller Setup The SETUP function menu consists of 10 screens listed in the following order: • Adjust Display Contrast • Set Controller Clock • Set Time Zone • Set Auto Daylight Savings option • Set Maximum Active Stations •... -
Page 16: Set Controller Date And Time
With the Function dial in the SETUP position, turn the Upper Line knob to select the following display: DATE (YEAR) Feb 24 2008 Turn the Lower Line knob to set the current year. Turn the Upper Line knob right to select the next menu item, Date (Month). -
Page 17: Select Time Zone
Set Time Zone Within the Setup menu, turn the Upper Line knob to view the following display: TIME ZONE Pacific Turn the Lower Line knob to select your time zone from the following choices: • Pacific (default setting) Alaska • Hawaii •... -
Page 18: Set Maximum Active Station Count
Set Maximum Active Station Count The actual number of stations being used for irrigation must be entered to enable accurate automatic scheduleing. Important: The Intelli-Sense Professional controller firmware provides for the scheduling of 48 stations regardless of controller output configuration. If the actual number of active stations is not set accurately and/or set according to controller output configura- tion, alert errors and reuced controller performace will result. -
Page 19: Select Stack Or Overlap Option
Select Stack or Overlap Option When the Stacking option is selected, the controller will be constrained to operate one station at a time. The Water Window start time and duration selected for Automatic Schedule A will also be assigned to Automatic Schedule B, C and D. When the Overlap option is selected, the constraint is removed, allowing multiple programs to run simultaneously. -
Page 20: Select Master Valve/Pump Start Option
Set Master Valve/Pump Start Option The controller features a dedicated master valve/pump start output as a standard feature. The master valve is used to isolate the mainline or a portion of the mainline when programmed as part of flow monitoring. It enables the controller to troubleshoot and isolate pipe malfunctions or other problems. -
Page 21: Select Run Time Valve Test Option
Set Runtime Valve Test Option The controller features a Valve Test feature that will test each station for a short-circuit condition each time it is activated. If a fault is detected, an Alert will be posted, enabling identification and repairs to be made. 1. - Page 22 Notes...
-
Page 23: Chapter 3 Set Program Schedule
Chapter 3 Set Program Schedule The Intelli-Sense Professional Controller enables four independent program schedules (A, B, C and D) to be defined by one or two start times with associated water window and a specific watering day schedule. Each station is then assigned to one of the programs in the Station Data function. -
Page 24: Set Program Start Times And Water Windows
Set Program Start Start Time and Water Window Within the Schedule menu, turn the Upper Line knob to select the following display: SET STARTS/WINDOWS PRG A Skip (Button to View) Note: To review the current start time/water window settings, press the Copy button. The abbreviated information will be displayed as shown in the example below. -
Page 25: Set High Et Start / Water Window
Note: Water window is the duration of time allotted for all stations, assigned to the program to complete their programmed watering cycle(s). The water window duration is adjustable from 1 hour to 23 hours and 59 minutes. The controller provides the water window end time by factoring the selected start time and duration. -
Page 26: Set Program Water Day Mode
Set Program Water Day Mode Each program can be assigned to unique water day schedule using one of the following options: • Optimized by WeatherTRAK - Water day schedule selected automatically by the Intelli-Sense scheduling engine. • Odd/Even - Odd or Even numbered calendar days. •... - Page 27 Interval Turn the Lower Line knob to select Interval. WATER DAY INTERVAL 01 (Everyday) The default Interval is 01 which schedules every day as active. To select an Interval from 02 – 30, turn the Lower Line knob. The current day is the first active day of the Interval schedule.
- Page 28 Days of Week by Month Turn the Lower Line knob to select Days of Week by Month. WATER DAY MODE Days of Week by Month Turn the Upper Line knob to view the following display: Jan OK TO WATER ON PGM A S M T W T F S By default, every day of every month is an active watering day.
-
Page 29: Chapter 4 Station Data Setup
You can adjust these values if needed. The items listed with an asterisk (*) will have default values based on the selection made in preceding setup parameter. Note: To begin the setup process, select Automated by WeatherTRAK mode on page 24, or User-defined modes starting on page 33. User Defined: • Select Station •... -
Page 30: Station Setup Mode: Automated By Weathertrak
Station Setup Mode: Automated by WeatherTRAK Select Station Turn the Function dial to the STATION DATA position. The Select Station menu item is displayed by default. SELECT STATION Station 01 is selected by default. To change the station number, turn the Lower Line knob. Note: The Maximum Active Station number defined in Setup, determines station number access. -
Page 31: Select Water Window Option
Select Water Window Option Turn the Upper Line knob to display Use Water Window. The current water window end time is automatically calculated and displayed for the selected program. Use Water Window Yes (end time 04:00pm) Yes is selected by default. To disable the water window for the selected station, turn the Lower Line knob to select No. -
Page 32: Set Precipitation Rate
Set Precipitation Rate Important:The sprinkler precipitation rate (PR) is a key factor in the calculation of an automatic watering program. If you know the actual PR value, enter it at this time. If you do not have this information, the baseline PR of the sprinkler type (entered in the previous step) will be entered. -
Page 33: Set Sprinkler Efficiency
Set Sprinkler Efficiency Like the sprinkler PR value, the Sprinkler Efficiency value is a key factor used by the Intelli-Sense to calculate an efficient watering program for each station. The controller will automatically enter an efficiency value based on the type of sprinkler selected for the station. Changing the efficiency value will alter overall station watering operation as follows: ▲... -
Page 34: Select Plant Type
Select Plant Type Within the Program menu, turn the Upper Line knob to select Plant Type. PLANT TYPE Cool Season Turf Select from the following Plant Type selections that best matches the plant material in the station: • Cool Season Turf •... - Page 35 Notes...
-
Page 36: Set Root Depth
Set Root Depth Within the Program menu, turn the Upper Line knob to select Set Root Depth. SET ROOT DEPTH 06 Inches The default root depth will be displayed for the soil type and plant type previously selected. To change the depth, turn the Lower Line knob to adjust from 2 –... -
Page 37: Select Slope Factor
Select Slope Factor The SlopeFactor is an important component used in the automatic watering program calculation to determine the amount of run time and number of repeat cycles required per watering day. The Slope Factor options are as follows: • 0 –... -
Page 38: Completing Station Setup
Completing Station Setup Turn the Upper Line knob to select Station (01) Complete. STATION 01 COMPLETE The next station number in sequence will be selected. To select a different station, turn the Lower Line knob. Turn the Upper Line knob to continue with the station setup procedure. Important: To set up additional stations with the same or similar operating parameters, use the COPY function to transfer station setup data from one station to another or to... -
Page 39: Select Station
Select Station Withthe Function dial in the Station Data position, turn the Upper Line knob to display Select Station. SELECT STATION Station 01 is selected by default. To change the station number, turn the Lower Line knob. Note: The Maximum Active Station number defined in Setup, determines station number access. -
Page 40: Select Usable Rainfall
Select Usable Rainfall The Usable Rainfall setting defines the percentage of the station’s watering area exposed to rainfall. This setting is adjustable from None (no rain contact) to 100% (full rain contact) in 25% increments. For example, about 25% of the station zone is covered by a roof overhang. -
Page 41: Select Number Of Cycles
Select Number of Cycles Turn the Upper Line knob to select Number of Cycles. NUMBER OF CYCLES 01 Cycles/Operating Day The number of watering cycles per watering day is set to 1 by default. To adjust the number between 0 – 20 cycles per operating day, turn the Lower Line knob. -
Page 42: Set Reference Et Value
Set Reference [weekly] ET Value (applies to User With ET mode only) The Reference ET is the weekly ET set in the User – With ET mode that your runtimes correspond to. Runtimes will be adjusted up or down automatically depending on whether the actual weekly ET is higher or lower than the Reference ET. -
Page 43: Chapter 5 Support Functions
Chapter 5 Support Functions The Setup, Schedule and Station Data functions enable you to set up an automatic watering schedule designed specifically or each watering zone of the landscape. The support functions provide enhanced control capabilities of your irrigation system; enabling you to perform various operations such as: program data copy, review, fine-tuning to resolving actual and potential irrigation problems, as well as providing a means of manually operating the irrigation system. -
Page 44: Using The Review Function
Using the Review Function The Review function provides a convenient, at-a-glance overview of all relavent station and flow monitro setup information. Turn the Function dial to the REVIEW position. Review Mode will be displayed. REVIEW MODE Station Data Station Data is selected by default. To select Flow Data, turn the Lower Line knob. -
Page 45: Review Flow Data
Flow Data Review With the Function dial in the REVIEW position, turn the Lower Line knob to display Flow Data. REVIEW MODE Flow Data Turning the Upper Line knob right displays the Flow Data review screens in the following sequence: •... -
Page 46: Using The Copy Function
Using the Copy Function The Copy function provides a convenient method of transferring all watering program information from one station to another or to all active stations simultaniously. Minor changes can then be made to each station as needed, greatly simplifying the process of programming several stations with similar watering progam attributes. -
Page 47: Restoring Station Default Settings
Restoring STATION Default Settings Important: Restoring the STATION defaults erases and resets all user settings for all stations as follows: Station Mode - Automated By WT Program Mode - A Use Water Window - Yes Usable Rainfall - 100% Sprinkler Type - Spray Head Precipitation Rate - 1.70 In/Hr Sprinkler Efficiency - 70% Turn the Function dial to the COPY position. -
Page 48: Restoring Program Settings
Restoring PROGRAM Default Settings Important: Restoring the default Program settings erases and resets all user-defined settings for all programs as follows: 1st Start Time - 12:00am Water Window - 16:00 2nd Start Type - High ET 2nd Start Time - 07:00 pm Turn the Function dial to the COPY position. -
Page 49: Restoring Setup Default Settings
Restoring SETUP Default Settings Important: Restoring the SETUP defaults erases and resets all user-defined settings as follows: Adjust Display - 224 Date - No change Time - No change Time Zone - No change Auto Daylight Savings - Yes Active Stations - No Change Turn the Function dial to the COPYposition. -
Page 50: Using The % Adjust Function
Using the % Adjust Function The % Adjust function allows you to make minor changes in overall station irrigation rate by increasing or decreasing the watering program values proportionally by percentage. Adjustments can be made in 5% increments by Water Amount (station run time and cycles per day), and by Day Frequency/Maximum Allowable Depletion (MAD). -
Page 51: Adjust By Day Frequency/ Max. Allowable Depletion
% Adjust by Day Frequency/Maximum Allowable Depletion Stations assigned to the Automated by WeatherTRAK station mode can be % adjusted by watering Day Frequency/Maximum Allowable Depletion. For example, when establishing new turf, total water application can be increased while decreasing the possibility of runoff. -
Page 52: Using The Alerts Function
Using the Alerts Function If a problem, confilict or error occurs with one of the essential Intelli-Sense functions, an Alert prompt will be immediately posted. Selecting Alerts function provides a quick overview of the monitored functions, and flags the source of the alert condition. Turn the Function dial to the ALERT position. -
Page 53: Using The Flow Monitor Function
The Intell-Sense Professional Controller incorporates a precision flow monitorfunction to display and record flow data provided by a compatible Toro TFS Series or Data Industrial IR Series flow sensor. (See flow sensor installation details on page 75.) With the flow sensor properly installed and configured for operation,the... -
Page 54: Set Station Exclusion
Set Station Exclusion The station exlusion feature enables individual stations to be omitted from the Flow Monitor operations. With the the Function dial in FLOW position, turn the Upper Line knob right to select Edit Excluded Stations. EDIT EXCLUDED STATIONS Skip (No Flow Only) Turn the Lower Line knob to change Skip to Edit. -
Page 55: Edit Flow Sensor K Value And Offset
Edit Flow Sensor K Value and Offset A default flow sensor K value, based on the flow sensor size, is automatically entered. Refer to the manufacturer’s recommended K value and edit accordingly. With the the Function dial in FLOW position, turn the Upper Line knob right to select Edit K Value. -
Page 56: Set Threshold And Delay Values
Set Threshold and Delay Values The threshold value is the defined limit for maximum, minimum and no-flow conditions. If monitored flow exceeds a threshold, an Alert is posted, and all remaining watering operations suspended or modified untl the alert is cleared or problem resolved. The delay period provides a 1- to 6-minute buffer between an exceeded threshold and the controller response. -
Page 57: Setting The No Flow Threshold
Turn the Upper Line knob (right) to select High Flow Delay. HIGH FLOW DELAY 050 GPM Turn the Lower Line knob to adjust the delay minutes (1–6). Setting the No Flow Threshold Note: To prevent a false alert response, the No Flow threshold should be set 10–15% lower than the expected flow in any program configuration. -
Page 58: Setting The Leak Detection Threshold
Setting the Leak Detection Threshold Note: Flow is monitored during non-irrigation periods (outside of scheduled irrigation or during soak periods) to detect leaks. If flow is monitored above the Leak Detect threshold, the master valve will be shut off and an alert will be posted. -
Page 59: Using The Reports Function
Using the Reports Function The Reports function provides cumulative station run time and flow data, selectable within the following specified reference formats: Weekly Stations - Run time in hours and minutes per station per week. Monthly Stations – Run time in hours and minutes per station per month. Flow –... -
Page 60: Flow Report
Turn the Upper Line knob right on stop to display Monthly Runtime for station 01 in January. MONTHLY RUNTIME Jan 000HRS 00MINS Turn the Lower Line knob right to change the month to review. Turn the Upper Line knob to change the day to review. Flow Report Turn the Lower Line knob to select the Flow report option. -
Page 61: Using The Rain Pause Function
Using the Rain Pause Function The Rain Pause function enables all automatic watering operations to be easily suspended from 1 to 200 days. At the end of the selected delay period, the controller resumes automatic operation. All other functions, including programming, manual operations and ET updates are available while the Rain Pause mode is active. -
Page 62: Using The Maintenance Timeout Function
Using the Maintenance Timeout Function The MaintenanceTimeout feature enables a time period ranging from 0.5 to 8.0 hours to be set, then selectedas required. During the timeout period, the leak detection function is disabled and the normally-closed master valve is energized. A typical use of the Maintenance Timout function would be to facilitate quick- coupler irrigation. -
Page 63: Using The Et Function
Using the ET Function The screens provided within in the ET function enable the current daily and weekly ET values to be reviewed, and the Kc value of custom plants and turf to be defined. Turn the Function dial to the ET position. The Current Daily ET value recievied from the ET Everywhere service will be displayed with the download date and time stamp. -
Page 64: Edit Custom Turf Kc Value
Edit Custom Turf Kc Value With the Function dial in the ET position, turn the Upper Line dial right to select the Custom Kc Turf screen. CUSTOM Kc TURF 1.00 January selected by default. To change the month setting, turn the Upper Line knob. -
Page 65: Beep On Message
Help and Information Screen Overveiw Turn the Function dial to the HELP/INFO position. The Toro Customer Service informaton screen is displayed by default. FOR CUSTOMER SERVICE Dial 1-800-664-4740... -
Page 66: Rain Service
Rain Service The Rain Service feature is offered by WeatherTRAK to monitor rainfall within your location and terminate automatic watering in the event of rain. With the Function dial in the HELP/INFO position, turn the Upper Line knob to select the Beep On Message screen. RAIN SERVICE ACTIVE Note: Rain Service is inactive by default. -
Page 67: Current Depletion
Current Depletion The Current Depletion reveiw screen provides the actual depletion value and the current MAD value for each station. An additional feature provided within this screen enables the actual depletion value to be easily reset to the current MAD value. With the Function dial in the HELP/INFO position, turn the Upper Line knob to select the Curent Depletion screen. -
Page 68: Using The Manual Watering Function
Using the Manual Watering Function The Manual function enable of all stations (in sequence) or individual station(s) to be manually operated at any time. Manual operation lasts for a specified number of minutes and starts immediately, whether or not the current day is a scheduled watering day. Only one station can be on at a time when operating manually. -
Page 69: Manually Operate All Stations
Manually Operate All Stations urn the Function Selector knob to MANUAL. Turn the Lower Line knob to view the following display: MANUAL WATER All Stations Turn the Upper Line knob to select the following display: MANUAL WATER ALL STATION 00.0 Minutes Turn the Lower Line knob to select manual operating time from 01 –... -
Page 70: The Run Function
The Run Function RUN is the Function dial position for normal controller operations. However, automatic controller operation will occur when the Function Selector knob is in any position other than OFF. the Function Selector knob to RUN to view the following Turn display (example): Aug 08 2007... -
Page 71: Appendix A - Troubleshooting Guide
Appendix A Troubleshooting Guide The landscape is too dry. Turn the Function dial to ADJUST. Turn the Upper Line knob to select a station. Turn Lower Line knob to adjust +5% and watch for 7 to 10 days. If your landscape is still too dry, increase 5% each week until stress is eliminated. - Page 72 76. Check the circuit breaker at the power source and reset as necessary. If the display does not return, contact Toro Customer Support at 1-800-664-4740. The controller programs correctly but does not operate automatically.
- Page 73 Week 1 of the watering day schedule appears incomplete. The days prior to installation will not be shown in the Week 1 schedule. The controller shows what days have irrigated or it anticipates what days will irrigate if the weather remains as it is today.
- Page 74 Notes...
-
Page 75: Appendix B Glossary Of Terms
Appendix B Glossary of Terms Group Number – This is a code number provided by the ET Everywhere service to the Intelli-Sense controller at the time of activation. The link enables the ET Everywhere service to communicate conditions relative to controllers in locations where irrigation regulation programs are in effect. - Page 76 Phase Lock – The Intelli-Sense receives daily weather updates from three different paging carriers. At the time of ET Everywhere service activation, the carrier with the highest signal strength is selected to ensure the best data reception and to expedite the activation process. After initial activation, the Intelli-Sense receives all carriers each night to provide redundancy for data reception.
-
Page 77: Appendix C - Installation Procedures
Appendix C Installation Procedures Selecting the Installation Site The Intelli-Sense controller is designed for most professionally installed applications where outdoor installation is required. For optimum controller use and perfomance and protection, use the following guidelines when selecting an installation site: •... -
Page 78: Mounting The Controller
Mounting the Controller Open the cabinet door and TM mounting plate. Position the controller on the wall and mark the top mounting hole location. Install the top mounting screw leaving the screw head about 1/8" (3 mm) from the wall. Note: When installing the controller on masonry or dry wall, install appropriate screw anchors. -
Page 79: Connecting The Power Wires
Connecting the Power Wires WARNING: All electrical components must meet applicable national and local electrical codes including installation by qualified personnel. These codes may require a means in the fixed wiring of disconnecting AC power having a contact separation of at least 0.120"... -
Page 80: Connecting The Station Wires (Includes Pump Relay)
37 38 39 40 41 42 43 44 45 46 47 48 37 38 39 40 41 42 43 44 45 46 47 48 13 14 15 16 17 18 19 20 21 22 23 24 6 AWG Solid 13 14 15 16 17 18 19 20 21 22 23 24 Copper Wire 12"... - Page 81 Valve Common Wire Caution: The controller must not be connected directly to a pump or other high current-draw equipment. A 24 VAC, 0.5A (max.) relay must be used to facilitate the connection. Failure to comply can result in severe controller damage.
-
Page 82: Toro Rain Sensor Connection
Toro Rain Sensor Connection Installation of the Toro TWRS rain sensor or TWFRS rain/freeze sensor sensor is recommend for best results. Note: If a rain sensor is NOT connected, the Sensor switch must be in the BYPASS position. If the Sensor switch is placed in the ACTIVE position without a rain sensor connection, the controller will be placed in a rain hold mode, and all operation will be suspended. -
Page 83: Flow Sensor Connection
Flow Sensor Connection The Intelli-Sense Commercial Controller is designed for use with a Toro TFS or Data Industrial IR series flow sensor. The flow sensor must be installed and connected in compliance with the instructions provided with the device. Important: Refer to the sensor manufacturer’s recommended communication cable size and type. -
Page 85: Fuse Replacement
Electrical • Input: 120 VAC, 50/60 Hz, 0.5A (24 W max.) • Output (per station): 24 VAC, 50/60 Hz, 0.5A (12 VA max.) • Output (total): 24 VAC, 50/60 Hz, 1.5A (36 VA max.) • Master Valve/Pump Start Relay Output: 24 VAC, 0.5A •... - Page 86 Notes...
-
Page 87: The Toro Promise - Limited Five-Year Warranty
Your remedy is limited solely to the replacement or repair of defective parts. Return the defective part to your local Toro distributor, who may be listed in your telephone directoryYellow Pages under "Irrigation Supplies"... -
Page 88: Fcc Compliance Information
: (1) l'appareil ne doit pas produire de brouil- lage, et (2) l'utilisateur de l'appareil doit accepter tout brouillage radioélec- trique subi, même si le brouillage est susceptible d'en compromettre le fonctionnement. www.toro.com © 2009 The Toro Company, Irrigation Division Form Number 373-0547 Rev. B...
Need help?
Do you have a question about the 24 and is the answer not in the manual?
Questions and answers