Table of Contents
Advertisement
Available languages
Available languages
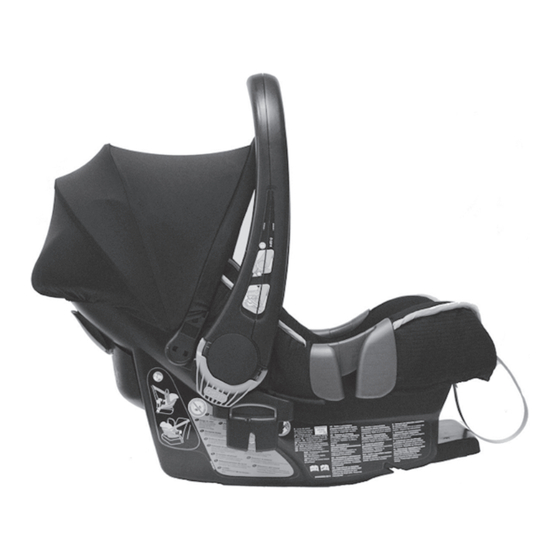
Operating Instructions BABY-SAFE plus II child seat
Instrucciones de servicio para el asiento infantil de
seguridad BABY-SAFE plus II
© 2018, Mercedes-Benz Accessories GmbH, Stuttgart · A Daimler AG Company.
Reprinting, translating and reproduction, in whole or in part, are not permitted
without our prior written consent.
2018/07
03F011-16
Advertisement
Chapters
Table of Contents

Related Manuals for Mercedes-Benz BABY-SAFE plus II

Summary of Contents for Mercedes-Benz BABY-SAFE plus II
- Page 1 Instrucciones de servicio para el asiento infantil de seguridad BABY-SAFE plus II © 2018, Mercedes-Benz Accessories GmbH, Stuttgart · A Daimler AG Company. Reprinting, translating and reproduction, in whole or in part, are not permitted without our prior written consent.
- Page 3 English (USA) ..........3 Español ........... 25...
-
Page 5: Table Of Contents
Contents Introduction ...........4 Recall Information (USA)....21 The following signal words are used in Limited Warranty (USA) .....21 these operating instructions:....4 Warranty card/handover check..23 Safety notes ...........5 General notes.........7 Approval ..........7 Use in the vehicle........7 Vehicles with automatic child seat recognition (ACSR) ........8 Vehicles with Occupant Classification System (OCS) ....8 Preparing to use the child seat....9... -
Page 6: Introduction
Proper care of your new child seat is important for the safety of the child. Useful information An approved Mercedes-Benz Center will be happy to provide you with assistance and advice at any time. Mercedes-Benz Accessories GmbH A Daimler Company... -
Page 7: Safety Notes
12 years of age and under 59 inches towards the rear. (1.50 m) in height, Mercedes-Benz make sure that the seat belts on the recommends you observe the following child seat are pulled tight across the information: child's body and are not twisted. - Page 8 Safety notes DANGER! WARNING The child seat may only be used in the front When using the child seat in the rear passenger seat if the front passenger passenger compartment, make sure that airbag has been disabled and the the front seat is only moved so far back "PASSENGER AIR BAG OFF"...
-
Page 9: General Notes
Restrain the child Never use the child seat without the seat with the belts of the child seat. cover. Use an original Mercedes-Benz seat This child seat meets all applicable cover, since it is an integral part of the requirements of the Federal Motor Vehicle child seat and its statutory approval. -
Page 10: Vehicles With Automatic Child Seat Recognition (Acsr)
Mercedes-Benz recommends that you use an authorized Mercedes-Benz Center. Vehicles with automatic child seat Do not use a child seat on the front recognition (ACSR) -
Page 11: Preparing To Use The Child Seat
Preparing to use the child seat Preparing to use the child seat Adjusting the head restraints 1. Loosening the shoulder belts; see page 9. Loosen the shoulder belts 2. Tilt head restraint 3 forwards out of the Press adjustment button 1 and catch, push it to the desired height and simultaneously pull shoulder belts 2 as press it back into the catch. -
Page 12: Sun Shade
Securing the child in the child seat Positions of the carrying handle Securing the child in the child seat DANGER! DANGER! Always secure the child in the child seat The protective function of the child seat using the child seat belts. Make sure that installed in the vehicle is only guaranteed if the seat belts on the child seat are pulled the carrying handle is in position A. -
Page 13: Securing The Child In The Child Seat
Securing the child in the child seat 5. Guide shoulder belts 2 over the WARNING shoulders of the child (without twisting or If the child seat is exposed to direct interchanging the shoulder belts). sunlight, parts could heat up. Children could Caution Lap belts 8 must be as low as suffer burns on these parts, particularly on possible over the child's groin. -
Page 14: Installation In The Vehicle
Installation in the vehicle For the safety of your child, check before Installation with the vehicle's 3-point each journey that: seat belt the head restraint and the child seat belts DANGER! are correctly adjusted. The seat belt must not be passed through the belts on the child seat are not twisted. - Page 15 Installation in the vehicle ® 12. Fold out D-SIP f on the side of the vehicle door. 4. Pull out the seat belt, guide it over the ® Note: The extended D-SIP serves as child seat and lock the belt tongue in belt additional accident protection in the event buckle a.
-
Page 16: Installation With The Latch
Installation in the vehicle Installation with the LATCH DANGER! The LATCH must be pulled tight and must not be twisted. If the LATCH does not secure the child seat correctly or not at all, in the event of an accident, abrupt braking maneuver or a sudden change in direction, the child may otherwise not be restrained and may be seriously or fatally injured. -
Page 17: Installation With The Vehicle's 2-Point Seat Belt
Installation in the vehicle Installation with the vehicle's 2-point seat belt DANGER! The seat belt must be pulled tight and must not be twisted. If the seat belt of the child seat is incorrectly secured or is not secured at all, in the event of an accident, abrupt braking maneuver or a sudden ®... -
Page 18: Removal
Removal Checklist for correct installation For the safety of your child, check before each journey that: the child seat is installed against the direction of travel. the child seat is only attached to the front passenger seat if no front passenger airbag can act on the child seat. -
Page 19: Removal When Secured With The Latch
Care instructions Removal when secured with the vehicle's 2-point seat belt 2. Push blue holder e away from the child seat slightly and unhook diagonal belt d. 1. Press orange button l and fold down 3. Open belt buckle a and remove lap ®... -
Page 20: Function Of The Belt Buckle
Care instructions Make sure that the child seat is not trapped between hard parts (vehicle door, seat rail, etc.) and subsequently damaged. Be sure to have a damaged child seat checked (e.g. after being dropped). Function of the belt buckle The full functioning of the belt buckle is crucial to safety. -
Page 21: Cleaning
Removing the sun shade WARNING Never use the child seat without the seat cover. Use an original Mercedes-Benz seat cover, since it is an integral part of the child seat and its statutory approval. Approval is invalidated as soon as you make modifications to the child seat. - Page 22 Care instructions Removing the seat covers 1. Loosening the shoulder belts; see page 9. 2. Press red button 6 and open the belt buckle of the child seat. 9. Thread the seat belt buckle and adjustment belt 9 out of the cover. 10.
-
Page 23: Recall Information (Usa)
33 to 79 lbs to this product. (15 to 36 kg) Within the scope of this warranty, Mercedes-Benz USA LLC reserves the right, at its own discretion, to provide repairs or Recall Information (USA) replacement parts for this product, replace... - Page 24 INCLUDING, BUT NOT LIMITED TO, IMPLIED WARRANTIES OF MERCHANTABILITY OR FITNESS FOR A PARTICULAR PURPOSE. IN NO EVENT WILL MERCEDES-BENZ USA LLC, ANY OF ITS PARENT OR AFFILIATED COMPANIES OR THE DEALER SELLING THIS PRODUCT BE LIABLE TO YOU FOR ANY...
-
Page 25: Warranty Card/Handover Check
Warranty card/handover check Warranty card/handover check Name: ..................Address: ....................................ZIP code: ..................City: ..................Telephone (with dialing code): ..................E-mail: ..................Child seat: ..................Article number: ..................Material color/design: ..................Accessories: ..................Handover check: 1. Completeness c checked/OK 2. - Page 27 Índice Introducción.........26 Función del cierre de las cintas de sujeción..........41 En estas Instrucciones de servicio Funcionamiento del LATCH ....41 se utilizan las siguientes palabras Limpieza..........42 de aviso: ..........26 Desecho ..........44 Indicaciones de seguridad ....27 Asientos sucesores......44 Indicaciones de carácter general ..29 Recall Information (USA)....44 Homologación........29 Limited Warranty (USA) .....44...
-
Page 28: Introducción
La conservación adecuada de su nuevo asiento infantil es importante para la Consejo Indicaciones útiles seguridad del niño. En su taller de servicio oficial Mercedes-Benz dispondrá en todo momento de ayuda y consejos. Mercedes-Benz Accessoires GmbH A Daimler Company... -
Page 29: Indicaciones De Seguridad
Por ese motivo, asegúrese: menores de 12 años y con una estatura de montar el asiento infantil orientado inferior a 59 in (1,50 m), Mercedes-Benz le hacia atrás en el vehículo recomienda que tenga en cuenta las de que las cintas del asiento infantil siguientes indicaciones sin excepción:... - Page 30 ¡ADVERTENCIA! Registre el asiento infantil en Un bebé con un peso de nacimiento Mercedes-Benz USA. reducido puede ser muy vulnerable durante su transporte en el vehículo. Le recomendamos que consulte con su médico ¡PELIGRO! antes de salir del hospital con su hijo.
-
Page 31: Indicaciones De Carácter General
¡Atención! Al fijar el asiento infantil con el el asiento infantil sin la funda. Utilice una cinturón de seguridad del vehículo, funda original Mercedes-Benz, ya que asegúrese de que el cinturón de seguridad no forma parte integral del asiento infantil y quede tendido sobre objetos de cantos de la homologación legal. -
Page 32: Utilización En El Vehículo
Utilización en el vehículo El asiento infantil no está homologado para el en el asiento del acompañante sí uso en aviones, ya que no se ha probado la en los asientos laterales traseros sí fijación del asiento infantil en un avión. El asiento infantil está... -
Page 33: Vehículos Con Sistema De Clasificación De Ocupantes (Ocs)
(OCS) en un taller página 31. especializado. Mercedes-Benz le recomienda al respecto un punto de servicio Mercedes-Benz. No utilice ningún asiento infantil en el asiento del acompañante si el sistema de clasificación de ocupantes (OCS) está averiado. -
Page 34: Estribo Portante
Aseguramiento del niño en el asiento infantil Estribo portante Ajuste el estribo portante A: Para llevar el asiento infantil y para fijarlo en el vehículo ¡Atención! Asegúrese de que el estribo portante 5 esté enclavado antes de levantar el asiento infantil. B: Parada de seguridad Esta posición impide que el estribo portante 5 se desplace hacia atrás de... - Page 35 Aseguramiento del niño en el asiento infantil ¡Atención! Asegúrese de que el asiento ¡PELIGRO! infantil esté bien apoyado y no pueda volcar Si las personas –especialmente los niños– antes de sentar al niño en él. se exponen al calor o al frío extremos ¡Atención! No pierda de vista al niño en el durante un periodo de tiempo prolongado, asiento infantil cuando lo coloque en una...
-
Page 36: Lista De Comprobación Del Correcto Aseguramiento Del Niño
Montaje en el vehículo las cintas del asiento infantil no estén retorcidas las lengüetas estén enclavadas en el cierre de las cintas de sujeción las cintas del asiento infantil estén ceñidas sin apretar las cintas de las caderas estén colocadas lo más abajo posible sobre las ingles del niño Montaje en el vehículo ¡Atención! Tire de la cinta de ajuste hacia... -
Page 37: Fijación Con El Cinturón De Fijación Por Tres Puntos Del Vehículo
Montaje en el vehículo Fijación con el cinturón de fijación 3. Enclave el estribo portante 5 en la por tres puntos del vehículo posición superior A. ¡PELIGRO! El cinturón de seguridad no debe tenderse entre el asiento infantil y las cintas del asiento infantil. -
Page 38: Fijación Con El Latch
Montaje en el vehículo 10. Compruebe el montaje correcto del el cinturón abdominal b pase por las dos asiento infantil. guías del cinturón de color azul c del asiento infantil 11. En caso necesario, extraiga el asiento infantil del vehículo y repita los pasos la cinta diagonal d pase entre el soporte 2 a 10 hasta que el asiento infantil esté... - Page 39 Montaje en el vehículo 3. Enclave el estribo portante 5 en la 8. Compruebe el montaje correcto del posición superior A. asiento infantil. 9. En caso necesario, extraiga el asiento infantil del vehículo y repita los pasos 2 a 8 hasta que el asiento infantil esté...
-
Page 40: Fijación Con El Cinturón De Fijación Por Dos Puntos Del Vehículo
Montaje en el vehículo Fijación con el cinturón de fijación por dos puntos del vehículo ¡PELIGRO! El cinturón de seguridad debe tensarse y bajo ningún concepto debe retorcerse. Si el cinturón de seguridad no fija el asiento infantil o no lo fija correctamente, el niño no quedaría retenido en caso de accidente, maniobras de frenado bruscas o cambios de sentido repentinos y podría sufrir... -
Page 41: Desmontaje
Desmontaje Lista de comprobación de un montaje Desmontaje en caso de fijación con el correcto cinturón de fijación por tres puntos del vehículo Para la seguridad del niño, antes de cada recorrido compruebe que: el asiento infantil esté fijado en dirección contraria al sentido de la marcha el asiento infantil se fije en el asiento del acompañante solo cuando el airbag... -
Page 42: Desmontaje En Caso De Fijación Con El Cinturón De Fijación Por Dos Puntos Del Vehículo
Instrucciones de conservación Apertura de las cintas del asiento infantil 2. Presione la tecla de soltado de color gris m a ambos lados del LATCH j para quitar la tensión del cinturón. 1. Pulse la tecla de ajuste 1, tire 3. -
Page 43: Función Del Cierre De Las Cintas De Sujeción
Instrucciones de conservación Función del cierre de las cintas de sujeción El funcionamiento del cierre de las cintas de sujeción contribuye notablemente a la seguridad. Los fallos de funcionamiento que se producen en el cierre de las cintas de sujeción suelen deberse a la suciedad. Fallos de funcionamiento (suciedad) 5. -
Page 44: Limpieza
Desmontaje de la capota solar ¡ADVERTENCIA! Nunca utilice el asiento infantil sin la funda. Utilice una funda original Mercedes-Benz, ya que forma parte integral del asiento infantil y de la homologación legal. La homologación expira si modifica el asiento infantil. - Page 45 Instrucciones de conservación 3. Deslice el reposacabezas 3 a la 9. Extraiga el cierre de las cintas de posición inferior, véase la página 31. sujeción y la cinta de ajuste 9 de la funda. 4. Incline el resposacabezas 3 hacia 10.
-
Page 46: Desecho
Recall Information (USA) en relación con este producto. Rellene la tarjeta de registro adjunta y En el marco de esta garantía, Mercedes-Benz envíenosla lo antes posible para que USA LLC se reserva el derecho a decidir podamos informarle en caso de una libremente si pone a disposición una... - Page 47 Para ejercer sus derechos en el marco de CONDICIONES DE GARANTÍA: esta garantía, diríjase a su punto de servicio Esta garantía no cubre ningún daño del Mercedes-Benz o póngase en contacto con producto provocado por negligencia, mala nosotros en: utilización o uso del producto de forma...
-
Page 48: Tarjeta De Garantía/Comprobación De Entrega
Tarjeta de garantía/comprobación de entrega Tarjeta de garantía/comprobación de entrega Nombre: ..................Dirección: ....................................Código postal: ..................Localidad: ..................Teléfono (con prefijo): ..................Correo electrónico: ..................Asiento infantil: ..................Número de artículo: ..................Color/diseño de la tela: ..................Accesorios: .................. - Page 49 Tarjeta de garantía/comprobación de entrega...
Need help?
Do you have a question about the BABY-SAFE plus II and is the answer not in the manual?
Questions and answers