Table of Contents
Advertisement
Quick Links
Advertisement
Table of Contents

Subscribe to Our Youtube Channel
Related Manuals for Monoprice Blackbird 39665


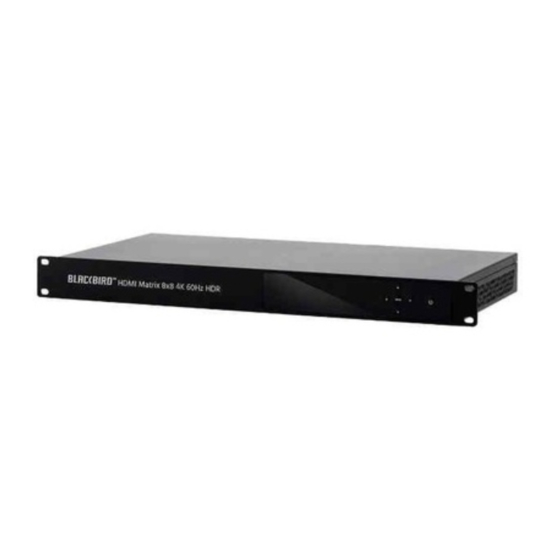
Summary of Contents for Monoprice Blackbird 39665
- Page 1 Blackbird™ 4K 8x8 HDMI® Matrix P/N 39665 User's Manual...
-
Page 2: Table Of Contents
CONTENTS SAFETY WARNINGS AND GUIDELINES ........................... 4 INTRODUCTION ......................................5 FEATURES ........................................5 CUSTOMER SERVICE ....................................6 PACKAGE CONTENTS .................................... 6 PRODUCT OVERVIEW ................................... 7 Front Panel ....................................... 7 Rear Panel ......................................... 7 IR Remote Control ..................................... 8 FRONT PANEL CONTROL ..................................8 Basic Connection .................................... - Page 3 Direct Connect....................................14 WEB GUI ......................................... 15 General Page ......................................15 Matrix Page ......................................16 EDID Page ....................................... 17 Network Page ...................................... 18 Upgrade Page ...................................... 19 RS-232 GUI ........................................20 TECHNICAL SUPPORT ..................................20 SPECIFICATIONS ...................................... 21 REGULATORY COMPLIANCE ................................ 22 Notice for FCC ....................................
-
Page 4: Safety Warnings And Guidelines
SAFETY WARNINGS AND GUIDELINES Please read this entire manual before using this device, paying extra attention to these safety warnings and guidelines. Please keep this manual in a safe place for future reference. • This device is intended for indoor use only. •... -
Page 5: Introduction
• Remove the batteries from the controller if it will go unused for a lengthy period of time. • Clean using a soft, dry cloth only. Do not use chemical cleaners, solvents, or detergents. For stubborn deposits, moisten the cloth with warm water. •... -
Page 6: Customer Service
If you have any problem with your order, please give us an opportunity to make it right. You can contact a Monoprice Customer Service representative through the Live Chat link on our website www.monoprice.com or via email at support@monoprice.com. -
Page 7: Product Overview
PRODUCT OVERVIEW Front Panel 1. OLED Display: Displays the system input/output port status, EDID® management, and matrix IP address. 2. IR Window: The IR window receives the signal from the included IR remote control. 3. Control Buttons: ◄, ►, ▲, ▼, and Menu buttons used for controlling the matrix. FRONT PANEL CONTROL See the section for operation details. -
Page 8: Ir Remote Control
6. AUDIO OUTPUT: Eight digital coaxial connectors for connecting external amplifiers for amplification of the de-embedded audio. 7. GND: Ground connection. IR Remote Control : Press the button to turn the matrix on or to put it into standby. 2. Input 1-8: Use the numbered buttons to directly select an input. -
Page 9: Check Edid
Check EDID Perform the following steps to check the EDID™ settings. 1. With the OLED Display in its initial state, use the ▲ and ▼ buttons to check the EDID setting for each input. 2. Press the Menu button to return to the initial state of the OLED Display. Select EDID Perform the following steps to set the EDID®... -
Page 10: Save Preset
Save Preset You can save the current configuration to a preset, from which it can later be recalled. 1. Press the Menu button. 2. Use the ▲ and ▼ buttons to select the function, then press the ► button. 3. Use the ▲ and ▼ buttons to select a storage location. 4. -
Page 11: Select Baud
Select Baud Perform the following steps to set the serial baud rate. 1. Press the Menu button. 2. Use the ▲ and ▼ buttons to select the function, then press the ► button. 3. Use the ▲ and ▼ buttons to select the baud rate. 4. -
Page 12: Edid Settings
EDID SETTINGS The following table lists the 27 different EDID® settings. Video Audio 720p 2.0 CH 1080p 2.0 CH 1080p 5.1 CH 1080p 7.1 CH 1080i 2.0 CH 1080i 5.1 CH 1080i 7.1 CH 2.0 CH 5.1 CH 7.1 CH 4K@30Hz 2.0 CH 4K@30Hz... -
Page 13: Sample Connection Diagram
Copy Output Copy HDMI Out A Copy HDMI Out B Copy HDMI Out C Copy HDMI Out D Copy HDMI Out E Copy HDMI Out F Copy HDMI Out G Copy HDMI Out H SAMPLE CONNECTION DIAGRAM... -
Page 14: Connecting Ethernet
CONNECTING ETHERNET Existing Network You can connect the matrix to your existing Ethernet network router or modem using an Ethernet cable. Once connected, you can access the Web GUI by typing 192.168.1.100 into the address bar of your web browser. Direct Connect If you do not have an existing Ethernet network or do not want to use your network, you can connect the matrix directly to your PC. -
Page 15: Web Gui
8. Click the Close button on the Local Area Connection Properties and Local Area Connection Status dialogs to close them, then close Control Panel. 9. Momentarily press the Menu button on the front panel of the matrix. Use the ▲ and ▼... -
Page 16: Matrix Page
3. Slide the Power switch to the right to turn the matrix on or to the left to put it into standby mode. 4. Slide the Beep switch to the right to enable an audible beep whenever a front panel button is pressed. -
Page 17: Edid Page
EDID Page 1. This section allows you to directly set the desired EDID® for any input. Use the first drop-down list to select the desired EDID setting, use the second drop-down list to select the input, then click the Set button to set the displayed EDID for the displayed input. -
Page 18: Network Page
Network Page 1. This section allows you to display or set the IP address, Subnet mask, Gateway, and MAC address. If the DHCP button is to the right, this displays the address values. Click the Set button to save the DHCP status. If the DHCP button is to the left, you can input the IP address, Subnet mask, Gateway, and MAC address. -
Page 19: Upgrade Page
Upgrade Page If a firmware update is available, use the drop-down list to select the firmware file, then click the Upgrade button to perform the update. -
Page 20: Rs-232 Gui
USB port on your computer. TECHNICAL SUPPORT Monoprice is pleased to provide free, live, online technical support to assist you with any questions you may have about installation, setup, troubleshooting, or product recommendations. -
Page 21: Specifications
SPECIFICATIONS Model 39665 Video Inputs 8x HDMI® Video Outputs 8x HDMI Audio Outputs 8x Digital Coaxial Control Inputs 1x RJ45, 1x RS-232 Front panel buttons, Web GUI, Control Options RS-232 GUI, IR remote control 4K@60Hz (YCbCr 4:4:4), 4K@30Hz, Maximum Video Resolutions 1080p@120Hz, 1080p 3D@60Hz Color Depth 8-bit, 10-bit, 12-bit, 16-bit... -
Page 22: Regulatory Compliance
Modifying the equipment without Monoprice's authorization may result in the equipment no longer complying with FCC requirements for Class B digital devices. In that event, your right to use the equipment may be limited by FCC regulations, and you may be required to correct any interference to radio or television communications at your own expense. -
Page 23: Notice For Industry Canada
This Class B digital apparatus complies with Canadian ICES-003. Cet appareil numérique de la classe B est conforme à la norme NMB-003 du Canada. Blackbird™ is a trademark of Monoprice Inc. HDMI®, the HDMI Logo, and High-Definition Multimedia Interface are trademarks or registered trademarks of HDMI Licensing LLC in the United States and other countries.
Need help?
Do you have a question about the Blackbird 39665 and is the answer not in the manual?
Questions and answers