
Related Manuals for Gecko Aeware in.k100 Series


Summary of Contents for Gecko Aeware in.k100 Series
- Page 1 ������� ��������������������������� ������������� �����������������������������������...
-
Page 2: Table Of Contents
in.k100 table of contents Table of contents overview ..................3 function description ..............4 general specifications ..............5 instructions - pump keys ............... 6 - light key ................6 installation & connections ............7... -
Page 3: Overview
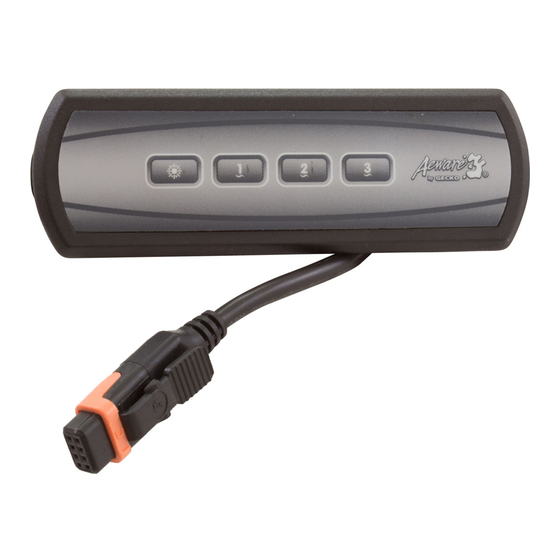
in.k100 overview in.k100 Advanced series of auxiliary keypads that gives complete control to wet fingers! In.k100 is a compact auxiliary keypad designed to be used with in.xm spa systems. Available in dual pump & blower or three pump configurations, in.k100 offers OEMs and spa users the flexibility of a secondary control. -
Page 4: Function Description
function description in.k100 Pump 1 key Pump 2 key Light key Pump 3/blower key... -
Page 5: General Specifications
in.k100 general specifications Dimensions: General specifications: Environmentals: Storage temperature: 70˚C (158˚F) to –30˚C (-22˚F) Operating temperature: 60˚C (140˚F) to –20˚C (-4˚F) " 11/16 Humidity: 100% condensing (42.9 mm) Mechanical Specs: " Weight: 0.41 kg (0.9 lbs) (130.2 mm) Dimensions (W x H x D): Front Panel: 130.2 mm x 42.9 mm x 52.4 mm ) Soft gasket... -
Page 6: Instructions - Pump Keys
instructions in.k100 Light key Pump 1 key Pump 2 key Pump 3/blower key Press Light key to turn light on Press Pump 1 key to turn Press Pump 2 key to turn Press Pump 3/blower key at high intensity. pump 1 on at low speed. pump 2 on at low speed. -
Page 7: Installation & Connections
in.k100 installation & connections Installing the in.k100 Gasket with or without adhesive To install the in.k100, use the drilling template provided in this section. Determine the mounting location and stick the template on chosen place. You must cut out a rectangular shape opening of by 1 according to the drilling template (see illustration). - Page 8 installation & connections in.k100 3,2 mm Drilling Template ∅ " 11,1 mm ∅ 7/16" 27,8 mm " 3/32 100 mm " 15/16 104 mm " 3/32...
- Page 9 in.k100 installation & connections Connecting in.k100 auxiliary keypad to in.xm Main keypad * in.k600 or in.k400 The in.k100 comes with a 20 ft cable and an in.link connector. in.k100 To connect the in.k100, simply insert its in.link connector into the appropriate keypad connector (as illustrated).
- Page 10 �������� ������������ ����� ����������� �������������� ����������������������������������������������������������������� ������������������������������������������������� ����� ����������� ��������������������� ����������...
Need help?
Do you have a question about the Aeware in.k100 Series and is the answer not in the manual?
Questions and answers