Table of Contents
Advertisement
Available languages
Available languages
HANGING SKIMMER
SKIMMER DE MOCHILA
SKIMMER HORS-BORD
HÄNGEFILTER
FILTRO A PARE
HANGEND SKIMME
SKIMMER DE MOCHIL
IN
STALLATION AND MAINTENANCE MANUAL
MANUAL DE INSTALACIÓN Y MANTENIMIENTO
MANUEL D'INSTALLATION ET D'ENTRETIEN
EINBAU-UND BETRIEBSANLEITUNG
MANUALE DI INSTALAZIONE E MANU
INSTALLATIE-EN ONDERHOUDSHANDLEIDINGE
INSTRUÇÕES E MANUNTENÇÃO
TE
R
A
TENZIONE
AR-125
Advertisement
Table of Contents

Related Manuals for GRE AR-125


Summary of Contents for GRE AR-125
- Page 1 AR-125 HANGING SKIMMER SKIMMER DE MOCHILA SKIMMER HORS-BORD HÄNGEFILTER FILTRO A PARE HANGEND SKIMME SKIMMER DE MOCHIL STALLATION AND MAINTENANCE MANUAL MANUAL DE INSTALACIÓN Y MANTENIMIENTO MANUEL D’INSTALLATION ET D’ENTRETIEN EINBAU-UND BETRIEBSANLEITUNG MANUALE DI INSTALAZIONE E MANU TENZIONE INSTALLATIE-EN ONDERHOUDSHANDLEIDINGE...
-
Page 3: Installation
ENGLISH IMPORTANT: The instruction manual you are holding includes essential information on the safety measures to be implemented for installation and start-up. Therefore, the installer as well as the user must read the instructions before beginning installation and start-up. Keep this manual for future reference. To achieve optimum performance of the Hanging Skimmer, follow the instructions provided below: SAFETY INSTRUCTIONS. -
Page 4: Operation
4.1.2. ANCHORING THE BACKPACK SKIMMER BODY Cut out the liner using a cutter (blade) following marked line (the liner must not be pulled from any point at this time). Install the double joint of the Skimmer, clamping the plate and the liner (No. 7 Fig. 3). Place the flap opening in the skimmer (Fig. - Page 5 To acquire these products, enquire at your dealers or the After-sales Service of the swimming pool manufacturer. Always use original spare parts. A hose that is longer than necessary to reach all points of the pool will hinder its use. Cut the excess length of hose. Ensure that rubber terminals do not leak.
-
Page 6: Guarantee Certificate
GUARANTEE CERTIFICATE GENERAL TERMS 1.1. In accordance with these provisions, the seller guarantees that the GRE product corresponding to this guarantee (“the Product”) is in perfect condition at the time of delivery. 1.2. The Guarantee Term for the Product is two (2) years from the time it is delivered to the purchaser. -
Page 7: Instalación
ESPAÑOL IMPORTANTE: El manual de instrucciones que usted tiene en sus manos, contiene información fundamental acerca de las medidas de seguridad a adoptar a la hora de la instalación y la puesta en servicio. Por ello, es imprescindible que tanto el instalador como el usuario lean las instrucciones antes de pasar al montaje y la puesta en marcha. -
Page 8: Mantenimiento
Marcar el orificio con un rotulador y hacer un corte en cruz en el centro del orificio con ayuda de un cúter (CUCHILLA) sin rebasar el agujero del troquel. Introducir el anillo de fricción y una de las juntas (Fig. 2). en la boquilla de retorno. Desde el interior de la piscina introducir por el corte, la boquilla de retorno con el anillo de fricción y la junta. - Page 9 Coloque el cartucho bajo un chorro de agua de una manguera de jardín a baja presión, hasta que observe que el cartucho está limpio (Fig. 6). Volver a introducir el cartucho con el extremo roscado hacia abajo, y roscarlo en su alojamiento. Colocar el cesto prefiltro y la tapa del Skimmer de mochila.
-
Page 10: Certificado De Garantía
CERTIFICADO DE GARANTÍA ASPECTOS GENERALES 1.1 De acuerdo con estas disposiciones, el vendedor garantiza que el producto GRE correspondiente a esta garantía (“el Producto”) no presenta ninguna falta de conformidad en el momento de su entrega. 1.2 El Periodo de Garantía para el Producto es de dos (2) años y se calculará desde el momento de su entrega al comprador. -
Page 11: Montage
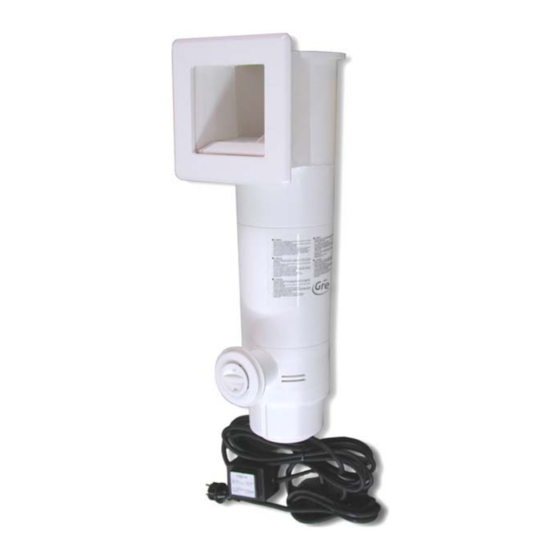
4. MONTAGE : Le corps du Skimmer hors-bord intègre l’elément filtrant, ou filtre à cartouche, ainsi que le moteur et la turbine situés dans la partie inférieure et dont le rôle est de faire circuler l’eau. Celle-ci est recueillie par la goulotte du Skimmer hors-bord placée sur la partie supérieure. Après être passée dans le filtre, l’eau est rejetée dans la piscine par la buse inférieure. -
Page 12: Entretien
Marquer l’orifice en utilisant un crayon feutre et faire une coupure en croix au centre de l’orifice à l’aide d’un cutter (LAME) sans dépasser le trou de l’étampe. Introduire l’anneau de friction et un des joints (Fig. 2) dans la buse de retour. Depuis l’intérieur de la piscine, introduire dans la coupure qui a été... - Page 13 Retirer le couvercle et le panier. Dévisser la cartouche de son logement et l’extraire de l’intérieur du Skimmer à dos (Fig. 7). Placer la cartouche sous un jet d’eau d’un tuyau d’arrosage à basse pression, jusqu’à ce que la cartouche soit bien propre (Fig. 6). Introduire de nouveau la cartouche, l’extrémité...
-
Page 14: Certificat De Garantie
CERTIFICAT DE GARANTIE ASPECTS GÉNÉRAUX 1.1. Conformément à ces disposiitions, le vendeur garantit que le produit GRE correspondant à cette garantie (“le Produit”) ne présente aucun défaut de conformité au moment de sa livraison. 1.2. La Période de Garantie pour le Produit est de deux (2) ans et elle sera calculée à partir du moment de sa remise à l’acheteur. - Page 15 DEUTSCH WICHTIG: Das Handbuch mit den Betriebsanleitungen, das Sie in Händen halten, enthält wichtige Information über die anzuwendenden Sicherheitsmaßnahmen für die Installation und Inbetriebnahme. Es ist daher unerläßlich, daß die Anweisungen vom Installateur und vom Benutzer vor der Montage und Inbetriebnahme aufmerksam durchgelesen werden. Bewahren Sie dieses Handbuch auf, falls Sie zu einem späteren Zeitpunkt Informationen über die Funktion dieses Apparates nachschlagen möchten.
- Page 16 4.1.1. VORHERIGE BEFESTIGUNG DES ANSCHLUSSTÜCKES FÜR DEN RÜCKLAUF DES EINHÄNGESKIMMERS (Abb. 2) Über dieses Anschlussstück wird das gefilterte Wasser erneut in das Schwimmbad eingelassen. So wird der Filterzyklus abgeschlossen. Beginnen Sie damit, das Schwimmbecken bis ungefähr 4 cm unterhalb des unteren Randes der Öffnung des Rücklaufventils mit Wasser zu füllen.
- Page 17 Das Einhängefilter hält länger, wenn es nicht länger als 4 h durchgehend benutzt wird. Die täglich notwendigen Filtermengen werden durch die Wassermenge in m im Schwimmbecken im Verhältnis zu den 3, 8 m /h Durchflussmenge des Einhängeskimmers bestimmt. Der Motor sollte mindestens 2 Stunden zwischen zwei Funktionsintervallen angehalten werden. INSTANDHALTUNG: 6.1.
- Page 18 GARANTIEZERTIFIKAT ALLGEMEINE GESICHTSPUNKTE 1.1. In Übereinstimmung mit diesen Verfügungen garantiert der Verkäufer, dass das Produkt GRE dieser Garantie (“das Produkt”) entspricht und dass es im Moment der Übergabe in allen Punkten mit den Anforderungen übereinstimmt. 1.2. Der Garantiezeitraum für das Produkt beträgt zwei (2) Jahre und wird ab dem Augenblick der Lieferung an den Käufer gerechnet.
-
Page 19: Installazione
ITALIANO IMPORTANTE: Il manuale d’istruzioni in suo possesso contiene informazioni fondamentali sulle misure di sicurezza da adottare per l'installazione e la messa in servizio. Per ciò è imprescindibile che sia l’installatore che l’utente leggano le istruzioni prima di iniziare il montaggio e la messa in servizio. Conservi questo manuale per poter consultare in futuro in merito al funzionamento di questo apparecchio. -
Page 20: Funzionamento
Marcare l'orifizio con un pennarello ed effettuare un taglio a croce nel centro dello stesso con l'aiuto di un taglierino senza eccedere la traccia marcata. Introdurre l'anello di frizione ed una delle guarnizioni (Figura 2) nella bocchetta di ritorno. Dalla parte interna della piscina, introdurre, attraverso il taglio realizzato, la bocchetta d' immissione assemblata come sopra. Il liner eccedente, che fuoriesce sul lato esterno della piscina, dovrà... -
Page 21: Manutenzione
Faccia riposare il motore per almeno due ore tra un periodo di funzionamento e l'altro. 6. MANUTENZIONE: 6.1. PULIZIA DELLA CARTUCCIA Interrompere l'alimentazione elettrica staccando l'apparecchiatura dalla presa di corrente. Aprire la chiusura superiore ed estrarre il cestello. Svitare la cartuccia dalla propria sede, estrarla dall'interno dello skimmer (Figura 7). Lavare la cartuccia con acqua corrente a bassa pressione utilizzando una tubo da giardino, sino a verificarne la completa pulizia (Figura Introdurre nuovamente la cartuccia nello skimmer, con l'estremità... -
Page 22: Certificato Di Garanzia
CERTIFICATO DI GARANZIA ASPETTI GENERALI 1.1. Ai sensi di queste disposizioni, il venditore garantisce che il prodotto GRE corrispondente a questa garanzia (“il Prodotto”) non presenta alcun difetto di conformità al momento della consegna. 1.2. Il Periodo di Garanzia per il Prodotto è di due (2) anni a decorrere dal momento della sua consegna all’acquirente. - Page 23 NEDERLANDS BELANGRIJK: De handleiding met instructies die voor U ligt bevat fundamentele informatie omtrent de veiligheidsmaatregelen die in acht moeten worden genomen bij het installeren en de in werking stelling van dit produkt. Daarom is het absoluut noodzakelijk dat zowel de installateur als de gebruiker de instructies aandachtig lezen alvorens tot de montage en in werk stelling over te gaan.
- Page 24 4.1.1. BEVESTIGING VAN HET TERUGVOERMONDSTUK VAN DE ZAKSKIMMER (Fig.2) Hierdoor wordt het gefilterde water weer in het zwembad teruggepompt, waardoor de filtercyclus wordt gesloten. Begin het zwembad met water te vullen, en stop wanneer het water ongeveer 4 cm onder de benedenrand van de opening van de terugvoerklep staat.
- Page 25 Laat de motor in ieder geval 2 uur uitstaan tussen elke filterperiode. 6. ONDERHOUD: 6.1. REINIGING VAN HET FILTERPATROON Verbreek de verbinding tussen het apparaat en de netvoeding. Verwijder het deksel en de filterkorf. Schroef het filterpatroon los, verwijder het uit de houder en verwijder het uit de zakskimmer (Fig. 7). Houdt het filterpatroon onder een waterstraal van een tuinslang onder lage druk totdat het filterpatroon er schoon uitziet (Fig.
- Page 26 1.1. ALGEMENE ASPEKTEN 1.2. In overeenkomst met de voorliggende bepalingen wordt door de verkoper gegarandeerd dat het produkt GRE verkocht onder deze garantie (“het Produkt”) geen enkel defekt vertoont op het moment van levering. 1.3. De Garantieperiode voor het Produkt bedraagt twee (2) jaar en is geldig vanaf het moment dat het Produkt aan de koper geleverd wordt.
- Page 27 PORTUGUÊS IMPORTANTE: O manual de instruções que você tem nas mãos contém informação fundamental sobre as medidas de segurança a tomar ao realizar a instalação e a colocação em funcionamento. Por isso, é imprescindível que tanto o instalador como o utilizador leiam as instruções antes de realizar a montagem e a colocação em funcionamento.
- Page 28 Introduza o anel de fricção e uma das juntas (Fig. 2) na abertura de retorno. Passe, por dentro da piscina, a abertura de retorno com o anel de fricção e a junta através do corte. Os pedaços do liner que aparecerem pela parte externa da piscina deverão ser cortados de uma forma limpa e rente. 4.1.2.
- Page 29 6.2. LIMPEZA DO FUNDO DA PISCINA Para a limpeza do fundo da piscina, pode utilizar o Skimmer de mochila com um de limpeza “Triangular" + tampa adaptação / AR-2062. Consulte o seu estabelecimento ou o Serviço de Pós-venda do fabricante da piscina para a sua aquisição. Utilize sempre reposições originais Uma mangueira com um comprimento superior ao necessário para chegar a todos os pontos da piscina dificulta a operação.
-
Page 30: Certificado De Garantia
CERTIFICADO DE GARANTIA CONDIÇÕES GERAIS 1.1. De acordo com estas disposições, o vendedor garante que, no momento da entrega, o produto GRE correspondente a esta garantia (“o Produto”) não apresenta nenhum tipo de falta de conformidade. 1.2. O Período de Garantia para o Produto é de dois (2) anos, contados a partir da data de entrega ao comprador. - Page 31 Model AR-125 ENGLISH CODE DESCRIPTION AR125 AR125S AR125M QUAN AR82 Filtering cartridge 20888G0003 Basket 20888G0200 Suction lid 20888G0002 Skimmer body lid 20888G0002 CL117 Skimmer body lid brown 30889G0500 Kit motor / Standard cable / Transformer 30889G050S Kit motor / Standard cable / Transformer...
- Page 32 ESPAÑOL CÓDIGO DENOMINACIÓN AR125 AR125S AR125M CANT. AR82 Cartucho para Filtro 20888G0003 Conjunto Cesto con Asa 20888G0200 Conjunto Tapa Aspiración 20888G0002 Tapa Skimmer 20888G0002 CL117 Tapa Skimmer Marron 30889G0500 Kit Motor / Cable standard / Transformador 30889G050S Kit Motor / Cable suizo / Transformador 20888G0100 Conjunto Compuerta 20888G0005...
- Page 33 DEUTSCH Artikel Nr. BESCHREIBUNG AR125 AR125 AR125M MENGE AR82 Deckel skimmerkörper 20888G0003 Ansaugdeckel 20888G0200 Filterkartusche 20888G0002 Korb 20888G0002 CL117 Korb braun 30889G0500 Transformator 30889G050S Transformator 20888G0100 Klappe 20888G0005 Doppelte Dichtung 20888G0500 Tüte mit Schrauben 20888G0600 Rahmen Skimmeröffnung + Zierblende 09928RG10 Einlaufduse 06667FP10 Schlüssel Düse...
- Page 34 NEEDERLAND CODE BESCHRIJVING AR125 AR125S AR125M AANTAL AR82 Filterpatroor 20888G0003 Tank 20888G0200 Zuigkap 20888G0002 Deksel Skimmerhuis 20888G0002 CL 117 Deksel Skimmerhuis bruin 30889G0500 Transformator 30889G050S Transformator 20888G0100 Klep 20888G0005 Dubbele waterdichte naad 20888G0500 Zakje schroven 20888G0600 Lijst Skimmeringang + Sierdeksel 09928RG10 Impuls nipple 06667FP10...
- Page 37 SACOPA, S.A.U. HANGING SKIMMER AR-125 PRODUCTS: SKIMMER DE MOCHILA AR-125 PRODUCTOS: SKIMMER HORS-BORD AR-125 PRODUITS: PRODUKTE: HÄNGEFILTER AR-125 PRODOTTI: FILTRO A PARETE AR-125 PRODUKTEN: HANGEND SKIMMER AR-125 PRODUTOS: SKIMMER DE MOCHILA AR-125 DECLARACION DE CONFORMIDAD DECLARATION OF CONFORMITY productos arriba...
- Page 38 • TECHNICAL CHARACTERISTICS • CARACTERISTICAS TECNICAS • CARACTERISTIQUES TECHNIQUES • TECHNISCHE ANGABEN • DATI TECNICI • TECHNISCHE GEGEVENS • CARACTERISTICAS TECNICAS AR-125 Ø184...
- Page 40 TECHNISCHE GEGEVENS • CARACTERISTICAS TECNICAS DESCRIPTION MODEL AR-125 Filtering speed / Velocidad de Filtración / Vitesse de Filtration Filtergeschwindigkeit / 3 m³/m²/h. Velocità di filtrazione / Filtreersnelheid / Velocidade de Filtração Flow rate / Débit / Caudal / Portada / Durchflußmenge / Debeit / Caudal 3,8 m³/h.
Need help?
Do you have a question about the AR-125 and is the answer not in the manual?
Questions and answers