Table of Contents
Advertisement
Available languages
Available languages
Quick Links
MASCHIO GASPARDO S.p.A.
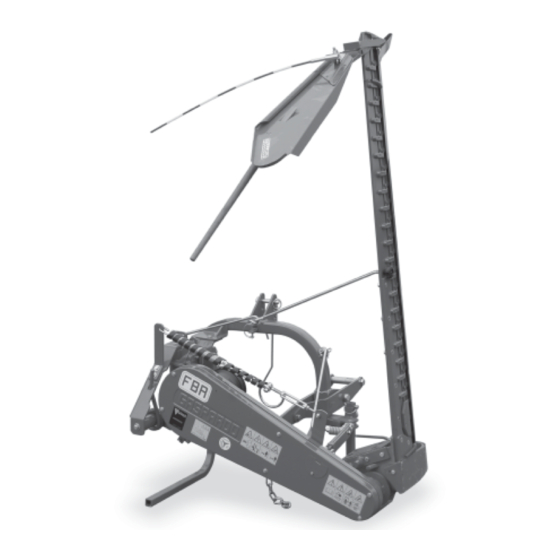
FBR Plus
IT
USO E MANUTENZIONE - PARTI DI RICAMBIO
EN
USE AND MAINTENANCE - SPARE PARTS
DE
GEBRAUCH UND WARTUNG - ERSATZTEILE
FR
EMPLOI ET ENTRETIEN - PIECES DETACHEES
ES
EMPLEO Y MANTENIMIENTO - PIEZAS DE REPUESTO
Cod. G19503010
2013-01
*)
*) Valido per Paesi UE
*) Valid for EU member countries
*) Valable dans les Pays UE
*) Gilt für EU-Mitgliedsländer
*) Válido para Países UE
Advertisement
Table of Contents

Related Manuals for Gaspardo FBR Plus


Summary of Contents for Gaspardo FBR Plus
- Page 1 MASCHIO GASPARDO S.p.A. FBR Plus USO E MANUTENZIONE - PARTI DI RICAMBIO USE AND MAINTENANCE - SPARE PARTS GEBRAUCH UND WARTUNG - ERSATZTEILE EMPLOI ET ENTRETIEN - PIECES DETACHEES EMPLEO Y MANTENIMIENTO - PIEZAS DE REPUESTO *) Valido per Paesi UE...
- Page 2 ITALIANO ENGLISH DEUTSCH INDICE INDEX INHALT Vorwort ..........45 Premessa ..........5 Foreword ..........25 Garanzia ..........5 Garantie ..........45 Warranty..........25 1.1.1 Verfall des garantieanspruchs ....45 1.1.1 Scadenza della garanzia ......5 1.1.1 When the warranty becomes void ..25 Identifi zierung ........45 Identifi cazione ........5 Identifi...
- Page 3 FRANÇAIS ESPAÑOL TABLES DE MATIERES INDICE Introduction ........65 Premisa ..........85 Garantie ..........65 Garantía ..........85 1.1.1 Expiration de la garantie ......65 1.1.1 Vencimiento de la garantía ....85 Identifi cation .........65 Identifi cación ........85 Description de la faucheuse ....66 Escripción de la segadora ....86 Donnes techniques ......66 Datos tecnicos ........86 Movimentation ........67...
- Page 4 cod. G19503010...
- Page 5 ENGLISH 1.0 FOREWORD 1.2 IDENTIFICATION Each individual machine has an identifi cation plate (Fig. 1) indica- ting the following details: This booklet describes the regulations for use, maintenance for the mower machine. This manual is an integral part of the product, 1) Mark and address of the Manufacturer;...
- Page 6 Fig. 4 1.4 TECHNICAL DATA U.M. FBR Plus Cutting arm lenght 1,45 1,75 2,05 2,35...
- Page 7 ENGLISH USE AND MAINTENANCE 1.5 HANDLING Fig. 5 During handling operations, use suitable personal protection gear: Overalls Gloves Shoes Goggles Ear defenders If the machine is handled, it must be lifted by hooking (Fig. 5) onto the appropriate holes with a suitable winch or crane of suffi cient capacity.
- Page 8 ENGLISH USE AND MAINTENANCE 1.7 DANGER AND INDICATOR SIGNALS The signs described are reproduced on the machine (Fig. 7). Keep them clean and replace them if they should come off or become illegible. Carefully read each description and learn their meanings 8) Danger of injury to the legs or the arms.
- Page 9 ENGLISH USE AND MAINTENANCE 2.0 SAFETY REGULATIONS AND ACCIDENT General norms Comply with the instructions given by the danger symbols in PREVENTION this handbook and affi xed to the mower. Never ever touch any moving part. Pay attention to danger signs, where shown, in this booklet. 3) Operations and adjustments to the implement must always be carried out when the engine is off and the tractor braked.
- Page 10 ENGLISH USE AND MAINTENANCE 28) Before leaving the tractor, lower the implement coupled to the lift unit, stop the engine, engage the hand brake, remove the ignition key from the control panel, cover the cutters and outer skid with the relative guards. Raise the mowing bar (transport protection) in compilance with the instructions given in this handbook.
- Page 11 ENGLISH USE AND MAINTENANCE 48) Before operating the mowing machine, check that the support struts (C and D, Fig.11) have been removed from underneath the implement. Make sure that the mower has been correctly mounted and adjusted. Check that the machine is in perfect order and that all components subjet to wear and deterioration are effi...
- Page 12 ENGLISH USE AND MAINTENANCE 3.0 USE INSTRUCTIONS Strictly comply with the following instructions to achieve the best performances. ATTENTION It is absolutely essential to disengage the tractor pto, lower the mowing machine, switch off the tractor, ensure that this is at a complete standstill and remove the key before servicing, adjusting or preparating the implement for work.
- Page 13 ENGLISH USE AND MAINTENANCE 3.0.2 SETTING-UP THE MOWING MACHINE For transport requirements, the mowers are sent with the cutting unit removed from the frame. After the two parts have been put back together, it is important to check carefully that all the screws are tightened correctly (Fig. 12) after the fi...
- Page 14 ENGLISH USE AND MAINTENANCE 3.0.4 CARDAN SHAFT ADAPTION 3.0.5 STABILITY OF MOWER AND TRACTOR DURING The Cardan shaft, supplied with the machine, is of standard leng- TRANSPORT th. Therefore it might be necessary to adapt the Cardan shaft. In When a mower is coupled to a tractor, so becoming an integral part that case, before doing anything, consult the Manufacturer for the of it for the purposes of road travel, the stability of the mower-tractor eventual adaptation.
- Page 15 ENGLISH USE AND MAINTENANCE Fig. 20 Fig. 19 3.0.6 ADAPTING THE MOWING BAR Fig. 21 To ensure optium use, the mowing bar must completely project from the tractor (Fig. 19); threee situations are shown in the Fi- gures (20): - hitching to a tractor normally used for mowing jobs (K1, Fig. 20);...
- Page 16 ENGLISH USE AND MAINTENANCE - Adjusting the hoisting chain (N, Fig. 24) so that during mowing Fig. 24 the hoisting arm (O, Fig. 24) is free to move up and down; in this way, the cutting arm can follow any unevenness of the ground. So that the mower will work well, we advise you to fi...
- Page 17 ENGLISH USE AND MAINTENANCE MOWING - Remove support (C and D, Fig. 28) and remount them, upside- down in their seat . - Remove tie rod (A, Fig. 29) from the cutting arm and secure it in its seat. - Remove safety hook (B1, Fig. 28), required only for transportation, and fi...
- Page 18 ENGLISH USE AND MAINTENANCE 4.0 MAINTENANCE Fig. 32 The various servicing operations are listed in the following para- graphs. Lower running costs and longer machine life depend on constant and methodical compliance with these operations. The maintenance periods listed in this booklet are only indi- cative and are for on normal conditions on use, therefore be varied depending the kind of service, the more or less dusty surroundings, seasonal factors, etc.
- Page 19 ENGLISH USE AND MAINTENANCE CLEANING AND OILING THE CUTTERS DANGER Mowing bar cleaning and oiling are very dangerous poerations. Always comply with the following instructions: - Lift the implement by means of the lift links in a fl at place where it cannot slip;...
- Page 20 ENGLISH USE AND MAINTENANCE CHECKING THE CLEARANCE BETWEEN THE TOOTH AND THE Fig. 37 UPPER BLADE GUIDE Before activating the mower, one must periodically check that the blade holder rod (D, Fig. 37) and the upper blade guides (E) are coupled properly.
- Page 21 ENGLISH USE AND MAINTENANCE Fig. 43 Fig. 42 4.2 EXTRA MAINTENANCE During all maintenance operations on moving parts, it is im- portant to grease all the points indicated in fi gure 32 before starting the machine. 4.2.1 REPLACING THE CUTTING BLADES ATTENTION The expansion pins must be reassembled as shown in Figure 42 (V), by tightening the screw and the conical nut with a torque...
- Page 22 ENGLISH USE AND MAINTENANCE 4.2.2 REPLACEMENT OF BELTS - Unscrew the screws (M, Fig. 47) and remove the protective casing. - Loosen the belt tensioner completely (N, Fig. 47). - Replace the worn belts with new ones. - Put these at the optimum tension using the belt tensioner. Belt play should not exceed 2 centimetres.
- Page 23 ENGLISH USE AND MAINTENANCE 5.0 ROAD TRANSPORT For transport, adjust and fi x the chains of the side lifting arms of the tractor; lift the mowing bar (Fig. 49); secure it with the hooking tie rod (Q, Fig. 50); slide in the safety hook (R, Fig. 50); cover the cutting blades and the outer mowing bar support with the guards provided (Fig.
- Page 24 cod. G19503010...
- Page 25 ESPAÑOL 1.0 PREMISA 1.2 IDENTIFICACIÓN Cada equipo está provisto de una tarjeta de identifi cación (Fig.1), en la que se encuentran: Este opúsculo describe las normas de manejo, mantenimiento para la segadora. El presente manual constituye parte integrante del pro- Marca y dirección del Fabricante.
- Page 26 Fig. 4 1.4 DATOS TECNICOS U.M. FBR Plus Longitud barra 1,45 1,75 2,05 2,35...
- Page 27 ESPAÑOL EMPLEO Y MANTENIMIENTO 1.5 MANIPULACIÓN Fig. 5 Durante los trabajos de mantenimiento, utilice los elementos de protección personal adecuados: Mono Guantes Zapatos Gafas Protecciones auditivas En caso de manipulación de la máquina, se precisa elevar la misma enganchándola a los ganchos al efecto (Fig. 5) mediante aparejo o grúa idóneos con sufi...
- Page 28 ESPAÑOL EMPLEO Y MANTENIMIENTO 1.7 SEÑALES DE SEGURIDAD Y DE INDICACION Las señales descritas están colocadas en la máquina (Fig. 7). Man- Permanecer alejados del radio de acción de la máquina. tenerlas limpias y reemplazarlas si se desprenden o se vuelven 8) Peligro para los miembros con barre.
- Page 29 ESPAÑOL EMPLEO Y MANTENIMIENTO 2.0 NORMAS DE SEGURIDAD Y PREVENCIÓN Normas generales 1) Prestar atención a los símbolos de peligro expuestos en este CONTRA LOS ACCIDENTES manual y presentes en la segadora. 2) No tocar jamás las partes en movimiento. Tener cuidado a las señales de peligro que se indican en este 3) Reparaciones y regulaciones sobre la máquina se deben siem- opúsculo.
- Page 30 ESPAÑOL EMPLEO Y MANTENIMIENTO 27) Está termimantemente prohibido usar el equipo sin las pro- tecciones. 28) Antes de abandonar el tractor, bajar el equipo enganchado al grupo elevador, detener el motor, inserir el freno de estacio- namiento, quitar la llave de encendido del tablero de mandos, cubrir las hojas de las cuchillas y la galga externa con las relativas protecciones, alzar la barra segadora (posición de transporte), siguiendo las indicaciones expuestas en este...
- Page 31 ESPAÑOL EMPLEO Y MANTENIMIENTO 47) Los desplazamientos fuera de la zona de trabajo se deben realizar con el equipo en posición de transporte. 48) Antes de poner en función la segadora controlar que se hayan quitado de abajo de la segadora los pilares de sostén (C y D, fi...
- Page 32 ESPAÑOL EMPLEO Y MANTENIMIENTO 3.0 NORMAS DE USO Para obtener las mejores prestaciones del equipo, seguir las siguientes instrucciones. ATENCION Todas las operaciones operaciones de manutención, regulación y preparación para el trabajo deben realizarse indefectible- mente con la toma de fuerza del tractor desacoplada, la segadora baja, el tractor apagado y completamente parado y sin la llave de contacto.
- Page 33 ESPAÑOL EMPLEO Y MANTENIMIENTO 3.0.2 PREPARACIÓN DE LA SEGADORA Por razones de transporte, las segadoras se envían con el grupo de corte desmontado del bastidor. Tras el montaje de las dos par- tes, se aconseja controlar el apriete de todos los tornillos (Fig. 12) transcurridas las primeras 4÷6 horas de trabajo.
- Page 34 ESPAÑOL EMPLEO Y MANTENIMIENTO 3.0.4 ADAPTACIÓN ÁRBOL CARDÁNICO 3.0.5 ESTABILIDAD DURANTE EL TRANSPORTE DE LA El árbol cardán, provisto junto con la máquina, tiene una longitud SEGADORA -TRACTOR estándar; por lo tanto, es posible que haya que adaptarlo. En Cuando una segadora se acopla a un tractor, convirtiéndose así este caso antes de intervenir sobre el árbol cardán, consultar el en parte integrante del mismo para la circulación por la vía pública, Fabricante del mismo para la eventual adaptación.
- Page 35 ESPAÑOL EMPLEO Y MANTENIMIENTO Fig. 20 Fig. 19 3.0.6 ADAPTACIÓN DE LA BARRE SEGADORA Fig. 21 Para lograr un empleo optimal de la barra segadora la misma debe sobresalir totalmente del contorno del tractor (Fig. 19); en las Figuras 20 se representan: - aplicación con tractor usado normalmente para la siega (K1, Fig.
- Page 36 ESPAÑOL EMPLEO Y MANTENIMIENTO - Regular la cadena (P, Fig. 24) de modo que, durante la siega, Fig. 24 el brazo de levantamiento (O, Fig. 24) sea lo bastante libre para oscilar, a fi n de consentir a la barra de seguir eventuales esca- brosidades del terreno.
- Page 37 ESPAÑOL EMPLEO Y MANTENIMIENTO SIEGA - Quitar los tirantes de soporte (C y D, Fig. 28) y volverlos a montar al revés en sus asientos. - Desenganchar el tirante (A, Fig. 29) de la barra y fi jarlo en su asiento. - Quitar el gancho de seguridad (B1, Fig.
- Page 38 ESPAÑOL EMPLEO Y MANTENIMIENTO 4.0 MANTENIMIENTO Fig. 32 Se enumeran a continuación las operaciones de mantenimiento que debemos efectuar periódicamente. El menor costo de ejercicio y la durabilidad de la máquina dependen de la metódica y constante observación de dichas normas. Los tiempos de intervención mencionados en este opúsculo tienen sólo carácter informativo y se refi...
- Page 39 ESPAÑOL EMPLEO Y MANTENIMIENTO LIMPIEZA Y ACEITADO DE LAS HOJAS PERICOLO La limpieza y el aceitado de la barra segadora es una opera- ción muy peligrosa. Efectuarla siempre siguiendo las siguientes instrucciones: - Alzar el equipo mediante las barras de elevación en un lugar plano y no resbaladizo;...
- Page 40 ESPAÑOL EMPLEO Y MANTENIMIENTO CONTROL DE LA HOLGURA ENTRE EL DIENTE Y EL GUÍA- Fig. 37 CUCHILLA SUPERIOR Antes de accionar la segadora es necesario controlar periódica- mente el acoplamiento correcto entre la barra porta dientes (D, Fig. 37) y los guía-cuchillas superiores (E). Tras un largo período de trabajo se pueden presentar fenómenos de desgaste del material de la guía de la hoja, produciendo un aumento de la tolerancia de acoplamiento con la varilla porta-...
- Page 41 ESPAÑOL EMPLEO Y MANTENIMIENTO Fig. 43 Fig. 42 4.2 MANTENIMIENTO EXTRAORDINARIO En todos los casos de mantenimiento de las partes de movi- miento, es importante engrasar todos los puntos indicados en la fi gura 32 antes de poner en funcionamiento la máquina. 4.2.1 SUSTITUCIÓN DE LAS CUCHILLAS DE CORTE ATENCIÓN Los pernos de expansión se deben volver a montar como...
- Page 42 ESPAÑOL EMPLEO Y MANTENIMIENTO 4.2.2 SUSTITUCIÓN DE LAS CORREAS - Desenrosque los tornillos (M, Fig. 47) y quite el cárter de pro- tección. - Afl oje completamente el tensor de correa (N, Fig. 47). - Sustituya las correas gastadas con correas nuevas. - Restablezca la tensión justa de las correas por medio del tensor de correas.
- Page 43 ESPAÑOL EMPLEO Y MANTENIMIENTO 5.0 TRANSPORTE POR LA VÍA PÚBLICA Para el transporte, regule y fi je las cadenas de los brazos late- rales de elevación del tractor; levante la barra de corte (Fig. 49); asegúrela con el tirante de enganche (Q, Fig. 50); introduzca el gancho de seguridad (R, Fig.
- Page 44 MONTAGGIO - ASSEMBLY - MONTAGE - MONTAGE - MONTAJE 7.0 MONTAGGIO Questo capitolo descrive le fasi di assemblaggio di una falciatrice imballata in cassa. Durante le operazioni di movimentazione, assemblaggio e successivamente di uso e manutenzione, utilizzare gli idonei dispositivi di protezione individuale (A): obbligo di indossare indumenti adeguati e protezioni indicate.
- Page 45 TIPO - TYPE - TYP TYPE - TIPO (cm - inch) (cm - inch) (cm - inch) (kg - lb) FBR Plus 175 (X2) 234 - 92 70 - 27.5 74 - 29 520 - 1145 FBR Plus 205 (X2) 234 - 92 70 - 27.5...
- Page 46 MONTAGGIO - ASSEMBLY - MONTAGE - MONTAGE - MONTAJE COMPONENTI DI UNA FALCIATRICE - MOWER COMPONENTS BAUTEILE EINER MÄHMASCHINE - COMPOSANTS D’UNE FAUCHEUSE COMPONENTES DE UNA SEGADORA cod. G19503010...
- Page 47 MONTAGGIO - ASSEMBLY - MONTAGE - MONTAGE - MONTAJE Sollevamento meccanico Sollevamento oleodinamico Mechanical lifting Hydraulic lifting Mechanische Aushebung Hydraulische Aushebung Relevage mécanique Relevage hydraulique Elevación mecánica Elevación hidráulica 1) TELAIO TERZO PUNTO. 1) CHÂSSIS TROISIÈME POINT. 2) PUNTELLOLATERALE. 2) ÉTRÉSILLON LATÉRAL 3) CUFFIA PRESA DI POTENZA.
- Page 48 MONTAGGIO - ASSEMBLY - MONTAGE - MONTAGE - MONTAJE M8 x 16 cod. G19503010...
- Page 49 MONTAGGIO - ASSEMBLY - MONTAGE - MONTAGE - MONTAJE M12 x 35 cod. G19503010...
- Page 50 MONTAGGIO - ASSEMBLY - MONTAGE - MONTAGE - MONTAJE M10 x 25 M10 x 25 M12 x 60 (x4) M10 x 60 ATTENTION L’inserimento delle bussole (A), per il fi ssaggio delle lame, dev’essere libero da interferenze, quindi deve avvenire senza l’ausilio di attrezzature! The bushing insertion (A), for fastening of blades, must be free from interfer- ence, so it must be done without the aid of equipment! ...
- Page 51 MONTAGGIO - ASSEMBLY - MONTAGE - MONTAGE - MONTAJE Non serrare a fondo il dado di fi ssaggio (A) dell’andana: permettere il corretto movimento della stessa. Do not tighten securing nut (A) on the moving guide completely: allow for proper movement of the guide. Die Feststellmutter (A) des Schwades nicht bis zum Anschlag festziehen: er Schwad muss sich korrekt bewegen...
- Page 52 MONTAGGIO - ASSEMBLY - MONTAGE - MONTAGE - MONTAJE 11.0 M16 x40 L. 154 M12 x40 M20 x200 cod. G19503010...
Need help?
Do you have a question about the FBR Plus and is the answer not in the manual?
Questions and answers
dopo aver cambitato corpo falciante nuovo della FBR si surriscalda il corpo falciante a 20 centimetri dall'attacco