Table of Contents
Advertisement
Quick Links
Oniris
F127
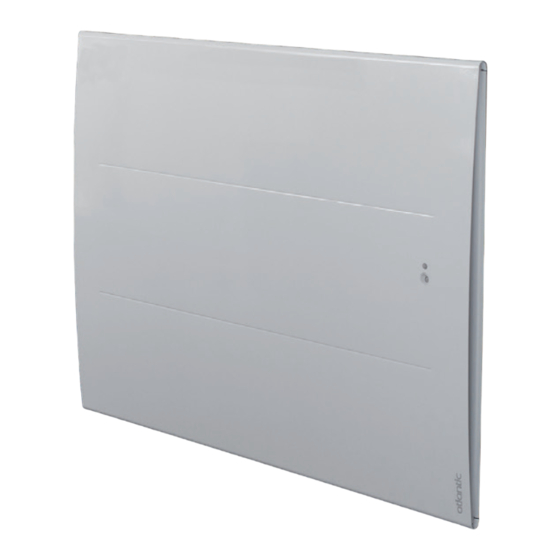
SLIM-LINE DESIGNER RADIATOR WITH SMART
QUALITY ACTIVE HEAT CONVECTOR
ENERGY-SAVING FUNCTIONS
WITH USER-FRIENDLY CONTROLS
All electrical appliances produced for the Company are guaranteed for one year against faulty material or workmanship. This applies only if the appliance has
All electrical appliances produced for the Company are guaranteed for one year against faulty material or workmanship. This applies only if the appliance has
been used for purposes in accordance with the instructions provided and has not been connected to an unsuitable electricity supply, or subject to misuse, neglect,
been used for purposes in accordance with the instructions provided and has not been connected to an unsuitable electricity supply, or subject to misuse, neglect,
damage or modified or repaired by any person not authorised by the Company. This guarantee is o ered to you as an extra benefit and does not a ect your legal
damage or modified or repaired by any person not authorised by the Company. This guarantee is o ered to you as an extra benefit and does not a ect your legal
rights. The correct electricity supply voltage is shown on the rating label attached to the appliance. Reasonable care has been taken to ensure that this guide is
rights. The correct electricity supply voltage is shown on the rating label attached to the appliance. Reasonable care has been taken to ensure that this guide is
accurate at the time of printing. In the interest of progress the Company reserve the right to vary specifications from time to time without notice.
accurate at the time of printing. In the interest of progress the Company reserve the right to vary specifications from time to time without notice.
1
Advertisement
Table of Contents

Related Manuals for Atlantic Oniris RAF3P-i2g


Summary of Contents for Atlantic Oniris RAF3P-i2g
- Page 1 Oniris F127 SLIM-LINE DESIGNER RADIATOR WITH SMART QUALITY ACTIVE HEAT CONVECTOR ENERGY-SAVING FUNCTIONS WITH USER-FRIENDLY CONTROLS All electrical appliances produced for the Company are guaranteed for one year against faulty material or workmanship. This applies only if the appliance has All electrical appliances produced for the Company are guaranteed for one year against faulty material or workmanship.
-
Page 2: Table Of Contents
Contents Horizontal (RAF3H-i2g) / Vertical (RAF3V-i2g) / Plinth (RAF3P-i2g) Models Warning Declaration of Conformity - Directive RED 2014/53/EU 1- INSTALLING THE APPLIANCE 1.1- Installing the appliance 1.2 - Mounting the wall bracket 1.3 - Connecting the radiator 1.4 - Locking the appliance on its wall bracket 1.5 - Maintenance 2 - OPERATION 2.1 - The control unit... -
Page 3: Warning P
WARNING - Caution very hot surface. CAUTION: Some parts of this product can become very hot and cause burns. Particular attention is required when children and dependent individuals are present. Children under 3 must be kept away from this appliance, unless they are under constant supervision. Children between the ages of 3 and 8 must only turn the appliance on or off provided that the appliance has been positioned or installed in a normal intended position and provided that the children are supervised or have been instructed with respect to the safe use of the appliance and... -
Page 4: Declaration Of Conformity - Directive Red 2014/53/Eu P
DECLARATION OF CONFORMITY DIRECTIVE RED 2014/53/EU Thermor Pacific hereby declares that the equipment referred to hereafter is compliant with the essential requirements of directive RED 2014/53/EU. The EU declaration of conformity completed for this equipment is available on request from our after-sales department (the address and telephone number are provided at the end of the manual). -
Page 5: 1- Installing The Appliance
1- INSTALLING THE APPLIANCE 1.1- Installing the appliance Your appliance is delivered with its own wall bracket. However, the choice of screws and of wall plugs depends on the nature of your wall and you are responsible for ensuring that you use screws and wall plugs that are adapted to the weight of the appliance. -
Page 6: Mounting The Wall Bracket
Do not install the appliance: In an air current that is likely to interfere with its adjustment (under a Centralised Mechanical Ventilation system, etc.). Under a fixed electric socket. In bathroom areas shown as 'Volume 1' in the above diagram. Appliances used in bathrooms must be installed so that the switches and other devices for controlling the appliance cannot be touched by an individual in the bath or the shower. -
Page 7: Connecting The Radiator
Re-mount the wall bracket by matching up the drilling points A with the lower holes on the wall bracket. Mark the 2 drilling points B with a pen. Step 3 Drill the 4 holes and insert wall plugs that are adapted to your wall (e.g. plasterboard, concrete). Position and screw in the wall bracket. -
Page 8: Operation
In order to maintain the performance levels of your radiator, dust needs to be removed from the lower and upper grills of the appliance approximately two times per year using a vacuum cleaner or a brush. The appliance can be cleaned using a damp cloth; never use abrasive products and solvents. In a polluted environment, dirt can appear on the appliance's grill. -
Page 9: The Switch
The control unit can be locked to prevent it from being unintentionally handled. To lock the control unit, press together for 5 seconds. Perform the same operation to unlock the control unit. 2.4 - The switch An On/Off switch is located behind the appliance. Only use this switch for an extended shut-down period (outside the heating periods). -
Page 10: Connectivity
3 - CONNECTIVITY Before performing any action, illuminate the screen by pressing any key. This menu grants access to the configurations for Connectivities. Our units are compatible with iO-homecontrol®. This highly secure wireless radio communication technology is integrated in a wide range of household equipment proposed by home specialist partner brands. - Page 11 Appliance 1 Appliance 2 Appliance 1 Wait for next display Appliances 1 2 3 Appliance 1 Appliance 3 or wait a few minutes to return to the initial screen Display the paired appliances: You can view the appliances that you have paired. Delete pairing: This operation deletes all the connections between the appliances.
-
Page 12: Adjusting The Temperature
iOS and Android compatible Cozytouch Bridge. Internet access unit. Cozytouch App. Sold by our brand distributors Available as a free download or on our website. from the App Store or from the Google Store. This installation allows you to remotely control, program and check your appliance(s) using a smartphone or a tablet. -
Page 13: Operating Modes
A period of at least 6 hours needs to elapse for the temperature to stabilise. It is possible, depending on your installation, that you will record a temperature that differs from that displayed on your appliance. In this case, refer to the "Expert Mode" - "T° Calibration" chapter. Frost Protection Position (Plinth version without Auto Mode) Use this function when you are absent for more than 48 hours. - Page 14 The appliance: • records your weekly lifestyle and any changes to your lifestyle in order to implement its own programming; • anticipates heating so that the room is at the correct temperature upon your return; • detects any unforeseen periods of presence and absence in order to automatically adjust the temperature;...
-
Page 15: Basic Mode
Anticipation time To optimally anticipate heating up before you return, your appliance learns and stores the heating-up time according to the characteristics of your room (volume, insulation, outside temperature, etc.). Energy savings Your appliance notifies you of any savings that have been made by showing the amount of time it has taken to reduce the temperature over the past 7 days. - Page 16 The appliance adheres to the instructions from the external programming system for your installation through a pilot wire link or an radio link. To control one or more of the appliance(s) from an control point outside your installation, then: 1) Exchange the security key before making the connection from the control point. To this end, access "Menu, Expert, Configurations, Connectivities, Send security key or Receive security key"...
- Page 17 5.3.2 - Functions accessible in Prog Mode Temperature reduction Allows the reduction level to be adjusted for the temperature that you desire outside the Comfort periods (from -2°C to -9°C). By default, it is set to -3.5° C (if the setpoint temperature is set to 19°C, then, outside the Comfort periods, it will reduce to 15.5°C).
-
Page 18: Detection Functions
Allows any unforeseen presence to be managed. For example: for Monday you programmed a Comfort temperature period from 17:00 hrs to 23:00 hrs. You return at 15:00 hrs and the appliance displays an Eco temperature. You can manually increase the temperature. One-off bypassing is active up until the next Comfort temperature period that is defined in the program. -
Page 19: Presence (Not Available On Low Height Version) P
If the appliances are paired, you can deactivate the open window detection of a single appliance without deactivating the others (refer to the "Configurations" chapter in the "Expert Menu"). 6.2 - Presence (not available on Plinth version) Allows your room to be heated only when someone is present. -
Page 20: Expert Mode
I leave I return After ½ hour I switch to My presence is detected comfort mode -1° and I switch back to comfort mode After another ½ hour I switch to comfort mode -2° 7 - EXPERT MODE Before performing any action, illuminate the screen by pressing any key. This menu grants access to the appliance's advanced functions. - Page 21 The calibration value is between -3°C and +3°C. For example: the temperature displayed on your radiator is 20°C. The temperature displayed on your thermometer is 18°C => select the calibration value -2°C. Window If paired, allows the open window detection detection function to be deactivated on this appliance only.
-
Page 22: Power Cut-Off
Makes existing pairing inoperative if the security key is not transmitted to the other pairs. Authorise Following key exchange, this operation is connection required to enable connection to an iO control point that is not part of our brand. Reset Deletes all connectivities (pairing of Connectivities appliances, connection to the app, connection... - Page 23 Problems Check to be undertaken encountered The control unit screen Check that the switch located behind or on the side of the appliance is does not turn on. in the I position. Check that the appliance is correctly powered. The radiator does not If you have accessed programming, check that the programming is set heat up.
-
Page 24: Identification Of The Appliance
instructions from the Instructions Oscilloscope Ref./ Mode obtained pilot wire. received Neutral 0 Volt COMFORT 230 V COMFORT – 1° C 3 s/5 min 230 V COMFORT – 2° C 7 s/5 min 230 V – 115 V negative FROST PROTECTION + 115 V positive STOP HEATING... - Page 28 Kingston Upon Hull, HU5 4JN Atlantic Heat is part of Ideal Boilers Limited. Ideal Boilers Ltd. pursues a policy of continuing improvement in the design and performance of its products. The right is therefore reserved to vary specification without notice.
Need help?
Do you have a question about the Oniris RAF3P-i2g and is the answer not in the manual?
Questions and answers