Table of Contents
Advertisement
Available languages
Available languages
Quick Links
NOTICE D'UTILISATION ET D'INSTALLATION
Installation and operating manual / Gebruiks- en installatiehandleiding / Manual do usario e de Instalação
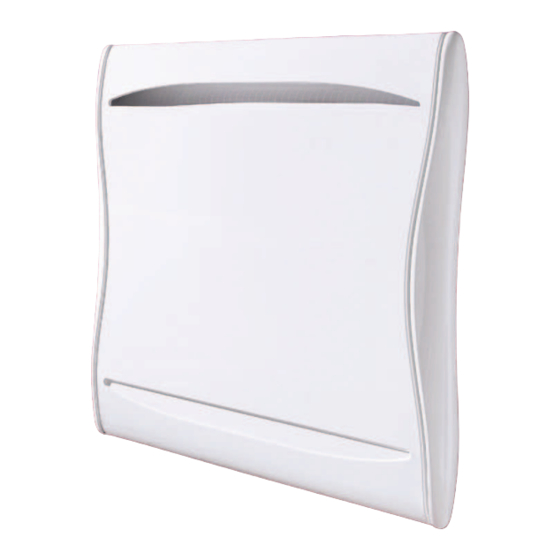
ALCOVE
RADIATEUR À INERTIE
CORPS DE CHAUFFE FONTE
Inertia radiator / cast iron heating element
Radiator met inertie/ Gietijzeren verwarmingselement
Radiador de inércia / corpo de aquacimento em ferro fundido
F
GB
NL
P
GUIDE À CONSERVER
PAR L'UTILISATEUR
Manuel must be kept by end user
Gids te bewaren door de gebruiker
Guia a conservar pelo usario
Advertisement
Chapters
Table of Contents

Related Manuals for Atlantic Alcove


Summary of Contents for Atlantic Alcove
- Page 1 NOTICE D’UTILISATION ET D’INSTALLATION Installation and operating manual / Gebruiks- en installatiehandleiding / Manual do usario e de Instalação ALCOVE RADIATEUR À INERTIE CORPS DE CHAUFFE FONTE Inertia radiator / cast iron heating element Radiator met inertie/ Gietijzeren verwarmingselement Radiador de inércia / corpo de aquacimento em ferro fundido GUIDE À...
-
Page 2: Table Of Contents
NOTICE D’INSTALLATION ET D’UTILISATION DU RADIATEUR (type RMG2-T1S) Sommaire 1 - Composition de l’appareil page 2 2 - Installation de votre appareil page 2 3 - Le boîtier de commande page 4 4 - Chauffer votre pièce page 5 5 - Les modes de chauffage - Quand les utiliser ? page 5 6 - Programmation de votre radiateur page 6... -
Page 3: Composition De L'appareil
Nous vous remercions d’avoir choisi cet appareil et de nous avoir ainsi témoigné votre confi ance. Le radiateur que vous venez d’acquérir a été soumis à de nombreux tests et contrôles afi n d’en assurer la meilleure qualité et ainsi vous apporter une entière satisfaction. Quelques conseils : Lisez la notice avant de commencer l’installation de l’appareil afi... - Page 4 2.2 - Fixer le support mural au mur Remontez le support mural en faisant coïncider les Posez le support mural au sol. Repérez les points précédemment repérés avec les trous de points de perçage A. Ceux-ci donnent la perçage A. position des fixations inférieures.
-
Page 5: Le Boîtier De Commande
Dans ce cas, pour vérifi er la transmission correcte des ordres de programmation, procédez aux vérifi cations suivantes : Absence de 230V pendant 230V pendant Ordres reçus 230V -115V négative +115V positive courant Signal à transmettre ARRET Mode obtenu CONFORT CONFORT -1°C CONFORT -2°C HORS GEL CHAUFFAGE-... -
Page 6: Chauffer Votre Pièce
4 - Chauffer votre pièce Ce que vous devez faire pour Ce que vous voulez faire Ce qui va se passer l’obtenir L’écran s’allume et indique la tem- Appuyez quelques instants sur la Mettre en route le radiateur pérature du mode confort ( ) par touche défaut... -
Page 7: Programmation De Votre Radiateur
Ce que vous devez faire pour Ce que vous voulez faire Ce qui va se passer l’obtenir La température évolue par pas de Appuyez sur les touches 0,5°C, elle clignote. Choisir la température de Arrêtez-vous à la température souhai- consigne ECO. La température choisie s’affi... -
Page 8: Fonction Aération
8 - Fonction aération Pour éviter de gaspiller de l’énergie, un régime mini doit être appliqué lorsqu’on aère les pièces. Votre appareil dispose d’une touche à accès direct pour vous faciliter cette démarche. Ce que vous devez faire pour Ce que vous voulez faire Ce qui va se passer l’obtenir Avant d’ouvrir la fenêtre, appuyez sur... - Page 9 Problèmes rencontrés Vérifi cation a faire Augmentez la température de consigne Confort. Si le réglage est au maximum, faîtes les vérifi cations suivantes : -Vérifi ez si un autre mode de chauffage existe dans la pièce. - Assurez-vous que votre radiateur ne chauffe que la pièce (porte fermée). Le radiateur ne chauffe pas assez - Faîtes vérifi...
- Page 10 RADIATOR INSTALLATION AND USER’S GUIDE (model RMG2-T1 S) Contents 1 - Device Composition page 2 2 - Installing your Device page 2 3 - Controls page 4 4 - Heating Your Room page 5 5 - Heating Modes - When to Use Them page 5 6 - Programming Your Radiator page 6...
-
Page 11: Device Composition
Thank you for having chosen this device and placing your confi dence in us. The radiator you have just acqui- red has been vigorously tested and inspected in order to insure the best quality and provide you with complete satisfaction. Some Advice: Read the Guide before starting installation in order to comply with regulatory requirements. - Page 12 2.2 - Attach the Wall Bracket to the Wall Drilling Points B Drilling Points A Drilling Points A Place the wall bracket with the previously identifi ed Place the wall support on the ground. Iden- points coinciding with drilling holes A. tify drilling points A.
-
Page 13: Controls
In this case, to check that the scheduling orders are correctly transmitted, conduct the following checks: Orders 230V for 3s 230V for 7s 230V -115V negative +115V positive Received power Signal to transmit LOAD FREEZE Mode Obtained COMFORT COMFORT -1°C COMFORT -2°C SHEDDING PROTECTION HEATING STOP... -
Page 14: Heating Your Room
4 - Heating Your Room What you want to do What you need to do so What will happen The screen lights up and displays the Start comfort mode temperature ( ) by Press and hold the keys. the radiator default The screen displays the current mode Activate the screen in... -
Page 15: Programming Your Radiator
What you want to do What you need to do so What will happen The temperature moves in increments Press the keys. of 0.5°C and fl ashes. Choose the set temperature for ECO mode. Stop on the desired temperature and The temperature chosen is displayed. -
Page 16: If You Have A Load Shedding Device
8- Ventilation Functions To prevent wasting energy the device must be correctly setup when ventilating rooms. Your device has a direct access button to facilitate this procedure. What you want to do What you need to do so What will happen icon is displayed on the Before opening the window, press the Activate the Ventilation... - Page 17 Problem Encountered Perform Check Increase the set temperature for Comfort. If the setting is at maximum, perform the following checks: - Check whether another heating mode exists in the room. The radiator does not heat - Ensure that the radiator is only heating the room (door closed). enough - Have the device’s power supply voltage checked.
- Page 18 La durée de garantie est de 2 ans à compter de la date d’installation ou d’achat et ne saurait excéder 30 mois à partir de la date de fabrication en l’absence de justificatif. Atlantic assure l’échange ou la fourniture des pièces reconnues défectueuses à l’exclusion de tous dommages et intérêts.
Need help?
Do you have a question about the Alcove and is the answer not in the manual?
Questions and answers