Subscribe to Our Youtube Channel
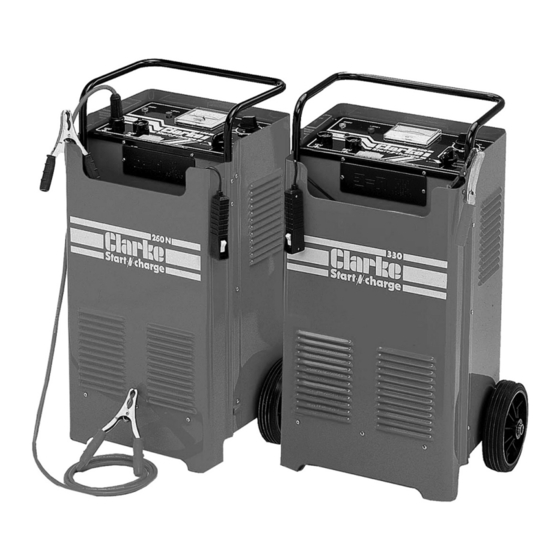
Summary of Contents for Clarke Start-N-Charge BC260N
- Page 1 HEAVY DUTY BATTERY STARTERS/CHARGERS MODEL NO: IBC260N & BC335 PART NO: 6225053 & 6235055 OPERATION & MAINTENANCE INSTRUCTIONS ORIGINAL INSTRUCTIONS GC1018 - ISS 4...
-
Page 2: Environmental Recycling Policy
Battery Charger will give you long and satisfactory service. GUARANTEE This CLARKE product is guaranteed against faulty manufacture for a period of 12 months from the date of purchase. Please keep your receipt as proof of purchase. -
Page 3: Safety Precautions
6. Never touch the negative and positive leads together. 7. Never attempt any repairs yourself. If you have a problem with your charger contact your local Clarke dealer or contact Service@Clarkeinternational.com 8. When charging is completed, ensure that the vehicle battery leads are secured to the proper terminals which should be clean, and lightly smeared with petroleum jelly to prevent corrosion. -
Page 4: Electrical Connections
ELECTRICAL CONNECTIONS WARNING! READ THESE ELECTRICAL SAFETY INSTRUCTIONS THOROUGHLY BEFORE CONNECTING THE PRODUCT TO THE MAINS SUPPLY. Connect the three core mains lead to a suitable industrial supply isolator, or heavy duty plug. These chargers must be connected to a supply having a rated capacity of greater than 13 Amps. - Page 5 OVERVIEW Timer Control Knob Mains Indicator Lamp Current Control Knob Thermal Overload Indicator C 12V Positive Terminal Ammeter D 24V Positive Terminal Fuse Parts & Service: 020 8988 7400 / E-mail: Parts@clarkeinternational.com or Service@clarkeinternational.com...
-
Page 6: Procedure For Normal Charging
PROCEDURE FOR NORMAL CHARGING NOTE: All references in brackets refer to Fig. 1 1. Before charging or boosting, ensure that the cells are filled with electrolyte to the correct level by adding distilled water where necessary. 2. Where appropriate we recommend that the non-earthed lead on the battery is disconnected prior to charging. -
Page 7: Procedure For Engine Starting
CHARGING WITH TIMER 1. Follow the same instructions as for Normal Charging up to and including para. 6. 2. Turn the timer control knob (A) clockwise to the desired charging time setting. 3. Switch ON the mains supply. 4. Turn the Current Control Knob (B) clockwise to position 5 or 6, to obtain the desired charging rate as indicated on the ammeter. - Page 8 then wait for at least 30 seconds before retrying. Failure to follow this procedure may cause damage to some electronic equipment on the vehicle and may also damage the battery and the Start ‘N’ Charge unit, which could invalidate your guarantee. 6.
-
Page 9: Troubleshooting
TROUBLESHOOTING Problem Cause Solution Battery does not Lack of AC input power. Make sure that the charger charge is plugged into AC outlet and the POWER LED is lit. Faulty connections to Unplug the charger and battery terminals. check the battery connection;... - Page 10 COMPONENT PARTS BC260N Parts & Service: 020 8988 7400 / E-mail: Parts@clarkeinternational.com or Service@clarkeinternational.com...
- Page 11 COMPONENT PARTS BC260N ESCRIPTION Switch Knob EM21690015 Switch 12A EM22205133 Timer 16a 250V EM22215001 Timer knob EM21690034 Upper control panel EM33710273 Ammeter 50A/Start EM22600027 Front frame EM21690322 Rectifier Pms 20/2/2 EM22400045 Thermostat 1004 & support EM04600113 PC board for remote control EM22700001 Input cable 3x2.5 M2.5 EM20220020...
- Page 12 COMPONENT PARTS BC335 Parts & Service: 020 8988 7400 / E-mail: Parts@clarkeinternational.com or Service@clarkeinternational.com...
- Page 13 COMPONENT PARTS BC335 ESCRIPTION Switch Knob EM21690015 Switch 12A EM22205133 Timer 16a 250V EM22215001 Timer knob EM21690034 Upper control panel EM33710285 Ammeter 50A EM22600050 Front frame EM21690322 Rectifier Pms 20/2/2 EM22400011 Thermostat & support EM04600113 Auxiliary transformer EM44140049 Input cable 3x2.5 M2.5 EM20220020 Contactor EM22225025...
-
Page 14: Declaration Of Conformity
DECLARATION OF CONFORMITY Parts & Service: 020 8988 7400 / E-mail: Parts@clarkeinternational.com or Service@clarkeinternational.com... -
Page 15: Specifications
SPECIFICATIONS Model Number 260N Supply voltage 220-240V, 50Hz 220-240V, 50Hz Battery charging voltages: 12V and 24V 12V and 24V Max charge (Amps) Max boost (Amps) Internal fuse rating 200A 300A Internal fuse part no EM22220008 EM22220011 NOTES __________________________________________________________________________ __________________________________________________________________________ __________________________________________________________________________ __________________________________________________________________________ __________________________________________________________________________ __________________________________________________________________________...


Need help?
Do you have a question about the Start-N-Charge BC260N and is the answer not in the manual?
Questions and answers