Table of Contents
Advertisement
Quick Links
Advertisement
Table of Contents

Related Manuals for Paramount Fitness FR1010-T-1 mini


Summary of Contents for Paramount Fitness FR1010-T-1 mini
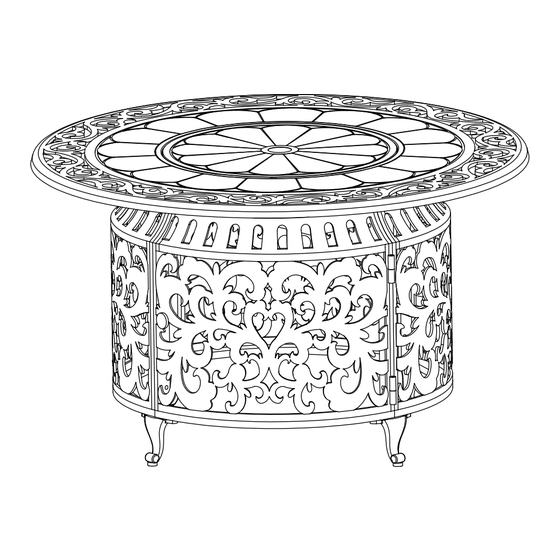
- Page 1 FP-348-BZ FR1010-T-1 mini...
- Page 2 16 19...
- Page 3 Burner Burner Bracket Side panel Table Foot Bolt (8*45mm) Bolt (6*32mm) Bolt (6*45mm) Washer (6mm) Nut (M8) QTY.16 QTY.4 QTY.40 Washer (8mm) Spring Washer (8mm) QTY.4 Nut (M6) Spring Washer (6mm) Screw Driver Wrench QTY.20 QTY.20 QTY.1 QTY.2...
- Page 5 Assemble 4 panels using Bolts , Washers Spring Washers and Nuts with Wrenches NOTE: Do not over tighten all bolts. 8 - Bolt 6*32mm 16 - Washer 6mm 8 - Spring Washer 6mm 8 - Nut M6...
- Page 6 Assemble Table Foot to the assembled unit using Bolts , Washers , Spring Washers and Nuts with Wrenches NOTE: Do not over tighten all bolts. 8 - Bolt 6*32mm 16 - Washer 6mm 8 - Spring Washer 6mm 8 - Nut M6 Assemble Burner Bracket to the assembled unit using Bolts...
- Page 7 Put the Burner on the Burner Bracket. Make sure the burner control face the door panel burner control Attach the 4 - Bolts (8*45mm) to the holes of the Table Top . Then attach the assembled panels to the table top with Washers,Spring Washers and Nuts with Wrench .
- Page 8 Pour the Fire Glass around the burner. Be careful not to obstruct pilot light housing. Put the removable burner cover on the burner. Put the Removable Burner cover on the burner when the fire pit is not in use or when cool after use. When the fire pit has cooled completely, cover it with Protective Cover .DO NOT PUT THE PROTECTIVE...
-
Page 11: Before Lighting
OPERATING INSTRUCTIONS OPERATING INSTRUCTIONS CAUTION WARNING DANGER! Do not attempt to operate until you FOR OUTDOOR USE ONLY have read and understand all General Very hot while in operation! Safety Information in this manual and CARBON MONOXIDE HAZARD Do not touch Table Top or Burner all assembly is complete and leak Never use this inside a house, or other test has been performed. -
Page 14: Troubleshooting
TROUBLESHOOTING PROBLEM POSSIBLE CAUSE CORRECTIVE ACTION Wait until the propane cylinder warms up and becomes Propane cylinder is frosted over unfrosted Burner will not light Blockage in orifice Clear blockage Control knob is not in ON position Turn control knob to ON Gas pressure is low Turn cylinder valve OFF and replace cylinder Outdoor temperature is less than... -
Page 15: Warranty
IMPORTANT For questions, concerns or problems with our product please Si vous eprouvez des dicultes, ou si vous avez des questions ou des email our customer service department: preoccupations, priere de faire parvenir un courriel notre Service la clientele customercare@jrhome.com customercare@jrhome.com DATED PROOF OF PURCHASE REQUIRED FOR WARRANTY SERVICE UNE PREUVE D'ACHAT DATEE EST REQUISE P OUR SE PREVALOIR DE LA GARANTI E. -
Page 18: Gas Conversion From Lp To Ng
GAS CONVERSION FROM LP TO NG 5. Reconnect the brass coupler on the stainless steel flex connector to the air shutter. Tighten using 2 wrenches. 6. Turn all knobs to OFF. Remove propane regulator and hose with brass adapter from the burner control (manifold) with a wrench.
Need help?
Do you have a question about the FR1010-T-1 mini and is the answer not in the manual?
Questions and answers