Beurer BM 55 Instructions For Use Manual
Hide thumbs
Also See for BM 55:
- User manual ,
- Instructions for use manual (152 pages) ,
- Instruction manual (88 pages)
Table of Contents
Advertisement
Available languages
Available languages
DE Blutdruckmessgerät
Gebrauchsanweisung ............................................... 2
EN Blood pressure monitor
Instructions for use ................................................. 20
FR Tensiométre
Mode d'emploi ........................................................ 36
ES Tensiómetro
Manual de instrucciones ......................................... 54
IT Misuratore di pressione
Istruzioni per l'uso ................................................... 71
TR Bilgisayarli tansiyon ölçer
Kullanım kılavuzu .................................................... 88
RU Прибор для измерения кровяного давления в
плечевой артерии
Инструкция по применению ............................... 104
PL Ciśnieniomierz
Instrukcja obsługi .................................................. 122
BM 55
Advertisement
Chapters
Table of Contents

Related Manuals for Beurer BM 55


Summary of Contents for Beurer BM 55
- Page 1 BM 55 DE Blutdruckmessgerät Gebrauchsanweisung ..........2 EN Blood pressure monitor Instructions for use ..........20 FR Tensiométre Mode d’emploi ............36 ES Tensiómetro Manual de instrucciones ......... 54 IT Misuratore di pressione Istruzioni per l’uso ........... 71 TR Bilgisayarli tansiyon ölçer Kullanım kılavuzu ............
-
Page 2: Table Of Contents
Gebrauchsanweisung aufmerksam durch, bewahren Sie sie Bei eventuell vorhandenen Herzrhythmusstörungen werden Sie für späteren Gebrauch auf, machen Sie sie anderen Benutzern gewarnt. zugänglich und beachten Sie die Hinweise. Die ermittelten Werte werden eingestuft und grafisch beurteilt. Mit freundlicher Empfehlung, ihr Beurer-Team... -
Page 3: Wichtige Hinweise
Zusätzlich verfügt dieses Blutdruckmessgerät über eine Verpackung umweltgerecht entsorgen hämodynamische Stabilitätsanzeige, die im weiteren Verlauf dieser Gebrauchsanweisung als Ruheindikator bezeichnet wird. Dieser zeigt an, ob während der Blutdruckmessung eine Hersteller ausreichende Kreislaufruhe vorliegt und die Blutdruckmessung damit genauer Ihrem Ruheblutdruck entspricht. Lesen Sie hier- Zulässige Lagerungs- und Transport- Storage / Transport zu mehr unter Kapitel 6. - Page 4 • Wenn Sie mehrere Messungen an einer Person durchführen sie werden durch eine für Ihre Sicherheit zuständige Person möchten, warten Sie zwischen den einzelnen Messungen beaufsichtigt oder erhielten von ihr Anweisungen, wie das jeweils 5 Minuten. Gerät zu benutzen ist. Kinder sollten beaufsichtigt werden, •...
- Page 5 • Sie können das Blutdruckmessgerät mit Batterien oder mit Hinweise zum Umgang mit Batterien einem Netzteil betreiben. Beachten Sie, dass eine Daten- • Wenn Flüssigkeit aus einer Batteriezelle mit Haut oder Augen übertragung und Datenspeicherung nur möglich ist, wenn in Kontakt kommt, die betroffene Stelle mit Wasser auswa- Ihr Blutdruckmessgerät Strom erhält.
- Page 6 • Das Gerät darf nicht selbst repariert oder justiert werden. • Die Verwendung von anderem Zubehör, als jenem, welches Eine einwandfreie Funktion ist in diesem Fall nicht mehr ge- der Hersteller dieses Gerätes festgelegt oder bereitgestellt währleistet. hat, kann erhöhte elektromagnetische Störaussendungen •...
-
Page 7: Gerätebeschreibung
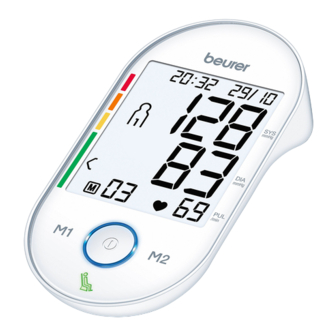
Werte auf den PC übertragen. 4. Anschluss für Netzteil und USB-Schnittstelle Hierzu benötigen Sie ein USB Kabel (im Lieferumfang enthal- 5. Display ten) sowie die PC-Software „beurer HealthManager“. 6. Speichertasten M1/M2 Die Software können Sie kostenlos im Downloadbereich unter 7. START/STOPP-Taste Service auf www.beurer.com herunterladen. -
Page 8: Messung Vorbereiten
4. Messung vorbereiten • Diese Zeichen finden Sie auf schadstoffhaltigen Batterien: Batterien einlegen Pb = Batterie enthält Blei, • Entfernen Sie den Deckel des Cd = Batterie enthält Cadmium, Batteriefaches auf der Rück- Hg = Batterie enthält Quecksilber seite des Gerätes. •... -
Page 9: Blutdruck Messen
• Stecken Sie das Netzteil in den dafür vorgesehenen An- Im Display blinkt die Monatsanzeige. schluss des Blutdruckmessgerätes. Das Netzteil darf nur • Wählen Sie mit den Speichertasten M1/M2 an die auf dem Typschild angegebene Netzspannung ange- Ihren gewünschten Monat und bestätigen schlossen werden. - Page 10 Legen Sie die Manschette nun eng, Achtung: Das Gerät darf nur mit der Original-Manschette aber nicht zu fest, um den Arm und be- betrieben werden. Die Manschette ist für einen Armumfang von festigen Sie sie mit dem Klettver- 22 bis 42 cm geeignet. schluss.
- Page 11 Blutdruckmessung durchführen Die Manschette wird automatisch aufgepumpt. Sie können die Messung jederzeit durch das Drücken Legen Sie, wie zuvor beschrieben, die Manschette an der START/STOPP-Taste abbrechen. und nehmen Sie die Haltung ein, in der Sie die Messung durchführen wollen. Der Manschetten-Luftdruck wird langsam abgelassen. Bei einer bereits zu erkennen den Tendenz zu hohem •...
-
Page 12: Ergebnisse Beurteilen
maß, Stress oder Mangel an Schlaf herrühren. Arrhythmie kann • Wählen Sie nun durch Drücken der Speichertasten nur durch eine Untersuchung bei Ihrem Arzt festgestellt werden. M1 oder M2 den gewünschten Benutzerspeicher aus. Wiederholen Sie die Messung, wenn das Symbol nach der Wenn Sie keine Auswahl des Benutzerspeichers vorneh- Messung auf dem Display angezeigt wird. - Page 13 Bereich der Systole Diastole GRÜN: Hämodynamische Stabilität vorhanden Maßnahme Blutdruckwerte (in mmHg) (in mmHg) Die Messergebnisse des systolischen und diastolischen Drucks Stufe 3: sind unter hinreichender Kreislaufruhe erhoben und reflektieren einen Arzt aufsu- starke ≥ 180 ≥ 110 mit guter Sicherheit den Ruheblutdruck. chen Hypertonie Liegt jedoch ein Hinweis auf mangelnde Kreislaufruhe vor...
-
Page 14: Messwerte Speichern, Abrufen Und Löschen
7. Messwerte speichern, abrufen und löschen nicht beseitigt werden kann. Weiter können auch bestehen- de Herzrhythmus-Störungen eine stabile Blutdruckmessung Die Ergebnisse jeder erfolgreichen Messung werden zu- verhindern. sammen mit Datum und Uhrzeit abgespeichert. Bei mehr Das Fehlen des Ruheblutdrucks kann unterschiedliche Ur- als 60 Messdaten gehen die jeweils ältesten Messdaten sachen haben, wie z.B. -
Page 15: Übertragung Der Messwerte
• Wenn Sie die jeweilige Speichertaste (M1 oder M2) Auf dem Display wird PC angezeigt. Starten Sie die wieder drücken, können Sie jeweils Ihre gemessenen Datenübertragung in der PC-Software „beurer Einzelmesswerte einsehen. HealthManager“. Während der Datenübertragung • Um das Gerät wieder auszuschalten, drücken Sie die wird im Display eine Animation angezeigt. -
Page 16: Gerät Und Manschette Reinigen Und Aufbewahren
Nach 30 Sekunden der Nichtverwendung sowie bei Unter- • ein System- oder Gerätefehler vorliegt ( oder brechung der Kommunikation mit dem PC schaltet sich das erscheint im Display), Blutdruckmessgerät automatisch ab. • die Batterien fast verbraucht sind • die Daten nicht an den PC gesendet werden konnten ( 9. -
Page 17: Technische Angaben
11. Technische Angaben Batterie-Lebensdauer Für ca. 200 Messungen, je nach Höhe des Blutdrucks bzw. Aufpumpdruck Modell-Nr. BM 55 Klassifikation Interne Versorgung, IPX0, kein AP oder M1002 APG, Dauerbetrieb, Anwendungsteil Messmethode Oszillometrisch, nicht invasive Blut- Typ BF druckmessung am Oberarm Messbereich Manschettendruck 0 –... -
Page 18: Netzteil
Teilen, die unter Strom stehen eines Zeitraumes von 5 Jahren ab Kaufdatum gegenüber der bzw. stehen können (Finger, Nadel, Beurer GmbH, Ulm (Germany) geltend zu machen. Prüfhaken). Der Anwender darf nicht gleichzeitig den Bitte wenden Sie sich im Falle von Reklamationen an un-... - Page 19 Tel.: +49 (0) 731 / 39 89-144 E-Mail: kd@beurer.de www.beurer.com Fordern wir Sie zur Übersendung des defekten Produktes auf, ist das Produkt an folgende Adresse zu senden: Beurer GmbH Servicecenter Lessingstraße 10 b 89231 Neu-Ulm Germany...
-
Page 20: Getting To Know Your Device
This blood pressure monitor also has a haemodynamic stability Best regards, display, which is referred to as a resting indicator throughout Your Beurer Team these instructions for use. This shows whether you, and con-... -
Page 21: Important Information
sequently your circulatory system, are sufficiently at rest when Manufacturer the blood pressure measurement is being taken and is there- fore a more precise indicator of your resting blood pressure. Permissible storage and transport tempera- Storage / Transport Read more about this in chapter 6. ture and humidity 2. - Page 22 • Repeat the measurement if you are unsure of the measured • Please note that when inflating, the functions of the limb in value. question may be impaired. • The measurements taken by you are for your information • During the blood pressure measurement, blood circulation only –...
- Page 23 • If the device is not to be used for a long period, take the bat- Storage and Care teries out of the battery compartment. • The blood pressure monitor is made up of precision electron- • Use identical or equivalent battery types only. ic components.
-
Page 24: Device Description
3. Device description Notes on electromagnetic compatibility • The device is suitable for use in all environments listed in these instructions for use, including domestic environments. • The use of the device may be limited in the presence of elec- tromagnetic disturbances. -
Page 25: Preparing The Measurement
Battery disposal The software can be downloaded free of charge from the • The empty, completely flat batteries must be disposed of download area under Service at www.beurer.com. through specially designated collection boxes, recycling System requirements for the “beurer HealthManager”... - Page 26 • The codes below are printed on batteries The month flashes on the display. containing harmful substances: •Choose the desired month with the M1/ Pb = Battery contains lead, M2 memory buttons and confirm with the Cd = Battery contains cadmium, Start/stop button Hg = Battery contains mercury.
-
Page 27: Measuring Blood Pressure
• Insert the mains part into the connection provided for this Now place the free end of the cuff purpose on the blood pressure monitor. The mains part must snugly, but not too tightly, around the only be connected to the mains voltage that is specified on arm, and fix it with the hook and loop the type plate. - Page 28 Correct posture The cuff’s air pressure is slowly released. If you already recognise a tendency for high blood pressure, you should reinflate the cuff and increase the cuff’s pressure again. As soon as a pulse is found, the pulse symbol is displayed.
-
Page 29: Evaluating Results
on the test results may be dangerous. It is vital to follow your • Using the Start/stop button , switch off the blood doctor‘s instructions. pressure monitor. The measurement is then stored in the selected user memory. Risk indicator: If you forget to turn off the device, it will switch off The measurements can be classified and evaluated in accord- automatically after approx. - Page 30 Blood pressure Systole Diastole RED: Lack of haemodynamic stability Action value category (in mmHg) (in mmHg) It is very probable that the systolic and diastolic blood pressures Normal 120 – 129 80 – 84 self-monitoring have not been measured whilst the patient is at rest and the rest- ing blood pressure measurement has therefore been distorted.
-
Page 31: Saving, Displaying And Deleting Measured Values
7. Saving, displaying and deleting measured • Press the relevant memory button (M1 or M2). values AM flashes on the display. The average value of the morning measure- The results of every successful measurement are stored ments for the last 7 days is displayed (morn- together with the date and time. -
Page 32: Transferring Measurements
PC is shown on the display. Begin the data transfer • the cuff is fastened too tightly or loosely ( appears in the “beurer HealthManager” PC software. During on the display) the data transfer, an animation is shown on the •... -
Page 33: Specifications
11. Specifications Make sure that the cuff tube is properly inserted and that you do not move or talk. Model no. BM 55 Re-insert the batteries if necessary, or else replace them. Type M1002 Technical alarm – description Measurement Oscillometric, non-invasive blood pres-... -
Page 34: Mains Part
Technical information is subject to change without notification Output 6 V DC, 600 mA, only in connection with to allow for updates. beurer blood pressure monitor. • This unit is in line with European Standard EN 60601-1-2 (In Supplier Shenzhen Iongxc power supply co., ltd... -
Page 35: Replacement Parts And Wearing Parts
In case of returning the unit please add a copy of your receipt and a short report of the defect. The following warranty terms shall apply: 1. The warranty period for BEURER products is either 5 years or- if longer- the country specific warranty period from date of Purchase. -
Page 36: Premières Expériences
13. Pièces de rechange et consommables ......52 7. Enregistrer, récupérer et supprimer les valeurs de mesure .48 14. Garantie / Maintenance ............52 Contenu Avec nos sentiments dévoués Beurer et son équipe • Tensiomètre • Manchette 1. Premières expériences • 4 piles AAA LR03 Vérifiez si l’emballage extérieur de l’appareil est intact et si tous... -
Page 37: Remarques Importantes
Ce tensiomètre dispose aussi d‘un indicateur de stabilité Emballage à trier hémodynamique, qu‘on appellera voyant de repos dans la suite de ce mode d‘emploi. Celui-ci indique si le repos circu- latoire est suffisant durant la mesure de la tension et si cette Fabricant dernière reflète ainsi plus précisément votre pression sanguine au repos. - Page 38 • Lorsque vous devez effectuer plusieurs mesures sur une l’expérience et/ou les connaissances nécessaires. Le cas personne, patientez à chaque fois 5 minutes entre chaque échéant, cette personne doit, pour sa sécurité, être surveillée mesure. par une personne compétente ou doit recevoir vos recom- •...
- Page 39 • Vous pouvez utiliser le tensiomètre avec des piles ou un • Au cas où vous ne vous servez pas de l’appareil pendant une adaptateur secteur. Notez que la transmission et l’enregis- longue période, nous vous recommandons de retirer les piles. trement des données n’est possible que si votre tensiomètre est alimenté.
- Page 40 Remarques relatives à la réparation et à la mise au Informations sur la compatibilité électromagnétique rebut • L’appareil est prévu pour fonctionner dans tous les environ- • Les piles ne sont pas des ordures ménagères. Veuillez jeter nements indiqués dans ce mode d’emploi, y compris dans les piles usagées dans les conteneurs prévus à...
-
Page 41: Description De L'appareil
Pour cela, vous avez besoin d‘un câble USB (inclus dans la 8. Affichage du voyant de repos livraison) ainsi que du logiciel PC « beurer Health Manager ». 9. Indicateur de risque Vous pouvez télécharger le logiciel gratuitement dans la 10. -
Page 42: Préparer La Mesure
Configuration requise pour le logiciel PC « beurer de collecte réservés à cet usage ou bien déposées chez un HealthManager » revendeur d’appareils électriques. L’élimination des piles est une obligation légale qui vous incombe. • Windows 7 SP1 ou ultérieur •... -
Page 43: Mesure De La Tension Artérielle
Pour cela, le compartiment à piles doit être vide. L’adaptateur L’année clignote à l’écran secteur est disponible en boutique spécialisée ou auprès du • À l’aide des touches de mémoire M1/M2, service après vente sous la référence 071.95. sélectionnez l’année souhaitée et confir- •... - Page 44 Refermez maintenant la manchette Attention : L’appareil ne doit être utilisé qu’avec la manchette autour du bras, sans trop serrer, à d’origine. La manchette est prévue pour un tour de bras de 22 l’aide de la fermeture auto-agrippante. à 42 cm. La manchette est bien positionnée Adoption d’une posture correcte lorsque vous pouvez placer deux doigts entre la manchette et le bras.
- Page 45 Mesurer la tension artérielle La manchette se gonfle automatiquement. Positionnez la manchette tel que décrit plus haut et ins- Vous pouvez interrompre la mesure à tout moment en tallez-vous dans la position de votre choix pour effectuer appuyant sur la touche START/STOP la mesure.
-
Page 46: Evaluation Des Résultats
au stress ou au manque de sommeil. L’arythmie ne peut être • En appuyant sur la touche M1 ou M2, sélectionnez décelée que par une consultation médicale. maintenant la mémoire utilisateur de votre choix. Si vous Si le symbole s’affiche à l’écran après la mesure, recom- ne choisissez pas de mémoire utilisateur, le résultat de mencez la mesure. - Page 47 Plage des va- Systole Diastole VERT : Stabilité hémodynamique atteinte Mesures leurs de tension (en mmHg) (en mmHg) Le résultat des mesures des pressions systolique et diastolique Niveau 3 : consulter un est obtenu avec un repos circulatoire suffisant et reflète la ≥...
-
Page 48: Enregistrer, Récupérer Et Supprimer Les Valeurs De Mesure
7. Enregistrer, récupérer et supprimer les Cette situation peut être causée entre autres par une agitation nerveuse ne pouvant pas être surmontée par de courtes valeurs de mesure périodes de repos. L’existence de troubles du rythme car- Le résultat de chaque mesure réussie est enregistré avec diaque peut également empêcher l’obtention d’une mesure de la date et l’heure. - Page 49 • Appuyez sur la touche mémoire correspondante (M1 • Si vous appuyez de nouveau sur la touche ou M2). mémoire (M1 ou M2), la dernière mesure s’affiche à l’écran (ici par exemple la Si vous avez choisi la mémoire utilisateur1, appuyez mesure 03).
-
Page 50: Transfert Des Valeurs Mesurées
• la pression systolique ou diastolique n‘a pas pu être mesurée PC s‘affiche sur l‘écran. Lancez le transfert des apparaît à l’écran) ; données dans le logiciel PC « beurer HealthMana- • la pression systolique ou diastolique se trouve hors de la ger ». Pendant le transfert des données, une plage de mesure ( ou Lo apparaît à... -
Page 51: Fiche Technique
8 secondes environ. Alimentation 4 x 1,5 V piles AAA 11. Fiche technique électrique N° du modèle BM 55 Durée de vie des Environ 200 mesures, selon le niveau de Type M1002 piles tension artérielle ainsi que la pression de gonflage Mode de mesure Mesure de la tension artérielle au bras,... -
Page 52: Adaptateur
Sortie 6 V DC, 600 mA, uniquement en associa- tion avec les lecteurs de tension artérielle 14. Garantie / Maintenance Beurer. Pour toute demande de garantie, veuillez contacter votre Fabricant Shenzhen Iongxc power supply co., ltd revendeur local ou la succursale locale (cf. la liste « Service Protection L’appareil dispose d’une isolation double et... - Page 53 Les conditions de garantie suivantes s’appliquent : 1. La période de garantie des produits BEURER est de 5 ans ou, si elle est plus longue, elle est applicable dans le pays concerné à compter de la date d’achat. Pour toute demande de garantie, vous devez prouver la date d’achat par une preuve d’achat ou une facture.
-
Page 54: Conocer El Aparato
Los valores medidos se clasifican y evalúan de forma gráfica. indicaciones. Este tensiómetro dispone además de un indicador de estabili- Les saluda cordialmente, su equipo Beurer dad hemodinámica que en adelante se denominará „indicador... -
Page 55: Indicaciones Importantes
de calma“ y que muestra si durante la medición la circulación Fabricante está suficientemente en calma y si, de esta forma, la medición se corresponde más exactamente con la presión sanguínea en Temperatura y humedad de almacenamiento Storage / Transport reposo. - Page 56 • Repita la medición en caso de desconfiar de la validez de los • Solo las personas que tengan el diámetro de brazo indicado valores medidos. para el aparato pueden usarlo. • Las mediciones realizadas por usted solo tienen carácter •...
- Page 57 • La desconexión automática apaga el tensiómetro para • Fíjese en los símbolos más (+) y menos (-) que indican la conservar las pilas si no se pulsa ninguna tecla durante un polaridad. intervalo de un minuto. • Si se derrama el líquido de una pila, póngase guantes protec- •...
-
Page 58: Descripción Del Aparato
3. Descripción del aparato aparato según la Directiva europea sobre residuos de aparatos eléctricos y electrónicos (WEEE). Para más información, póngase en contacto con la autoridad municipal competente en materia de eliminación de residuos. Indicaciones relativas a la compatibilidad electromagnética mmHg •... -
Page 59: Preparar La Medición
Indicaciones en la pantalla: Requisitos del sistema para el software de PC „beurer HealthManager“ 1. Fecha / hora • a partir de Windows 7 SP1 2. Presión sistólica • a partir de USB 2.0 (Type-A) 3. Presión diastólica 4. Pulso medido 4. - Page 60 les o a través de los distribuidores de equipos electrónicos. El indicador del mes parpadea en la pantalla. Los usuarios están obligados por ley a eliminar las pilas • Seleccione con las teclas de memoriza- correctamente. ción M1/M2 el mes deseado y confirme •...
-
Page 61: Medir La Presión Sanguínea
• El tensiómetro se debe utilizar exclusivamente con la fuente Ajuste el brazalete alrededor del brazo sin que quede demasiado tirante y de alimentación aquí descrita para evitar posibles daños en cierre el cierre autoadherente. El el mismo. brazalete está suficientemente •... - Page 62 Atención: el aparato solo se debe utilizar con el brazalete Medición de la presión sanguínea original. El brazalete está diseñado para un diámetro de brazo Póngase el brazalete como se ha descrito anteriormen- de entre 22 y 42 cm. te y colóquese en la postura en la que desea realizar la Colocar el cuerpo en la posición correcta medición.
-
Page 63: Evaluar Los Resultados
El brazalete se infla automáticamente. • Seleccione el registro de usuario deseado pulsando la tecla de memorización M1 o M2. Si no realiza ninguna El proceso de medición puede interrumpir- selección de registro de usuario durante la memoriza- se en cualquier momento pulsando la tecla ción, el resultado de la medición se asignará... - Page 64 de estimulantes, estrés o sueño insuficiente. La arritmia puede ser Rango de los Sístole Diástole diagnosticada únicamente mediante un examen médico. valores de la Medida (en mmHg) (en mmHg) Repita la medición, si en la pantalla aparece el símbolo presión arterial después de la medición.
- Page 65 Si no se indica que la circulación no está suficientemente en permanezcan inestables, señale sus valores de medición de calma, el icono (estabilidad hemodinámica) se visualiza presión sanguínea con respecto a esta circunstancia, ya que verde y el resultado de la medición se puede documentar en ese caso no se puede conseguir una calma en la circulación como valor cualificado adicional de presión sanguínea en suficiente durante las mediciones.
-
Page 66: Almacenamiento, Consulta Y Borrado De Los Valores Medidos
7. Almacenamiento, consulta y borrado de los • Pulse la tecla de memorización correspondiente (M1 o valores medidos M2). Si ha seleccionado el registro de usuario1, deberá Los resultados de todas las mediciones correctamente pulsar la tecla de memorización M1. realizadas se guardan en la memoria junto con la fecha y Si ha seleccionado el registro de usuario2, deberá... -
Page 67: Transmisión De Los Valores De Medición
En la pantalla se visualiza PC. Inicie la transferencia • Si vuelve a pulsar la tecla de memorización corres- de datos en el software de PC „beurer pondiente (M1 o M2) podrá consultar sus respectivos HealthManager“. Durante la transferencia de datos valores individuales medidos. -
Page 68: Aviso De Fallas/Eliminación De Fallas
(en la pantalla aparece 11. Especificaciones técnicas • la presión de inflado es superior a 300 mmHg (en la pantalla N.º de modelo BM 55 aparece Tipo M1002 • el inflado dura más de 160 segundos (en la pantalla aparece Método de... -
Page 69: Adaptador
• Este aparato cumple con la norma europea EN60601-1-2 Salida 6 V DC, 600 mA, solamente en combinación (Conformidad con CISPR 11, IEC 61000-4-2, IEC 61000-4-3, con los tensiómetros Beurer IEC 61000-4-4, IEC 61000-4-5, IEC 61000-4-6, IEC 61000-4- Fabricante Shenzhen Iongxc power supply co., ltd 8, IEC 61000-4-11) y está... -
Page 70: Piezas De Repuesto Y De Desgaste
Polaridad de la conexión de tensión con- Se aplican las siguientes condiciones de garantía: tinua 1. El periodo de garantía para productos de BEURER es de Aislamiento de protección / Clase de pro- 5 años o, si es superior, se aplica el periodo de garantía tección 2... -
Page 71: Note Introduttive
Inoltre, questo misuratore di pressione è dotato di un indicatore Cordiali saluti, il Suo team Beurer di stabilità emodinamico, che nelle seguenti istruzioni per l‘uso verrà chiamato indicatore del valore a riposo. Questo... -
Page 72: Avvertenze Importanti
indicatore segnala se, durante la misurazione della pressione, Temperatura e umidità di trasporto e Storage / Transport la circolazione è sufficientemente rilassata e se la misurazione stoccaggio consentite corrisponde correttamente alla pressione a riposo. Per ulteriori informazioni, fare riferimento al capitolo 6. Temperatura e umidità... - Page 73 medico i propri valori, non intraprendere in alcun caso terapie • La misurazione delle pressione non deve impedire la circo- mediche definite autonomamente (ad es. impiego di farmaci lazione del sangue per un tempo inutilmente troppo lungo. e relativi dosaggi). In caso di malfunzionamento dell’apparecchio, rimuovere il •...
- Page 74 Avvertenze sull’uso delle batterie • Le riparazioni devono essere eseguite esclusivamente dal servizio assistenza di Beurer o da ri-venditori autorizzati. • Se il liquido della batteria viene a contatto con la pelle e con Prima di ogni reclamo verificare in primo luogo lo stato delle gli occhi, sciacquare le parti interessate con acqua e consul- batterie e sosti-tuirle, se necessario.
-
Page 75: Descrizione Dell'apparecchio
3. Descrizione dell’apparecchio Avvertenze sulla compatibilità elettromagnetica • L‘apparecchio è idoneo per l‘utilizzo in qualsiasi ambiente riportato nelle presenti istruzioni per l‘uso, incluso l‘ambiente domestico. • In determinate circostanze, in presenza di disturbi elettroma- gnetici l‘apparecchio può essere utilizzato solo limitata- mente. -
Page 76: Preparazione Della Misurazione
Indicatori sul display: Requisiti di sistema per il software per PC „beurer HealthManager“ 1. Data / Ora 2. Pressione sistolica • Da Windows 7 SP1 3. Pressione diastolica • Da USB 2.0 (Type-A) 4. Battito cardiaco 4. Preparazione della rilevato misurazione 5. - Page 77 Sul display lampeggia il numero dell’anno. Smaltimento delle batterie • Con i pulsanti per la memorizzazione • Smaltire le batterie esauste e completamente scariche negli M1/M2 selezionare il numero dell’anno appositi punti di raccolta, nei punti di raccolta per rifiuti desiderato e confermare con il pulsante tossici o presso i negozi di elettronica.
-
Page 78: Misurazione Della Pressione Sanguigna
Funzionamento con l’alimentatore di rete Il bracciale va posizionato sul braccio in modo che il suo bordo inferiore L’apparecchio può essere utilizzato anche con un alimentatore venga a trovarsi 2 – 3 cm al di sopra di rete. A tale scopo il vano batterie non deve contenere bat- della piega del gomito e al di sopra terie. - Page 79 La pressione può variare dal braccio destro al sinistro e di Esecuzione della misurazione della pressione conseguenza anche i valori misurati possono essere diversi. Applicare il manicotto e sistemarsi nella posizione in cui Eseguire la misurazione sempre sullo stesso braccio. si desidera eseguire la misurazione.
-
Page 80: Valutare I Risultati
• Vengono visualizzati i valori misurati per • Attendere almeno 5 minuti prima di effet- pressione sistolica e diastolica e battito tuare una nuova misurazione! cardiaco. • Inoltre, un simbolo sotto al display si illumi- na per segnalare se durante la misurazione della pressione la circolazione è... - Page 81 Tali valori standard costituiscono tuttavia solo un riferimento Misurazione dell’indicatore del valore a riposo (con generale in quanto la pressione individuale presenta differenze diagnostica HSD) a seconda della persona e dell‘età. L’errore più frequente nella misurazione della pressione è È importante consultare regolarmente il proprio medico per causato dalla circolazione non a riposo (stabilità...
-
Page 82: Memorizzazione, Ricerca E Cancellazione Dei Valori Misurati
7. Memorizzazione, ricerca e cancellazione dei Ripetere la misurazione dopo una pausa di riposo e rilassa- mento di almeno 5 minuti. Recarsi in un luogo sufficientemente valori misurati tranquillo e comodo, restare in silenzio, chiudere gli occhi, cer- Gli esiti di ogni misurazione corretta vengono memoriz- care di rilassarsi e respirare tranquillamente e regolarmente. - Page 83 • Premere il pulsante per la memorizzazione corrispon- • Premendo nuovamente il pulsante per la dente (M1 o M2). memorizzazione corrispondente (M1 o M2), il display visualizza l’ultima misura- Una volta selezionata la memoria utente1, utilizzare il zione singola (nell’esempio la misurazione pulsante per la memorizzazione M1.
-
Page 84: Trasmissione Dei Valori Misurati
(sul display appare Sul display viene visualizzato PC. Avviare la • la pressione sistolica o diastolica rilevata risulta oltre i valori trasmissione dei dati nel software per PC “beurer o Lo, Alta o Bassa), di misurazione (sul display appare HealthManager”. Durante la trasmissione dei dati •... -
Page 85: Dati Tecnici
8 secondi. Alimentazione 4 batterie AAA da 1,5 V 11. Dati tecnici Durata delle batterie Ca. 200 misurazioni, in base alla pressio- Codice BM 55 ne sanguigna e di pompaggio Tipo M1002 Classificazione Alimentazione interna, IPX0, non fa parte... -
Page 86: Adattatore
Se aplican las siguientes condiciones de garantía: Classe di protezione 2 1. El periodo de garantía para productos de BEURER es de 5 años o, si es superior, se aplica el periodo de garantía vigente en el país correspondiente a partir de la fecha de... - Page 87 compra. En caso de una reclamación de la garantía, la fecha de compra deberá demostrarse con el recibo de compra o una factura. 2. Las reparaciones (todo el aparato o solo algunas piezas) no hacen que se prolongue el periodo de garantía. 3.
-
Page 88: İçindekiler 1. Tanıtım
Bu tansiyon ölçme aleti ayrıca bu dokümanda sükunet gös- deki yönergelere uyun. tergesi olarak adlandırılacak olan bir hemodinamik stabilite Dostane tavsiyelerimizle Beurer Müessesesi göstergesine sahiptir. Bu, tansiyon ölçümü sırasında yeterli bir... -
Page 89: Önemli Bilgiler
dolaşım sükunetinin olup olmadığını ve böylece tansiyon ölçü- Üretici münün sükunet hali tansiyonunuza uyup uymadığını gösterir. Bununla ilgili ayrıntılı bilgi için bkz. bölüm 6. İzin verilen depolama ve taşıma sıcaklığı ve Storage / Transport hava nemi 2. Önemli bilgiler İzin verilen çalışma sıcaklığı ve hava nemi Operating İşaretlerin açıklaması... - Page 90 • Tarafınızca tespit edilen ölçüm değerleri, yalnızca size bilgi • Kan dolaşımı, tansiyon ölçümü nedeniyle gereğinden uzun verme amaçlıdır ve doktor tarafından yapılan bir muayenenin kısıtlanmamalıdır. Aletin hatalı çalışması durumunda, manşeti yerini tutamaz! Ölçüm değerlerinizi doktorunuza bildirin ve koldan çıkarın. hiçbir zaman ölçüm sonuçlarından yola çıkarak kendi tıbbi •...
- Page 91 • Eğer cihaz uzun bir süre kullanmayacaksa, pillerin çıkarılması çalışması garanti edilemez. tavsiye edilir. • Onarımlar sadece Beurer yetkili servisi veya yetkili satıcılar tarafından yapılmalıdır. Fakat her reklamasyondan önce, yine Pillerle temas etme durumu için uyarılar de ilk olarak pilleri kontrol ediniz ve gerekirse bunları değişti- riniz.
-
Page 92: Cihaz Açıklaması
3. Cihaz açıklaması Elektromanyetik uyumluluk hakkında bilgiler • Cihaz, konutlar dahil olmak üzere bu kullanım kılavuzunda belirtilen tüm ortamlarda çalıştırılabilir. • Elektromanyetik parazit mevcudiyeti olduğunda cihazın fonksiyonlarının duruma bağlı olarak kısıtlanma ihtimali vardır. Bunun sonucunda örneğin hata mesajları görülmesi veya ekranın/cihazı... -
Page 93: Ölçüme Hazırlık
Tansiyon ölçme aleti ile ayrıca ölçülen değerlerinizi bilgisayara aktarabilirsiniz. Bunun için piyasada sunulan bir USB kablosu Pillerin elden çıkarılması (teslimat kapsamında mevcuttur) ve bilgisayar yazılımı „beurer • Kullanılmış, tamamen boşalmış piller özel işaretli toplama HealthManager“ gereklidir. kutularına atılarak, özel atık toplama yerlerine veya elektrikli Bu yazılımı... - Page 94 Saat formatı, tarihin ve saatin ayarlanması Saat formatı olarak ayarlandığında gün ve ay Bu menüde aşağıdaki fonksiyonlar sırayla ayarlanabilir. göstergelerinin sırası değişir. Saat biçimi Tarih Saat ➔ ➔ Ekranda saat göstergesi yanıp söner. • Hafıza düğmeleri M1/M2 ile istediğiniz saati Tarihi ve saati mutlaka ayarlamalısınız.
-
Page 95: Tansiyonun Ölçülmesi
5. Tansiyonun ölçülmesi Manşet takıldıktan sonra indeks işareti ) OK bölgesinin içindeyse, manşet Lütfen cihazı ölçümden önce oda sıcaklığına getiriniz. sizin için uygun demektir. Ölçümü sol veya sağ kolda yapabilirsiniz. Manşetin takılması Manşeti çıplak sol üst kola takın. Ölçümü sağ kolun üst kısmında yaparsanız hortum dirseğin Kolun kan dolaşımı... -
Page 96: Sonuçların Değerlendirilmesi
• Tansiyon ölçümü için rahat bir şekilde oturun. Sırtınızı ve Bu kullanım kılavuzunda yer alan „Sonuçları kollarınızı dayayın. Bacak bacak üstüne atmayın. Ayaklarınızı değerlendirme / Sükunet göstergesinin düz bir şekilde yere koyun. ölçümü“ adlı bölümü dikkate alınız. • Ölçüm sonucunun yanlış olmasını önlemek için, ölçüm esna- •... - Page 97 Bu durum, aritmi hastalığı için bir belirti olabilir. Aritmi, kalp Tansiyon Sistol Diyastol Önlem atışını kontrol eden biyoelektriksel sistemdeki hatalardan do- değerlerinin aralığı (mmHg olarak) (mmHg olarak) layı, kalp ritminin anormal olduğu bir hastalıktır. Septomların Kademe 3: (gerçekleşmeyen veya erken gerçekleşen kalp atışları, yavaş şiddetli ≥...
- Page 98 Dolaşım sükunetinin mevcut olmadığını bildiren herhangi bir lir. Ayrıca, mevcut olabilecek kalp ritmi bozuklukları da stabil bir tansiyon ölçümünü etkileyebilir. uyarı görüntülenmezse, sembol (hemodinamik stabilite) Sükunet tansiyonunun eksikliğinin çeşitli nedenleri olabilir: örne- yeşil yanar ve ölçüm sonucu, ek olarak uygun nitelikte sükunet ğin bedensel yorgunluk, ruhsal gerginlik, dikkat dağınıklığı, tan- tansiyonu değeri olarak belgelenebilir.
-
Page 99: Ölçüm Değerlerini Kaydetme, Çağırma Ve Silme
7. Ölçüm değerlerini kaydetme, çağırma ve • İlgili hafıza düğmesine (M1 veya M2) basın. silme Kullanıcı hafızası 1’i seçtiyseniz M1 hafıza düğmesine Başarılı her ölçümün sonuçları, tarih ve saat ile birlikte basın. kaydedilir. Ölçüm verileri 60’ı aştığında, en eski ölçüm Kullanıcı... -
Page 100: Ölçüm Değerlerinin Aktarılması
Ekranda PC (bilgisayar) gösterilir. „beurer Health- • İlgili hafıza düğmesine (M1 veya M2) Manager“ bilgisayar yazılımında veri aktarımını yeniden basarsanız ekranda son münferit başlatın. Veri aktarımı sırasında ekranda bir ölçüm gösterilir (Buradaki örnekte 03 ölçü- animasyon gösterilir. Veri aktarımının başarıyla mü). -
Page 101: Hata Mesajı/Hata Giderilmesi
• şişirme basıncı 300 mmHg‘nin üzerinde olduğunda (ekranda gösterilir), 11. Teknik bilgiler • şişirme işlemi 160 saniyeden uzun sürdüğünde (ekranda Model no. BM 55 gösterilir), M1002 • bir sistem veya cihaz hatası olduğunda (ekranda veya gösterilir), Ölçüm yöntemi Üst koldan, osilometrik, invazif olmayan... -
Page 102: Adaptör
Pil kullanım ömrü Yakl. 200 ölçüm için, tansiyonun yüksekli- ğine veya şişirme basıncına göre Çıkış 6 V DC, 600 mA, sadece Beurer tansiyon ölçme cihazı ile birlikte kullanılır. Sınıflandırma Dahili besleme, IPX0, AP veya APG yok, devamlı kullanım, uygulama parçası tip BF Üretici... -
Page 103: Yedek Parçalar Ve Yıpranan Parçalar
Cihazı geri gönderirken faturanızın bir kopyasını ve arızanın kısa açıklamasını ekleyin. Aşağıdaki garanti koşulları geçerlidir: 1. BEURER ürünlerinin garanti süresi 5 yıldır veya – daha uzun ise – ilgili ülkede geçerli olan satın alma tarihinden itibaren garanti süresi kabul edilir. -
Page 104: Ознакомление
в доступном для других пользователей месте и следуйте ее указаниям. • Прибор для измерения кровяного давления • Манжета для измерения кровяного давления в плечевой С дружескими пожеланиями сотрудники компании Beurer артерии 1. Ознакомление • 2 батарейки ААА, 1,5 В LR03 • Сумка для хранения... -
Page 105: Важные Указания
С его помощью Вы можете быстро и просто измерять Ваше Аппликатор типа BF кровяное давление, вводить в память результаты измерений и показывать изменения и средние значения давления. Постоянный ток Вы будете предупреждены при возможно имеющихся на- рушениях ритма сердца. Прибор следует утилизировать согласно Полученные... - Page 106 щих преэклампсией. Перед использованием прибора для Сертификационный знак для изделий, экс- измерения артериального давления во время беремен- портируемых в Российскую Федерацию и ности рекомендуется проконсультироваться с врачом. страны СНГ • Заболевания системы кровообращения могут привести к неправильным результатам измерения или снижению Указания...
- Page 107 • Избегайте длительного давления в манжете и частых из- – Предохраняйте прибор от ударов, действия влаги, гря- мерений. Нарушение кровообращения может привести к зи, сильных колебаний температуры и прямых солнеч- повреждениям. ных лучей. • Убедитесь в том, что к кровеносным сосудам руки, на ко- –...
- Page 108 • Используйте батарейки только одного типа или равно- Указания по электромагнитной совместимости ценных типов. • Заменяйте все батарейки сразу. • Прибор предназначен для работы в условиях, • Не используйте перезаряжаемые аккумуляторы! перечисленных в настоящей инструкции по применению, • Не разбирайте, не открывайте и не разбивайте батарейки. в...
- Page 109 Для этого Вам понадобится стандартный кабель USB (входит 8. Дисплей индикатора состояния покоя в комплект поставки), а также программное обеспечение 9. Индикатор риска «beurer HealthManager». 10. Разъем для штекера манжеты (с левой стороны) Данное программное обеспечение можно бесплатно загру- зить в разделе Сервис/Загрузки на сайте www.beurer.com.
-
Page 110: Подготовка К Измерению
Системные требования для программного обеспечения Утилизация батареек «beurer HealthManager» • Выбрасывайте использованные, полностью разряжен- • от Windows 7 SP1 и выше ные батарейки в специальные контейнеры, сдавайте • от USB 2.0 (Type-A) и выше в пункты приема спецотходов или в магазины электро- 4. Подготовка к измерению... - Page 111 На дисплее замигают часы. • Удерживайте кнопку START/STOP нажатой в течение 5 секунд. • С помощью кнопок сохранения M1/M2 выберите нужное количество часов и • С помощью кнопок сохранения M1/M2 подтвердите выбор нажатием кнопки выберите желаемый часовой формат START/STOP и подтвердите выбор нажатием кнопки START/STOP На...
-
Page 112: Измерение Кровяного Давления
измерения артериального давления удаляются. Однако Вставьте шланг манжеты в разъем сохраненные результаты измерения остаются в памяти для штекера манжеты. прибора. 5. Измерение кровяного давления Пожалуйста, перед измерением храните прибор при ком- Манжета Вам подходит, если после натной температуре. ее наложения отметка индекса ( Измерение... - Page 113 Принять правильное положение Измерение артериального давления Наложите манжету, как описано выше, и займите удобное для измерения положение. • Для запуска прибора для измерения ар- териального давления нажмите кнопку START/STOP . Все элементы дисплея отображаются на короткий промежуток • Перед каждым измерением расслабляйтесь в течение времени.
-
Page 114: Оценка Результатов
• Отобразятся результаты измерения си- • Выключите прибор для измерения артериально- столического, диастолического давления го давления, нажав кнопку START/STOP . Таким и пульса. образом в выбранной пользовательской памяти • Кроме того, под дисплеем загорится сохранится результат измерения. символ, показывающий, достаточно ли Если... - Page 115 Повторите измерение, если пиктограмма появляется Диапазон Систолическое Диастолическое Рекомендуемые значений давление давление меры на дисплее после измерения. Учтите, что перед измерени- кровяного (в мм рт. ст.) (в мм рт. ст.) ем Вы должны 5 минут отдохнуть, а во время измерения давления не должны говорить и двигаться. Если пиктограмма Степень 3: появляется...
- Page 116 Если прибор не получает данных о недостаточно спокой- оставайтесь в состоянии покоя, закройте глаза, постарай- ном кровообращении, символ (гемодинамическая ста- тесь расслабиться и спокойно дышать. бильность) горит зеленым цветом, и результат измерения Если и следующее измерение показывает недостаточную может быть записан как дополнительно подтвержденное стабильность, повторите...
-
Page 117: Сохранение, Просмотр И Удаление Результатов Измерения
спокойное кровообращение, является особенно надежным • Нажмите соответствующую кнопку сохранения (M1 результатом. или M2). 7. Сохранение, просмотр и удаление Если выбрана пользовательская ячейка памяти1, результатов измерения нажмите кнопку сохранения M1. Если выбрана пользовательская ячейка памяти2, Результаты каждого успешного измерения сохраня- нажмите... -
Page 118: Передача Результатов Измерения
На дисплее отобразится индикатор подключения M2), можно просмотреть результаты конкретных к компьютеру ( PC ). Запустите передачу данных измерений. на компьютер в программе «beurer • Чтобы вновь выключить прибор, нажмите кнопку HealthManager». Во время передачи данных на рис. 1 START/STOP дисплее... -
Page 119: Сообщения О Неисправностях / Устранение Неисправностей
через 8 секунд. 300 мм рт. ст. (на дисплее появляется надпись 11. Технические данные • накачивание длится более 160 с (на дисплее появляется надпись Модель № BM 55 • произошел сбой в работе системы или прибора (на дис- Тип M1002 плее появляется надпись или... - Page 120 • Данный прибор соответствует европейскому стандарту Надежность максимально допустимое стандартное от- EN60601-1-2 (Соответствие стандартам CISPR 11, IEC измерений клонение по результатам клинических испы- 61000-4-2, IEC 61000-4-3, IEC 61000-4-4, IEC 61000-4-5, таний: 8 мм рт. ст. для систолического / IEC 61000-4-6, IEC 61000-4-8, IEC 61000-4-11) и является 8 мм...
-
Page 121: Блок Питания
100 – 240 В, 50 – 60 Гц, 0.5 A Максимально можно приобрести в соответствующих сервисных центрах, Выход 6 В пост. тока, 600 мА, только в комбинации указав номер детали в каталоге. с приборами для измерения артериального давления Beurer Название Артикульный номер или номер Защита Прибор имеет двойную защитную... -
Page 122: Spis Treści 1. Zapoznanie
że zdecydowali się Państwo na zakup naszego wazyjnego pomiaru i kontroli tętniczych wartości ciśnienia krwi produktu. Firma Beurer oferuje dokładnie przetestowane, wyso- dorosłych ludzi. Możliwy jest szybki i dokładny pomiar ciśnienia kiej jakości produkty przeznaczone do ogrzewania ciała, pomiaru krwi, zapis wartości do pamięci oraz wyświetlenie przebiegu i... -
Page 123: Ważne Wskazówk
Ponadto ciśnieniomierz jest wyposażony we wskaźnik stabilności Opakowanie zutylizować w sposób przyjazny hemodynamicznej, zwany dalej wskaźnikiem spoczynku. Wskaź- dla środowiska nik ten pokazuje, czy podczas pomiaru ciśnienia krwi układ krwio- nośny znajduje się w odpowiednim spoczynku, czyli czy pomiar Producent ciśnienia krwi odpowiada dokładnie ciśnieniu spoczynkowemu. - Page 124 • Na co najmniej 30 minut przed wykonaniem pomiaru nie • Nie wolno zakłócać cyrkulacji krwi przez zbyt długi pomiar należy jeść, pić, palić ani podejmować wysiłku fizycznego. ciśnienia. W przypadku błędnego działania urządzenia należy • Powtórz pomiar, jeśli zmierzona wartość budzi wątpliwości. zdjąć...
- Page 125 • Jeśli dojdzie do kontaktu elektrolitu ze skórą lub oczami, • Naprawy mogą być przeprowadzane jedynie przez serwis należy przemyć dane miejsce wodą i skontaktować się z firmy Beurer lub autoryzowany serwis dystrybutora sprzętu. lekarzem. Przed złożeniem reklamacji sprawdzić najpierw baterie i w razie potrzeby wymienić...
-
Page 126: Opis Urządzenia
3. Opis urządzenia Electrical and Electronic Equipment). W razie pytań należy zwrócić się do odpowiedniej instytucji odpowiedzialnej za utylizację. Wskazówki dot. kompatybilności elektromagnetycznej • Urządzenie jest przeznaczone do użytkowania w każdym otoczeniu wymienionym w niniejszej instrukcji obsługi, włącznie z domem. mmHg •... -
Page 127: Przygotowanie Do Pomiaru
Oprogramowanie można pobrać bezpłatnie z sekcji pobierania można zmierzyć ciśnienia. Należy wymienić wszystkie baterie. na karcie Service na stronie www.beurer.com. Po wyjęciu baterii z urządzenia konieczne jest ponowne usta- wienie daty i godziny. Zapisane wyniki pomiarów nie zostaną... - Page 128 wać do punktów zbiórki odpadów specjalnych lub do sklepu Na wyświetlaczu zacznie migać wskazanie ze sprzętem elektrycznym. Użytkownik jest zobowiązany do miesiąca. utylizacji baterii zgodnie z przepisami. • Za pomocą przycisków pamięci M1/M2 • Na bateriach zawierających szkodliwe związki wybierz żądany miesiąc i potwierdź za znajdują...
-
Page 129: Pomiar Ciśnienia Krwi
• Ciśnieniomierza można używać wyłącznie z opisanym tutaj Należy założyć mankiet wokół ramienia zasilaczem. Używanie tylko tego zasilacza pozwoli wyklu- tak, aby przylegał (ale nie za mocno), czyć ewentualne uszkodzenia urządzenia. i zamocować go zapięciem na rzep. • Podłącz zasilacz do odpowiedniego gniazda ciśnieniomierza. Mankiet jest założony wystarczająco Zasilacz może być... - Page 130 Przyjęcie prawidłowej pozycj Powietrze jest pomału spuszczane z mankietu. W przy- padku rozpoznawalnej tendencji do zbyt wysokiego ciśnienia krwi, powtarza się pompowanie i zwiększa ciśnienie w mankiecie. Po rozpoznaniu tętna pojawia się symbol tętna • Wyświetlane są wyniki pomiaru ciśnienia skurczowego, rozkurczowego i tętna.
-
Page 131: Ocena Wyników
diagnoza lub leczenie na podstawie wyników pomiarów może być • Wyłącz ciśnieniomierz za pomocą przycisku START/ niebezpieczne. Koniecznie stosować się do zaleceń lekarza. STOP . Spowoduje to zapisanie wyniku pomiaru w Wskaźnik ryzyka: wybranej pamięci. Jeżeli użytkownik zapomni wyłączyć urządzenie, wy- Zgodnie z wytycznymi/definicjami Światowej Organizacji Zdrowia łączy się... - Page 132 W przypadku wystąpienia symptomu wskazującego na brak Zakres wartości Ciśnienie Ciśnienie Rozwiązanie spoczynku układu krwionośnego (niestabilność hemodyna- ciśnienia skurczowe rozkurczowe miczna), symbol zapali się na czerwono. (w mmHg) (w mmHg) W takim przypadku należy powtórzyć pomiar po fizycznym normalne Regularna kon- 130–139 85–89 i psychicznym odpoczynku.
-
Page 133: Zapis, Odczyt I Usuwanie Wyników Pomiaru
Brak spoczynkowego ciśnienia krwi może mieć różne przyczy- – Jeśli chcesz wyświetlić dane pomiarów z danej pamięci ny, jak np. obciążenie fizyczne organizmu, psychiczne napięcie użytkownika , naciśnij przycisk pamięci M1. lub rozkojarzenie, rozmowa czy zakłócenia rytmu serca pod- – Jeśli chcesz wyświetlić dane pomiarów czas pomiaru ciśnienia krwi. -
Page 134: Przenoszenie Danych Pomiarowych
Na wyświetlaczu pojawi się wskazanie PC. (M1 lub M2), możesz zobaczyć poszczególne zmierzo- Rozpocznij przesyłanie danych za pomocą ne wartości. oprogramowania „beurer HealthManager”. Podczas • Aby wyłączyć urządzenie, naciśnij przycisk START/ transmisji danych na wyświetlaczu pojawi się STOP animacja. Pomyślnie wykonana transmisja danych rys. -
Page 135: Czyszczenie I Dbałość O Urządzenie Oraz Mankiet
• mankiet został zaciśnięty zbyt słabo lub zbyt mocno (na wy- 11. Dane techniczne świetlaczu pojawia się symbol Nr modelu BM 55 • ciśnienie pompowania przekracza 300 mmHg (na wyświetla- czu pojawia się symbol M1002 • pompowanie trwa dłużej niż 160 sekund (na wyświetlaczu... - Page 136 Numer seryjny znajduje się na urządzeniu lub w komorze Zakres pomiaru Ciśnienie w mankiecie 0 – 300 mmHg, baterii. ciśnienie skurczowe 60 – 260 mmHg, Producent zastrzega sobie prawo do zmiany danych technicz- ciśnienie rozkurczowe 40 –199 mmHg, nych z powodu aktualizacji bez konieczności powiadamiania. tętno 40 –180 uderz./minutę...
-
Page 137: Adapter
Biegunowość przyłącza napięcia stałego Obowiązują następujące warunki gwarancji: 1. Okres gwarancji na produkty firmy BEURER wynosi 5 lat Posiada izolację ochronną / lub, jeśli jest dłuższy, obowiązuje w danym kraju od daty Klasa ochronna 2 zakupu. - Page 138 d. Ponadto nie obejmuje akcesoriów dostarczonych z urzą- dzeniem, które ulegają regularnemu zużyciu. Odpowiedzialność za szkody bezpośrednio lub pośrednio spowodowane przez urządzenie jest wykluczona także wtedy, gdy w przypadku jego uszkodzenia uznane zostanie roszczenie z tytułu gwarancji.
- Page 140 BEURER GmbH • Söflinger Str. 218 • 89077 Ulm (Germany) • www.beurer.com www.beurer-blutdruck.de • www.beurer-gesundheitsratgeber.com • www.beurer-healthguide.com...
Need help?
Do you have a question about the BM 55 and is the answer not in the manual?
Questions and answers