Table of Contents
Advertisement
MODEL NO.
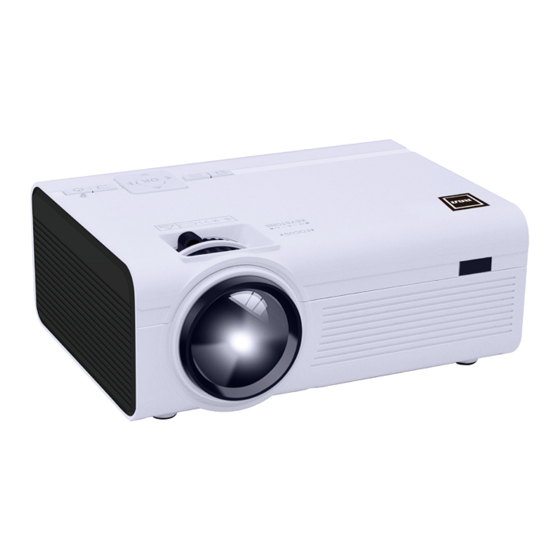
BLUETOOTH HOME THEATER PROJECTOR
BUNDLED WITH FOLD UP SCREEN
Ideal for dark viewing environments for optimal performance.
Please note:Projector brightness is measure in ANSI lumens. Your viewing
environment is the deciding factor on how many lumens your projector needs.
PLEASE READ BEFORE OPERATING THIS EQUIPMENT
This product is manufactured and sold by Curtis International Ltd.
RCA, the RCA logo, the two dogs (Nipper and Chipper) logo, are registered
trademarks or trademarks of RCA TrademarkManagement and are used
under license by Curtis International Ltd. Any other product, service,
company, trade or product name and logo referenced herein are neither
endorsed nor sponsored by RCA Trademark Management or its affiliates.
RPJ199-COMBO
Advertisement
Table of Contents

Subscribe to Our Youtube Channel
Related Manuals for RCA RPJ199-COMBO


Summary of Contents for RCA RPJ199-COMBO
- Page 1 PLEASE READ BEFORE OPERATING THIS EQUIPMENT This product is manufactured and sold by Curtis International Ltd. RCA, the RCA logo, the two dogs (Nipper and Chipper) logo, are registered trademarks or trademarks of RCA TrademarkManagement and are used under license by Curtis International Ltd. Any other product, service, company, trade or product name and logo referenced herein are neither endorsed nor sponsored by RCA Trademark Management or its affiliates.
- Page 2 Important Safety Instruc ons 1. Read these Instruc ons. 2. Keep these Instruc ons. 3. Heed all Warnings. 4. Follow all instruc ons. 5. Do not use this apparatus near water. 6. Clean only with a dry cloth. 7. Do not block any ven la on openings. Install in accordance with the manufacturer’s instruc ons.
- Page 3 Addi onal Warnings and Precau ons 1. Do not look directly into the projector light. 2. Don’t touch the project lens 3. Mains adapter is used as disconnect device and it should remain readily operable during intended use. In order to disconnect the apparatus from the mains completely, the mains plug should be disconnected from the mains socket outlet completely.
-
Page 4: Fcc Warning
FCC Warning This device complies with Part 15 of the FCC rules. Operation is subject to the following two conditions: (1) this device may not cause harmful interference, and (2) this device must accept any interference received, including interference that may cause undesired operation. NOTE: This equipment has been tested and found to comply with the limits for a Class B digital device, pursuant to Part 15 of the FCC Rules. -
Page 5: Table Of Contents
Table of Contents Important Safety Instructions - - - - - - - - - - - - - - - - - - - - - - - - - - - - P1 Additional Warnings and Precautions - - - - - - - - - - - - - - - - - - - - - - P2 FCC Warning - - - - - - - - - - - - - - - - - - - - - - - - - - - - - - - - - - - - - - - - - P3 In The Box - - - - - - - - - - - - - - - - - - - - - - - - - - - - - - - - - - - - - - - - - P3 Table of Contents - - - - - - - - - - - - - - - - - - - - - - - - - - - - - - - - - - - - P4... -
Page 6: Remove & Close The Lens Cover
Remove & Close The Lens Cover Remove the lens cover before using Close the lens cover when unit not using REMOVE CLOSE LENS COVER LENS COVER Placing Your Projector Your projector can be installed in four different configurations ( see picture below): Front Table: Select this location with the projector placed... -
Page 7: Distance Between The Projector And Screen
Square /Rectangle It is recommended to move the projector as close to center of screen. Distance Between The Projector And Screen Measure the distance between the projector and where you want to position the screen. This is the projection distance. "... -
Page 8: Adjust The Vertical Location
Follow below picture to adjust the vertical location. SCREEN SCREEN PROJECTOR VERTICAL VERTICAL DIMENSION DIMENSION PROJECTOR SCREEN VERTICAL DIMENSION PROJECTOR Adjust this knob ( ANGLE ADJ. knob) to fine- tune the display angle to higher. Adjust The Focus And Keystone Follow below picture to adjust the focus and trapezoidal screen. -
Page 9: Controls Of Remote
Controls Of Remote Power Mute Press to power ON. Press to mute volume. Back / Fwd Press twice to power OFF. Press to search through an individual Previous / Next chapter or track. Press to skip between chapters or tracks. Stop VOL+ / VOL−... -
Page 10: Controls Of Projector
Controls Of Projector 3 4 5 9 10 13 14 15 Micro SD Card HDMI Port 1 HDMI Port 2 USB Port DC IN jack VGA Port TRAPEZOIDAL ADJ. Knob POWER on Indicator FOCUS ADJ. Knob IR Window ( Rear Side) IR Window ( Front Side) LENS ANGEL ADJ. -
Page 11: Install Power Adapter
Power Source Arrows/OK Press to Back Press to Menu Press to power on the change media Press to return navigate on- Press to access projector. source mode. to a previous screen menus on-screen Press twice to power page or setting and make menus and off the unit... -
Page 12: Connect Av Show The Image On Projector Screen
Connect HDMI Show The Image On Projector Screen Follow below picture to connect HDMI cable and device. Turn off the unit before connect HDMI cable. light GREEN / SOURCE Press the device will show on projector screen. There are 2 HDMI input, HDMI1 interface corresponds to HDMI 1 in SOURCE mode , and HDMI2 interface corresponds to HDMI 2 in SOURCE mode. -
Page 13: Connect Vga Show The Image On Projector Screen
Connect VGA Show The Image On Projector Screen Follow below picture to connect HDMI cable and device. Turn off the unit before connect VGA cable. Press the button to turn off power of your projector before connection. light GREEN / SOURCE Press the will show on projector screen. -
Page 14: Connect Audio Output (Aux Out / Line Out / Earphones)
Connect Audio Output ( Aux Out / Line Out / Earphones) Follow below picture to connect audio cable and device. Press the button to turn off power of your projector before connection. Use audio cable to connect follow below figure. After connect and turn on both units. - Page 15 Micro SD Card And USB Playback (Media Player) Install USB / microSD device: 1. Turn off the unit bMicro SDefore install USB / Micro SD Card. 2. Install the USB device into USB port. GREEN. / SOURCE 4. Press the search the MEDIAPLAYER mode.
-
Page 16: Using Bluetooth Playback
Using Bluetooth Playback Pairing to Bluetooth Wireless Speakers or Sound Bar NOTE: Bluetooth is OFF by default when the projector powers ON. Bluetooth can be turned ON or OFF from the OPTIONS Menu. 1.Enable Bluetooth on the receiver (external speakers, sound bar, etc.) to which you wish to connect. -
Page 17: Using Projector Menu 1.0
Using Projector Menu 1.0 Press button to enter projector menu. Press again to previous status. buttons to select manual page. This manual showed on right upper of view screen. Picture Mode Select Vivid, User (custom), Soft ,or Standard Contrast ,Brightness, etc Set Picture Mode to “User “... - Page 18 Using Projector Menu 2.0 Press button to enter projector menu. Press again to previous status. buttons to select manual page. This manual showed on right upper of view screen. Sound Mode Select Music, Movie, User (custom), Sports ,or Standard Treble, Bass Set Sound Mode to “User “...
- Page 19 Panel Flip Rotate Select rotate 0, rotate 1, rotate 2, rotate 3.. Keystone correction Default by 0, adjust different angle between -22 to 22. INFO Display the unit information as below. Model:RPJ199-COMBO SN:RPJ199-COMBO SW Ver: V7.0 LOGO: RCA FL040CT_30 English...
- Page 20 Using Projector Menu 4.0 Press button to enter projector menu. Press again to previous status. buttons to select manual page. This manual showed on right upper of viewing screen. Clock-- -- Select clock to Day, Month, Year, Hour ,and Minutes. Off Timer Select turn off timer to Day, Hour ,and Minutes.
-
Page 21: Specifications
Specifications Light Source Type White light output ANSI: 33 Lumens Brightness Output White brightness output ANSI: 27 Lumens 800 x 480 Display Native Resolution 1080p , 1080i , 720p, 576i , 480p, and 480i HDMI Input Supported Video Resolution. Operating 36W; Standby 0.8W Power Consumption Power Input DC 12V , 3.5A... - Page 22 Installation Instructions 1. Simple screen package includes 2. First of all, pull the screen fabric screen fabric, hooks and double- flat and lay it on the wall where it will side adhesive tapes. be installed. Mark every position of the grommets correctly on the wall. 3.
-
Page 23: Troubleshooting
TROUBLESHOOTING Before resorting the maintenance service, please kindly check by yourself with the following chart. 1.Power light is on. If it is not on, check the projector is plugged into the mains, that the socket is switched on, and then press the power button on the projector.
Need help?
Do you have a question about the RPJ199-COMBO and is the answer not in the manual?
Questions and answers
Qué formato de vídeo lee
The RCA RPJ199COMBO supports the following video formats: AVI, MP4, MKV, FLV, MOV, RMVB, 3GP, MPEG1, MPEG2, MPG, TS, TP, and VOB.
This answer is automatically generated
Qué tipo de USB asimila : 3.0 ó 2.0
Qué formato de USB permite utilizar : NTFS o fat32