Table of Contents
Advertisement
Quick Links
Advertisement
Table of Contents

Related Manuals for PowerTec MT4009


Summary of Contents for PowerTec MT4009
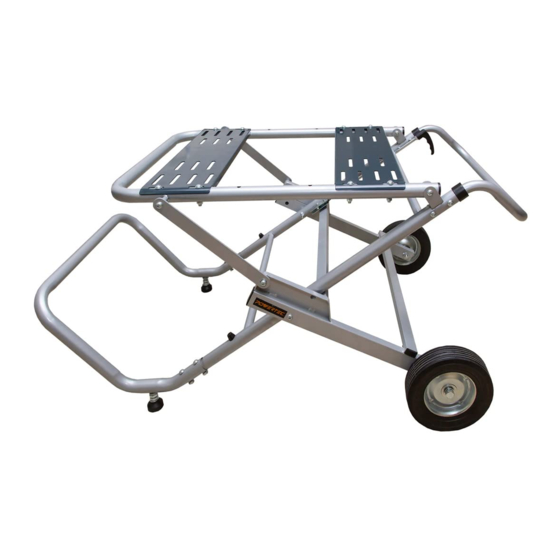
- Page 1 Model No. MT4009 Owner’s Manual TABLE SAW STAND QUESTION... 1•847•780•6120 Visit us on the web at www.powertecproducts.com You will need this manual for safety instructions, operating procedures, and warranty. Put it and the original sales invoice in a safe, dry place for future reference.
-
Page 2: Table Of Contents
TABLE OF CONTENTS PRODUCT SPECIFICATIONS SECTION PAGE SAFETY RULES Net Weight: ........35.3 lbs (16 kg) Maximum Weight Capacity: .....331 lbs (150 kg) Maximum Mounting Space: ..... 21-3/4" x 18-1/4" ASSEMBLY (55.25 mm x 46.4 mm) Stand Height: ........22-5/8" (57.5 mm) Unpacking Tools Needed Assembly... -
Page 3: Safety Rules
SAFETY RULES • Store properly. Do not store the table saw stand WARNING outdoors or in a damp location. • Do not stand or climb on table saw stand. It could tip For your own safety, read all of the rules and precautions over, causing serious injury. -
Page 4: Assembly
ASSEMBLY UNPACKING TOOLS NEEDED Refer to Figure 1 The following tools (not included) are needed to assemble Check for shipping damage. Check immediately that all the table saw stand: parts and accessories are included. 1 - 13 mm wrench (Footrest, Handle Assembly and 1-3/4" ITEM DESCRIPTION Mounting Hardware) Main Frame... -
Page 5: Attach The Footrest And Feet
ASSEMBLY Attach the Footrest and Feet • Repeat with other wheel. Figure 6 Flat Refer to Figure 4–5 Raised Hub Washer • Slide the footrest onto the main frame and secure with Main Frame four button head screws and four hex locking nuts (two on each side). -
Page 6: Attach The Lever Assembly
Attach the Lever Assembly Mounting the Saw Refer to Figure 11 Refer to Figure 8–10 WARNING • Remove the bolt, washers, nut, large washer and spring from the lever assembly (See Figure 10). Risk of accidental starting and serious personal injury. •... -
Page 7: Operation
OPERATION Figure 13 WARNING Do not use the table saw stand for scaffolding or as a ladder. Make sure to securely tighten all fasteners before using. Maximum capacity is 331 lbs (150 kg). Folding and Unfolding the Stand Refer to Figure 12 NOTE: Take care when folding and unfolding the stand to reduce the hazard of pinching hands and fingers. -
Page 8: Maintenance
MAINTENANCE GENERAL MAINTENANCE WARNING WARNING Keep the table saw stand dry, clean, and free from oil and grease. Always use a clean cloth when cleaning. Never When servicing, use only identical replacement parts. Use use brake fluids, gasoline, petroleum based products of any other parts may create a hazard or cause product or any strong solvent to clean the table saw stand . -
Page 9: Parts Illustration
TABLE SAW STAND PARTS ILLUSTRATION AND LIST Key# Part# Description Specifications Qty Key# Part# Description Specifications Qty φ17*14 MT4009001 Nut MT4009021 Rubber Mat MT4009002 Locking Handle MT4009022 Cross Recessed M4.2x16 Countersunk Head Tapping MT4009003 Flat Washer Screws MT4009004 Locking Shaft Ø8 MT4009023 Levelling Pads M12x55,φ40... -
Page 10: Warranty
30- DAY SATISFACTION GUARANTEE POLICY During the first 30 days after the date of purchase, if you are dissatisfied with the performance of this POWERTEC tool for any reason, you may return the tool to the retailer from which it was purchased for a full refund or exchange. You must present proof of purchase and return all original equipment packaged with the original product. - Page 12 Southern Technologies, LLC, Waukegan, IL 60087...
Need help?
Do you have a question about the MT4009 and is the answer not in the manual?
Questions and answers
What is the difference between the Table Saw stands MT4009, MT4009C, MT4009D etc. Is there a comparison chart somewhere? I want to buy one but don't know the differences.