Table of Contents
Advertisement
Quick Links
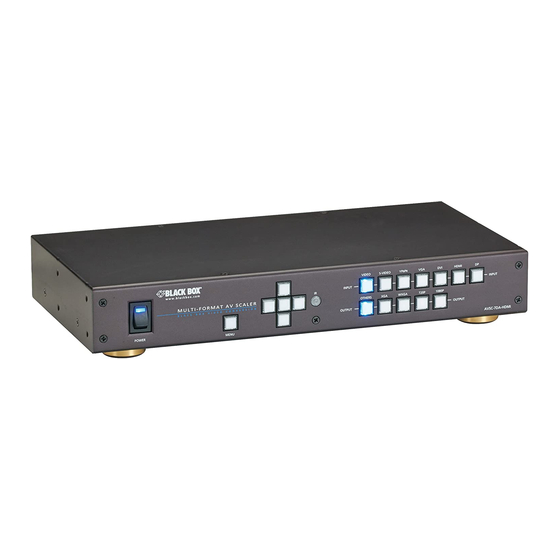
Multi-Format AV Scaler with DisplayPort
Scales analog video, S-Video, component video,
VGA, DVI, HDMI, and DisplayPort video input
signals into VGA or HDMI output signals.
Supports resolutions of 480i/p, 720p, and 1080i/p.
Order toll-free in the U.S.: Call 877-877-BBOX (outside U.S. call 724-746-5500)
Customer
FREE technical support 24 hours a day, 7 days a week: Call 724-746-5500 or fax 724-746-0746
Support
Mailing address: Black Box Corporation, 1000 Park Drive, Lawrence, PA 15055-1018
Information
Web site: www.blackbox.com • E-mail: info@blackbox.com
BLACK BOX
AVSC-7DA-HDMI
®
Advertisement
Table of Contents

Related Manuals for Black Box AVSC-7DA-HDMI


Summary of Contents for Black Box AVSC-7DA-HDMI
- Page 1 Order toll-free in the U.S.: Call 877-877-BBOX (outside U.S. call 724-746-5500) Customer FREE technical support 24 hours a day, 7 days a week: Call 724-746-5500 or fax 724-746-0746 Support Mailing address: Black Box Corporation, 1000 Park Drive, Lawrence, PA 15055-1018 Information Web site: www.blackbox.com • E-mail: info@blackbox.com...
- Page 2 Trademarks Used in this Manual Trademarks Used in this Manual Black Box and the Double Diamond logo are registered trademarks of BB Technologies, Inc. Any other trademarks mentioned in this manual are acknowledged to be the property of the trademark owners.
- Page 3 FCC and IC RFI Statements Federal Communications Commission and Industry Canada Radio Frequency Interference Statements This equipment generates, uses, and can radiate radio-frequency energy, and if not installed and used properly, that is, in strict accordance with the manufacturer’s instructions, may cause inter ference to radio communication. It has been tested and found to comply with the limits for a Class A computing device in accordance with the specifications in Subpart B of Part 15 of FCC rules, which are designed to provide reasonable protection against such interference when the equipment is operated in a commercial environment.
- Page 4 NOM Statement Instrucciones de Seguridad (Normas Oficiales Mexicanas Electrical Safety Statement) 1. Todas las instrucciones de seguridad y operación deberán ser leídas antes de que el aparato eléctrico sea operado. 2. Las instrucciones de seguridad y operación deberán ser guardadas para referencia futura. 3.
- Page 5 Safety Information Safety Information 1. Save the carton and packing materials whether or not the unit arrives in good condition. If you ever need to ship the unit, use the original factory packing. 2. Read all documentation before operating your equipment. Retain all documentation for future reference. 3.
- Page 6 Important Safety Instructions Important Safety Instructions To ensure the best from this product, read this manual carefully. Keep it for future reference. To reduce the risk of electric shock, do not remove the cover from the unit. There are no user-serviceable parts inside. Refer servicing to qualified personnel. To reduce the risk of fire, do not expose the unit to rain, water, or excessive moisture.
-
Page 7: Table Of Contents
6.4 Image Properties .................................25 6.5 Video Wall ...................................26 6.6 Options ..................................27 7. RS-232 Protocol Commands ..............................28 7.1 AVSC-7DA-HDMI RS-232 Protocol and Commands .....................28 7.2 Ethernet TCP Setup Guide ............................29 7.3 Data String Format ..............................30 7.4 Commands .................................. 31 Appendix. Video Timing List ..............................40 Appendix B. -
Page 8: Specifications
Chapter 1: Specifications 1. Specifications Technical Specifications Advanced Video Processing High-quality video and graphics scaling up and down Frame rate conversion Approvals CE, FCC, RoHS (2002/95/EC) Audio Input Signal Digital Audio (PCM), Stereo Audio Audio Output Signal 1x S/PDIF Digital Audio, 1x Analog Audio RH/LH, 1x HDMI Audio Chassis Material Metal... - Page 9 Chapter 1: Specifications Input Resolution Support Input Resolution Component HDMI DisplayPort √ √ √ √ 640 x 350 @ 85 Hz 480p/480i √ √ √ 640 x 400 @ 85 Hz 576p/576i √ √ √ √ √ 640 x 480 @ 60 Hz 720p √...
- Page 10 Chapter 1: Specifications Input Resolution Support (Continued) Input Resolution Component HDMI DisplayPort √ 1600 x 1200 @ 65 Hz UXGA √ 1600 x 1200 @ 70 Hz UXGA √ 1600 x 1200 @ 75 Hz UXGA √ √ √ √ 1680 x 1050 @ 60 Hz WSXGA+ √...
- Page 11 Chapter 1: Specifications Output Resolution Support Output Front Panel Buttons Resolution HDMI √ √ OTHERS 720 x 480 √ √ 800 x 600 √ √ 1280 x 800 √ √ 1280 x 1024 √ √ 1360 x 768 √ √ 1400 x 1050 √...
-
Page 12: Overview
2.1 Introduction The AVSC-7DA-HDMI is a video graphics scaler that accepts seven types of signals: analog video, S-Video, component video, VGA, DVI, HDMI, and DisplayPort signals. It scales the input signals into either VGA or HDMI signals, supporting higher full HD resolutions of 480i/p, 720p, and 1080i/p. -
Page 13: Hardware Description
Chapter 2: Overview 2.4 Hardware Description Figure 2-1 shows the front panel of the scaler. Table 2-1 describes its components. Figures 2-2 through 2-4 show the back panel of the scaler. Tables 2-2 through 2-4 describe its components. 2.4.1 Front Panel Figure 2-1. -
Page 14: Back Panel
Chapter 2: Overview 2.4.2 Back Panel Figure 2-2. Back panel of the scaler. Table 2-2. Back panel components. Number in Component Description Picture Specifications Figure 2-2 DC power inlet/outlet The scaler has a DC power plug-pack Power jack: input connector. Make sure the plug- DC jack: Inner OD = 2.1 mm pack used is of an approved type and Outside OD = 5.5 mm... - Page 15 Chapter 2: Overview Figure 2-3. Back panel of the scaler. Table 2-3. Back panel components (continued). Number in Component Description Picture Specifications Figure 2-3 YPbPr + AR/AL audio Connect a component video signal Component video via (3) RCA female input directly to the female RCA connector, connectors which supports component video...
- Page 16 Chapter 2: Overview Figure 2-4. Back panel of the scaler. Table 2-4. Back panel components (continued). Number in Component Description Picture Specifications Figure 2-4 Video + AR/AL audio Connect a composite video signal to the Female RCA connector input RCA connector. Connect the output Stereo audio (AR/AL) via (1) 3.5-mm port of your source audio device to the earphone jack connector...
-
Page 17: Typical Application
Chapter 2: Overview 2.5 Typical Application Audio out Composite plus audio in Audio amplifier Ethernet RS-232 HDMI HDTV PC/Ethernet Component in RS-232 control HDMI out VGA out DVI plus audio in HDMI in Blu-ray DVD DisplayPort in Figure 2-5. Multi-Format AV Scaler with DisplayPort. 724-746-5500 | blackbox.com Page 17... -
Page 18: Remote Controller
Chapter 3: IR Remote 3. IR Remote 3.1 Remote Control Before connecting anything to the scaler, observe the following: • Make sure the voltage supply matches the label on the supplied plug-pack (±10%). • Make sure the power switch is off. •... -
Page 19: Ir Remote Custom And Data Codes (Nec Standard)
Chapter 3: IR Remote 3.2 IR Remote Custom and Data Codes (NEC Standard) How to set up IR codes: Custom Code: 20 DF Power on: 20DF 5DA2 Power off: 20DF 5EA1 Mute: 20DF 02FD HDMI: 20DF 1FE0 VGA: 20DF 0AF5 DVI: 20DF 50AF DP: 20DF 59A6 YPbPr: 20DF 58A7... -
Page 20: Ir Extender
Chapter 4: IR Extender 4. IR Extender 4.1 IR Extender Connection Rear panel IR extender port Room Figure 4-1. IR extender connection. NOTE: When you plug the external IR extender into the scaler, the front panel IR receiver remains active. 4.2 IR Extender Package How to Set Up the IR Extender Components Figure 4-2. -
Page 21: Installation
Chapter 5: Installation 5. Installation Control Ports: 1. Front panel—function key press buttons. 2. IR remote—IR remote controller. 3. RS-232 interface—RS-232 interface system. 4. Ethernet—Ethernet interface system. Inputs 1–7 Port Source Signals: Component video, AV, DVI, HDMI, DisplayPort (5 input ports connected) Outputs 1–2 Port Display Signals: VGA, HDMI NOTE: The Multi-Format AV Scaler with DisplayPort supports seven inputs and two outputs, control IR, and RS-232 interface... -
Page 22: On-Screen Display (Osd)
Chapter 6: On-Screen Display (OSD) 6. On-Screen Display (OSD) 6.1 OSD Options Overview Table 6-1. OSD options. Layer 1 Layer 2 Layer 3 Picture Brightness Contrast Saturation Sharpness Image Setup Automatic Manual Clock/Phase/Save Horizontal Position Vertical Position Image Properties Color Preset Mode/Custom Input Signal DVI/HDMI/VGA/DisplayPort/Component/Composite/S-Video... -
Page 23: Picture
Chapter 6: On-Screen Display (OSD) 6.2 Picture Picture allows you to digitally adjust the brightness, contrast, hue, saturation, and sharpness of the images. An unlit icon suggests the function is not available. To enable it, the unit color must be set in custom mode. Go to the third icon in the first layer to change the setting in color: Image properties—>color—>custom—>save. -
Page 24: Image Setup
Table 6-3. Image setup. Icon Description Automatic: AVSC-7DA-HDMI reads the input signal and automatically sets the optimal value for the output. Manual: Clock/Phase /Save Horizontal Position Move the image to the right or left. Vertical Position Move the image up or down. -
Page 25: Image Properties
Chapter 6: On-Screen Display (OSD) 6.4 Image Properties Image properties allow you to change color, select input signal, adjust scaling, and change output resolution. Under the output mode, you can select resolutions not listed on the front panel button. Figure 6-3. Image properties icon. •... -
Page 26: Video Wall
Chapter 6: On-Screen Display (OSD) 6.5 Video Wall The AVSW-7DA-HDMI scaler can send divided images on multiple display devices and build a video wall of, for example, 1x2, 2x2, or 10x10. A video wall of 15x15 is the maximum size the scaler can generate. NOTE: An AVSW-7DA-HDMI is required for each output. -
Page 27: Options
Chapter 6: On-Screen Display (OSD) 6.6 Options Options allows you to check the connection status, change menu language, return to factory defaults, save settings, and make adjustments to the OSD menu settings. Figure 6-7. Options icon. • Layer one: the fifth icon from the left. •... -
Page 28: Rs-232 Protocol Commands
Chapter 7: RS-232 Protocol Commands 7. RS-232 Protocol Commands 7.1 AVSC-7DA-HDMI RS-232 Protocol and Commands Figure 7-1. RS-232 cable pin lines. 1. Transmission rate: 9600 bps 2. Data format: 8 data bits, no parity, 1 start bit, and 1 stop bit 3. -
Page 29: Ethernet Tcp Setup Guide
Chapter 7: RS-232 Protocol Commands 7.2 Ethernet TCP Setup Guide The Ethernet (TCP) port allows control of the unit via a computer by redirecting serial commands (COM port) to the unit’s IP address. To connect to the unit: 1. Set your PC within the same subnet of the unit (default address 192.168.0.3). 2. -
Page 30: Data String Format
For example: Response: [SKU] [ ] [Status] [;]| The status is a two-digit numerical code. Specific details are discussed later in this document. NOTE: If at any time the AVSC-7DA-HDMI receives an invalid command, a response of “AVSC-7DA-HDMI 01” will be returned. 724-746-5500 | blackbox.com Page 30... -
Page 31: Commands
Timeout Set/check the timeout status from the OSD. 1. Key Function Command Response Description Set Key Key +000; AVSC-7DA-HDMI 00; Set Menu Key Key +001; AVSC-7DA-HDMI 00; Set Up Key Key +002; AVSC-7DA-HDMI 00; Set Down Key Key +003; AVSC-7DA-HDMI 00;... - Page 32 Chapter 7: RS-232 Protocol Commands 2. Power Function Command Response Description Power OFF Power +000; AVSC-7DA-HDMI 00; Power OFF Power ON Power +001; AVSC-7DA-HDMI 00; Power ON Check the status of condition Power ?; Power +000; Power OFF Power +001;...
- Page 33 5. Resolution Function Command Response Description Set Resolution Resolution +000; AVSC-7DA-HDMI 00; Set resolution to 720 x 480, 60 Hz Resolution +001; AVSC-7DA-HDMI 00; Set resolution to 1280 x 720, 60 Hz Resolution +002; AVSC-7DA-HDMI 00; Set resolution to 1920 x 1080, 60 Hz Resolution +003;...
- Page 34 Function Command Variables Set Contrast CONTRAST XXXX; AVSC-xxxx = Contrast number +000–+100 Command Example Response Description CONTRAST +015; AVSC-7DA-HDMI 00; Set Contrast to 15. Function Command Response Description Check Contrast CONTRAST ?; CONTRAST +001; Contrast setting is 1. CONTRAST +015;...
- Page 35 Function Command Variables Set Sharpness SHARPNESS XXXX; AVSC-xxxx = Sharpness number +000–+100 Command Example Response Description SHARPNESS +015; AVSC-7DA-HDMI 00; Set Sharpness to 15. Function Command Response Description Check Sharpness SHARPNESS ?; SHARPNESS +001; Sharpness setting is 1. SHARPNESS +015;...
- Page 36 Command Variables Set V-zoom V-ZOOM XXXX; xxxx = V zoom number +000 – +009 Command Example Response Description V-ZOOM +001; AVSC-7DA-HDMI 00; Set V-Zoom to 1. Function Command Response Description Check V-zoom V-ZOOM?; V-ZOOM +001; V-zoom setting is 1. 14. H-Pan...
- Page 37 Command Variables Set Overlap Left Edge OVERLAP-L XXXX; xxxx = Overlap-L number +-600– +600 Command Example Response Description OVERLAP-L+050; AVSC-7DA-HDMI 00; Set Overlap-L to +50. Function Command Response Description Check Overlap-L OVERLAP-L?; OVERLAP-L +050; Overlap-L setting is +50. 17. Overlap—R...
- Page 38 Command Variables Set Overlap Bottom Edge OVERLAP-B XXXX; xxxx = Overlap-B number +-600– +600 Command Example Response Description OVERLAP-B +050; AVSC-7DA-HDMI 00; Set Overlap-B to +50. Function Command Response Description Check Overlap-B OVERLAP-B?; OVERLAP-B +050; Overlap-B setting is +50. 20. Language...
- Page 39 Command Variables Set TimeOut TIMEOUT XXXX; xxxx = Timeout number +000 – +060 Command Example Response Description TIMEOUT +015; AVSC-7DA-HDMI 00; Set timeout to 15 seconds. Function Command Response Description Check Timeout TIMEOUT?; TIMEOUT +001; Timeout setting is 1 second.
-
Page 40: Appendix. Video Timing List
Appendix A: Video Timing Lists Appendix A. Video Timing Lists Table A-1. Video Timing List (HDMI). Resolution H. Freq. V. Freq. Pixel H. Total H. Display H. Front H. Sync. H. Sync. V. Total V. Display V. Front (kHz) (Hz) Clock Pixel Pixel... - Page 41 Appendix A: Video Timing Lists Table A-1 (Continued). Video Timing List (HDMI). Resolution H. Freq. V. Freq. Pixel H. Total H. Display H. Front H. Sync. H. Sync. V. Total V. Display V. Front (kHz) (Hz) Clock Pixel Pixel Porch Width Pol.
- Page 42 Appendix A: Video Timing Lists Table A-3. Video Timing List (DisplayPort). Resolution H. Freq. V. Freq. Pixel H. Total H. Display H. Front H. Sync. H. Sync. V. Total V. Display V. Front (kHz) (Hz) Clock Pixel Pixel Porch Width Pol.
- Page 43 Appendix A: Video Timing Lists Table A-3 (Continued). Video Timing List (DisplayPort). Resolution H. Freq. V. Freq. Pixel H. Total H. Display H. Front H. Sync. H. Sync. V. Total V. Display V. Front (kHz) (Hz) Clock Pixel Pixel Porch Width Pol.
-
Page 44: Appendix B. Troubleshooting
If you determine that your Multi-Format AV Scaler with DisplayPort is malfunctioning, do not attempt to alter or repair the unit. It contains no user-serviceable parts. Contact Black Box Technical Support at 724-746-5500 or info@blackbox.com. Before you do, make a record of the history of the problem. We will be able to provide more efficient and accurate assistance if you have a complete description, including: •... - Page 45 NOTES 724-746-5500 | blackbox.com Page 45...
- Page 46 NOTES 724-746-5500 | blackbox.com Page 46...
- Page 47 NOTES 724-746-5500 | blackbox.com Page 47...
- Page 48 About Black Box Black Box provides an extensive range of networking and infrastructure products. You’ll find everything from cabinets and racks and power and surge protection products to media converters and Ethernet switches all supported by free, live 24/7 Tech support available in 30 seconds or less.
Need help?
Do you have a question about the AVSC-7DA-HDMI and is the answer not in the manual?
Questions and answers