Table of Contents
Advertisement
Quick Links
Advertisement
Table of Contents

Related Manuals for Viking Range VCTSO5200SS


Summary of Contents for Viking Range VCTSO5200SS
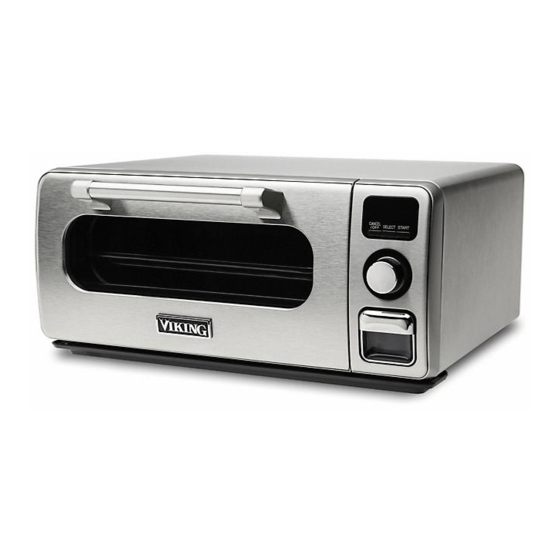
- Page 1 Installation / Use & Care Manual Superheated Steam Countertop Oven VCTSO5200SS...
-
Page 2: Service Information
3. Clearly describe the problem that you are having. If you are unable to obtain the name of an authorized service agency, or if you continue to have service problem, contact Viking Range, LLC at (888) 845-4641 or write to:... -
Page 3: Table Of Contents
Table of Contents 2 SERVICE INFORMATION 10 COOKING - NO PREHEAT IS REQUIRED 3 TABLE OF CONTENTS 10 COOKING CHART 4 IMPORTANT SAFEGUARDS 11 BROILING PAN & CRISPER TRAY 5 INFORMATION YOU NEED TO KNOW 11 TIPS FOR COOKING 5 ADDITIONAL IMPORTANT 11 TO SET ACCESSORIES SAFEGUARDS 11 TO SET TOAST COLOR,... -
Page 4: Important Safeguards
IMPORTANT SAFEGUARDS When using electrical appliances basic safety precautions should always be followed, including the following: 1. Read all instructions. 14. Oversize foods, metal foil packages, or utensils must not be inserted in 2. Do not touch hot surfaces. Use the appliance as they may involve a handles or knobs. -
Page 5: Information You Need To Know
Information You Need To Know Please make reading this Operation Manual your first step prior to using the appliance. This important booklet explains exactly how the appliance works and what you need to know to operate it successfully. ADDITIONAL IMPORTANT outer cabinet. -
Page 6: Extension Cord
Information You Need To Know properly installed and grounded. Should * Default mode is “Toast”. Once you use you only have a 2-prong outlet, have a the appliance, it will show the cooking qualified electrician install a correct wall mode you set last. receptacle. -
Page 7: Part Names
Part Names 1. Ventilation openings Be aware that hot steam or air comes out during cooking, and keep children away from the appliance. 2. Door open handle 3. LCD display 4. Control panel 5. Dial 6. Water tank (See page 9) 7. -
Page 8: Control Panel
Control panel 1. CANCEL/OFF button: • Press if you make a mistake Bake/Reheat Broil/Grill during programming. Pizza Warm ° • Press to stop the cooking Toast function. CANCEL SELECT START /OFF 2. START button: • Press to begin the operation. 3. -
Page 9: Important Instructions
Important Instructions Do not leave it filled with water in the READ CAREFULLY BEFORE COOKING oven for over a day. WATER TANK • Do not drop or damage the water Filling the water tank with cold, filtered tank. Heat may cause the water tank to tap water is necessary for all functions. -
Page 10: Cooking Chart
Cooking - No preheat is required. There are five cooking modes. Refer to the “COOKING CHART”. The chart gives information on each setting. The appliance has seven color settings for Toast, and one temperature setting for Broil/ Grill. Warm, Pizza and Bake/Reheat modes each have appropriate temperature ranges from 14 preset temperatures (160, 200, 225, 250, 275, 300, 325, 350, 375, 400, 425, 450, 475 and 485°F) Preheating is not necessary. -
Page 11: Broiling Pan & Crisper Tray
Cooking - No preheat is required. BROILING PAN & CRISPER TRAY: TO SET TOAST COLOR, TEMPERATURE OR COOKING Broiling Pan Crisper Tray TIME Turn the dial clockwise or counterclock- wise. Toast Color/Temperature Lighter/ Darker/ Reduce Increase 1. Select desired position depending temperature temperature on the food size. -
Page 12: Broil/Grill
Cooking - No preheat is required. 3. Close door. Turn dial to the cooking WARNING mode. The oven door, outer cabinet, oven cav- ity, accessory and especially the heating 4. Press SELECT to set the temperature. elements will become hot. The display will show the preset temperature. -
Page 13: Other Features
Other Features EXTENDING COOKING TIME SOUND ON/OFF AT THE END OF COOKING You can mute the appliance. Cooking results may vary depending Sound ON/OFF function is available on room temperature, initial food tem- when the display shows any cooking perature and other factors. You can mode indicator only. -
Page 14: Cleaning And Care
Cleaning And Care INTERIOR Before cleaning, turn the appliance off. Important information: Unplug and allow it to cool completely. • After every use, once the oven has An authorized service representative cooled down and is safe to touch, should perform any other servicing, wipe the oven walls with a soft cloth except for specific cases detailed in and warm water (or mild soapy water). -
Page 15: Troubleshooting
Troubleshooting The following situations are normal and are not signs that the appliance is malfunc- tioning. QUESTION / SITUATION ANSWER 1. Display Nothing appears on the Turn the dial or install the water tank. display. Check that power plug is connected to a suitable wall outlet. -
Page 16: Error Mode
Troubleshooting QUESTION / SITUATION ANSWER 4. Cooking Food in oven is not • Check that power plug is connected result heated. to a suitable wall outlet. See page 5. • Does the display show “D”? If so, the oven is in demonstration mode. To cancel it, see ANSWER for QUESTION/ SITUATION 1. -
Page 17: Specifications
Specifications AC Line Voltage: Single phase 120V, 60Hz, AC only AC Power Required: 1750 W, 14.5 amps. Outside Dimensions: 19.7”(W) x 9.3”(H) x 19.3”(D) Cavity Dimensions: 13.8”(W) x 4.6”(H) x 14.0”(D) Cavity Volume: 0.5 Cu. Ft. Net Weight: Approx. 24.5 lb.(without accessories) - Page 18 NOTES...
- Page 19 NOTES...
- Page 20 VIKING RANGE, LLC 111 FRONT STREET GREENWOOD, MISSISSIPPI 38930 USA (662) 455-1200 FOR PRODUCT INFORMATION CALL 1-888-845-4641 OR VISIT OUR WEB SITE AT VIKINGRANGE.COM TINSEA013KRRZ Printed in Thailand...
Need help?
Do you have a question about the VCTSO5200SS and is the answer not in the manual?
Questions and answers