Advertisement
Table of Contents
- 1 Table of Contents
- 2 Introduction and Readers of this Manual
- 3 Safety Information
- 4 Dimensions
- 5 Technical Data
- 6 Unpacking
- 7 Removing the Feet
- 8 Smoke Discharge Direction
- 9 Replacing the Knob of the Handle
- 10 Installation
- 11 Instructions for Use
- 12 Maintenance
- 13 Troubleshooting
- Download this manual
Advertisement
Table of Contents

Subscribe to Our Youtube Channel
Related Manuals for EdilKamin LILLE 5


Summary of Contents for EdilKamin LILLE 5
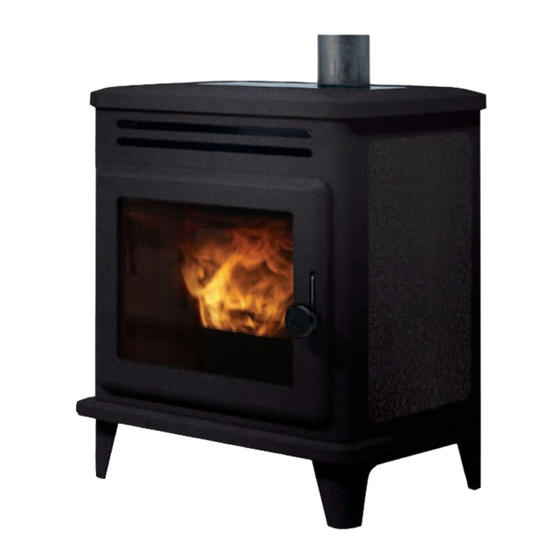
- Page 1 LILLE 5 LILLE 8 Pellet stove Installation, use and maintenance page...
-
Page 2: Table Of Contents
Lille 5 : Performance declaration: (DoP - EK no. 156) Lille 8 : Performance declaration: (DoP - EK no. 157) Moreover, the company hereby declares that: the LILLE 5 and LILLE 8 wood pellet stoves satisfy the requirements of the following European directives: 2014/35/EC - Low Voltage Directive... -
Page 3: Introduction And Readers Of This Manual
First ignition is required for activation of the Edilkamin manual, observe local regulations. manufacturer warranty. The warranty is only valid in the The diagrams provided in this manual are for illustration country where the product was bought. -
Page 4: Safety Information
• Blocking the aeration vents and air intakes in the neither Edilkamin nor the retailer are liable for room. DO NOT BLOCK THE AERATION VENTS damage resulting from incorrect installation or OR FLUE. Risk of smoke returning into the room maintenance. -
Page 5: Dimensions
DIMensIons DIMENSIONS (cm) Ø 8 predispo- sition for Ø 4 cm smoke outlet combustion air from behind 19.5 removable feet: stove height without feet 70 cm Ø 8 cm standard smoke outlet from above UseR/InstALLeR... -
Page 6: Technical Data
The above data are for guidance only and were measured during certification by a notified body. EDILKAMIN s.p.a. reserves the right to modify the product without notification in the interests of improvement. When this manual was printed, the product was under the certification process. Therefore, the details are for guidance only. -
Page 7: Unpacking
UnPAcKInG PRePARAtIon AnD UnPAcKInG HoW to ReDUce tHe WeIGHt of tHe The packaging materials are neither toxic nor noxious PRoDUct foR HAnDLInG and do not require special disposal. To reduce the weight of the product for handling you The user is responsible for storing, disposing of and can remove: recycling them in a regulatory fashion. -
Page 8: Removing The Feet
ReMoVInG tHe feet At the base of the product there are four removable feet which can be removed to lower the product. The feet on each side consist of a single element which will be called “two feet assembly” (A) from now on Proceed as follows to remove them. - Page 9 ReMoVInG tHe feet 3. Remove the top and the pellet loading lid 4. Undo the two screws on each side on the brackets underneath the top 5. Slide the sides off (F) InstALLeR...
- Page 10 ReMoVInG tHe feet 6. Undo three screws per side of the feet assembly 7. Remove the feet assembly from each side (A) 8. Remove the adjustable feet (R) from the cast iron feet (P) to use them underneath the stove for levelling 9.
-
Page 11: Smoke Discharge Direction
sMoKe oUtLet DIRectIon sMoKe oUtLet The stove can have its smoke outlet pipe connected to the top or the rear. The stove is delivered with the smoke outlet pipe on the top. To operate on the rear smoke outlet (only with the electrical power disconnected) proceed as follows. 1. - Page 12 sMoKe oUtLet DIRectIon 4. refit the sides. Use the metal cover provided with the product to close off the smoke outlet on the top. NOTE The top smoke outlet is female, the rear smoke outlet is male. InstALLeR...
-
Page 13: Replacing The Knob Of The Handle
RePLAcInG tHe Knob The product has a knob (C Figure 1) on the handle of the combustion chamber door, with black as the standard colour. Operations are represented in the even number figures on this page. To replace it, if needed, proceed as follows. 1. -
Page 14: Installation
Contact the authorised Edilkamin Technical Assistance itself, or in any area with an explosive atmosphere. Centre. Any extraction fans operating in the same room or area as the product, may affect its draw. - Page 15 InstALLAtIon fLUe systeM • be certified, with a chimney plate if metal (Smoke duct, flue and chimney pot) • be of uniform cross section or vary in cross section This chapter has been drawn up pursuant to European only immediately after the outlet, not at some mid regulations EN 13384, EN 1443, EN 1856 and EN point of its length.
- Page 16 InstALLAtIon tHe fLUe: eXteRnAL AIR IntAKe Further to the general prescriptions for the smoke duct In general, we suggest two ways to ensure a proper and flue, the flue: flow of combustion air. • must serve solely to discharge smoke • must be correctly sized to satisfy the requirements Indirect air intake of smoke discharge (EN 13384-1)
- Page 17 The electrical system must be compliant; check the operation of the earth in particular. Edilkamin is not responsible for malfunctions resulting from an improperly earthed system. The power line must be of adequate section for the power of the appliance.
-
Page 18: Instructions For Use
InstALLAtIon fIRst IGnItIon (coMMIssIonInG) PHAs- LoAdINg THE PELLETS INTo THE TANk. To open the tank, lift and remove the lid by using the • Make sure you have read and understood this handle* (use glove if hot) Make sure not to touch the smoke discharge pipe if manual hot. - Page 19 UseR InstRUctIons oPeRAtIon PHAses Further to the above operational procedures, the stove has the following phases description. The access to and adjustment of these functions is described below: - Ignition (display reads ON ) Flame ignites and grows stable Mode Size settings This is the result of: MANUAL...
- Page 20 • Open the bottom of the remote the intensity of use. Edilkamin and the retailer control and insert the 2 batteries in will not consider claims for battery life under any the indicated orientation.
- Page 21 UseR InstRUctIons The display reads the PossIbLe stAtes described below: - off stAte The product is shutting down or is off in response to a manual switching off by using the ON/OFF button of the remote control or due to an external contact (crono, phone dialler) The display shows the current time, room temperature and the status in relation to which the product is OFF.
- Page 22 UseR InstRUctIons UseR contRoLs (ReMote contRoL) Ventilation setting - on/off Follow the instructions below to manually regulate the - Switch-on/switch-off power levels of the fan. - Manual mode setting Press “OK” once. • Power setting The fan setting displays, next to the blade symbol •...
- Page 23 UseR InstRUctIons - Relax function - Stand by Natural convection function (without ventilation) with When the Stand by function is active, in automatic automatic power limiting. and crono modes, the product shuts off when the This function is available in all modes: automatic, temperature setpoint is reached and turns on again manual and crono.
- Page 24 UseR InstRUctIons - crono “OK”: confirm the time When the Crono function is active, the user sets a “M” : return to the previous menu temperature setpoint and a time zone for which that ON/OFF: return to the main screen. setpoint is specified.
- Page 25 UseR InstRUctIons - night Pellet Load This function shuts the product down after a set Allows you to load pellets after the worm screw has number of hours from activation of the function. emptied following a no-pellets alarm. Used by the technician during commissioning. this is convenient if you go to bed and want the product Available only in the OFF state.
- Page 26 UseR InstRUctIons Date/time Beep Sets the current date/time. Allows you to enable/disable the beep. This displays the first time the remote control is To access the function from the main menu (as activated with the stove powered on, or by selecting indicated in the Menu section above), press the M the option in the menu.
-
Page 27: Maintenance
MAIntenAnce Before doing any maintenance, disconnect the appliance from the mains. Regular maintenance is essential to keeping the appliance in good working order. Failure to service the product properly will prevent it from working properly. Any problems due to failure to service the stove will void the warranty. DAILy MAIntenAnce These operations must be done with the product off, cold and preferably disconnected from the mains. - Page 28 MAIntenAnce WeeKLy MAIntenAnce When the product is off and cold, you should activate the cleaning brushes inside the combustion chamber. Operations are represented in the even number figures on this page. 1. How to access the cleaning brushes: • open the combustion chamber door (P) • remove the top deflector (D), by pulling it towards 2.
- Page 29 MAIntenAnce QUARteRLy MAIntenAnce In case of frequent use, decide with the technician whether to: clean the inspection areas on the bottom of the product; clean the inspection areas on the rear. To clean the inspection areas on the bottom of the product, proceed as follow. In case we have removed feet, technician can use inspection on the sideThe view holes are accessible as long as the feet have not been removed.
- Page 30 You should clean the chimney system at least once a Using non-original spare parts may damage the year (check local regulations for details). appliance and relieves Edilkamin of all liability for damage resulting there from. If you fail to regularly clean and inspect the system,...
-
Page 31: Troubleshooting
tRoUbLesHootInG If problems occur, the product shuts itself off automatically. The display will show the reason (see below). do not disconnect from the power supply. To start the product up again, allow the shutdown procedure to complete, then press the remote control’s oN/oFF button or the simplified ignition button. - Page 32 The battery symbol will appear on the remote control display if the battery is low. MAIntenAnce: A wrench symbol is shown on the display after 2000 hours of operation. The product is working, but it must be serviced by an authorised Edilkamin technician. UseR/InstALLeR...
- Page 36 *941383-GB* w w w . e d i l k a m i n . c o m code 941383-GB 04.17/C...
Need help?
Do you have a question about the LILLE 5 and is the answer not in the manual?
Questions and answers