Table of Contents
Advertisement
Advertisement
Table of Contents

Subscribe to Our Youtube Channel
Related Manuals for Victrola VTA-754B


Summary of Contents for Victrola VTA-754B
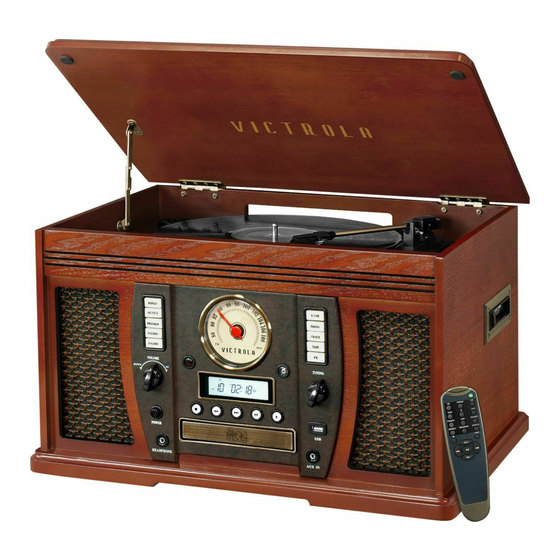
- Page 1 MODEL: VTA-754B 8-IN-1 TURNTABLE...
-
Page 2: Table Of Contents
Important Safety Instructions ..................3 Product Overview ...................... 5 Setup / Basic Operation ..................... 8 Remote Control......................8 Listening to a Vinyl Record..................10 Listening to a CD..................... 10 Listening to the Radio....................12 Listening to an External Audio Device (AUX Mode) ..........12 Listening to an External Audio Device (BT Mode) .......... -
Page 3: Important Safety Instructions
CAUTION: To reduce the risk of fire or electric shock, do not expose this appliance to rain or moisture. WARNING: To prevent electric shock, do not use this (polarized) plug with an extension cord, receptacle or other outlet unless the blades can be fully inserted to prevent blade exposure. WARNING: Invisible laser radiation when open and interlock failed or defeated. - Page 4 -This lightning flash with arrowhead symbol within an equilateral triangle is intended to alert the user to the presence of non-insulated “dangerous voltage” within the product’s enclosure that may be of sufficient magnitude to constitute a risk of electric shock. -Warning: To reduce the risk of electric shock, do not remove cover (or back) as there are no user-serviceable parts inside.
-
Page 5: Product Overview
Product Overview Front View REPEAT: In CD or USB mode, press to select a repeat mode. 14. FM: Press to enter to FM mode. 15. TUNING: In FM mode, turn to tune SHUFFLE: In CD or USB mode, press in station. for shuffle playback. - Page 6 Right Side View CASSETTE FF & EJECT: Press halfway to fast forward, press all the way to end and eject the tape. Rear View FM WIRE ANTENNA While tuned to a station in FM mode, extend the wire and reposition to adjust for best reception.
- Page 7 Parts of the Turntable A. Turntable. B. Safety Screw (for transport) Before using the unit, turn the screw clockwise using a coin or screwdriver. Important: When you transport the unit, turn the screw counterclockwise to secure the turntable. C. Cue-lever Use this lever to lift the tone arm. D.
-
Page 8: Setup / Basic Operation
Setup / Basic Operation Setup 1. Remove white protective needle cover by gently pulling towards front of unit. 2. Remove any packaging materials from the unit. 3. Connect the AC power cord to a wall outlet. Note: To prevent interference, avoid bundling audio signal cables together with the AC power cord. Basic Operation 1. - Page 9 Battery Replacement When the operating distance between the remote control unit and main unit decreases, it is necessary to replace the battery with new ones. Battery Precautions Be sure to insert the batteries with correct positive “+” and negative “-” orientation. ALWAYS use batteries of the same type.
-
Page 10: Listening To A Vinyl Record
Listening to a Vinyl Record 1. Press the “PHONO” button, “PHONO” will appear on the display. 2. Gently open the top cover. Note: Be careful not to pinch your finger when opening /closing the top cover. 3. Place a vinyl record on the turntable. When playing a 45 RPM record, use the included adaptor. - Page 11 can permanently damage the tray door mechanism. - Do not push the CD tray – always use the OPEN/CLOSE button. - It takes a moment for the unit to load a disc, during which all buttons will be temporarily deactivated. Repeat Playback Each time the REPEAT button is pressed, the repeat mode will cycle through the following options: REPEAT 1 (Repeat one track)
-
Page 12: Listening To The Radio
Programmed Playback Up to 20 tracks can be programmed to play in the desired order. Notes: - Shuffle playback does not work during programmed playback. - Programmed playback works with finalized discs only. 1. Press “CD” to enter CD mode, then load a CD. 2. -
Page 13: Listening To A Cassette Tape
Listening to a Cassette Tape 1. Load an audio cassette tape into the unit (located on the right side of the unit). Playback will automatically begin. 2. Press button halfway to Fast Forward the tape. Press button lightly and playback will resume. 3. -
Page 14: Usb Recording Operation
Notes: - Pressing ( ) during shuffle playback will randomly select the next track. - A track cannot be repeated during shuffle playback. - Shuffle playback doesn’t work during programmed playback. Programmed Playback You can program up to 98 tracks for the USB. Notes: - Shuffle playback does not work during programmed playback. -
Page 15: Maintenance / Proper Handling
Maintenance / Proper Handling Compact Disc Handling Always place the disc on the disc tray with the label side facing upward (compact discs can be played/recorded • only on one side) To remove a disc from its storage case, press down on the center of the case and lift the disc •... -
Page 16: Specifications
Specifications GENERAL Power Requirements AC 100-240V~50/60 Hz Power Consumption Dimensions (W x H x D) 20 x 11.8 x 13.4 in (approx.) 510 x 300 x 340 mm (approx.) Weight 20.2 lbs (approx.) 9.16 kg (approx.) AMPLIFIER Output Power 6 W + 6 W Frequency Response 60 to 20,000 Hz SPEAKER SYSTEM... -
Page 17: Troubleshooting Guide
Troubleshooting Guide Symptom Possible Cause Solution Unit will not power on. Unit is unplugged. Connect the unit to the • • • AC power supply. No sound output from The volume level is set too low. Adjust the volume. • •... - Page 18 Repair the unit and • device again. For further assistance with your product, call Victrola at TOLL FREE# 1-877-ITECH-97 (1-877-483-2497). Please note: As a result of continual improvements, the design and specifications of this product are subject to change without notice.
-
Page 19: Fcc Statement
FCC Statement This device complies with Part 15 of the FCC Rules. Operation is subject to the following two conditions: (1) This device may not cause harmful interference, and (2) this device must accept any interference received, including interference that may cause undesired operation. NOTE: This equipment has been tested and found to comply with the limits for a Class B digital device, pursuant to Part 15 of the FCC Rules. - Page 20 To obtain service, the purchaser MUST present an original sales receipt / proof of purchase. Please contact us at www.victrola.com to request an RMA (Return Material Authorization) number to return products for service or replacement. Returns without an RMA number on the package will be refused and returned to sender.
Need help?
Do you have a question about the VTA-754B and is the answer not in the manual?
Questions and answers