Table of Contents
Advertisement
Quick Links
MODEL NO: JLSBI
MODEL NAME:
DANGER
If you smell gas:
1. Shut off gas to the appliance.
2. Extinguish any open flame.
3. Open lid.
4. If odor continues, keep away from the
appliance and immediately call your gas
supplier or your fire department.
ASSEMBLY, USE AND CARE MANUAL
LUX Series Built In
FOR OUTDOOR
WARNING
1. Do not store or use gasoline or other
flammable liquids or vapors in the
vicinity of this or any other appliance.
2. An LP cylinder not connected for use
shall not be stored in the vicinity of this
or any other appliance.
USE ONLY
Advertisement
Table of Contents

Related Manuals for Jackson Grills LUX Built In Series


Summary of Contents for Jackson Grills LUX Built In Series
- Page 1 ASSEMBLY, USE AND CARE MANUAL MODEL NO: JLSBI LUX Series Built In MODEL NAME: FOR OUTDOOR USE ONLY DANGER WARNING If you smell gas: 1. Do not store or use gasoline or other flammable liquids or vapors in the 1. Shut off gas to the appliance. 2.
-
Page 2: Table Of Contents
TABLE OF CONTENTS Messages to Our Users -----------------2 Installer Final Check List-------------------15 Important ------------------------------------4 Grill Lighting Instructions-------------------15 Installation Safety Precautions---------5 Operation Instructions-----------------------17 Exploded View & Parts List-------------6 Care & Maintenance-------------------------19 Assembly Instructions--------------------8 Trouble Shooting-----------------------------20 Gas Connection----------------------------9 Grilling Tips------------------------------------21 Natural Gas Conversion----------------11 Placement of Grill----------------------------21 Installation----------------------------------13 Limited Warranty -----------------------------22... - Page 3 NOTE: It is normal for st ainless steel surfaces to discolor due to high heat given of f from the barbeque burners. Please take the time to fill out and return the Ownership and Registration Card below . It can be mailed to: Jackson Grills Inc. 106 - 2480 Mt. Lehman Road Abbotsford, BC V4X 2N3 Or Fax: 1-877-855-5373 Please complete and return within 10 days.
-
Page 4: Important
IMPORTANT The symbols and boxes shown below explain what each symbol means. Read and follow every message found in this manual. !!! DANGER !!! DANGER: Indicates an imminently hazardous situat ion which will result in death or serious bodily injury if not followed. !!! WARNING !!! WARNING: Warning of the possibility of serious bod ily injury if the instructions are not followed strictly. -
Page 5: Installation Safety Precautions
INSTALLATION SAFETY PRECAUTIONS !!!WARNING!!! Do not try to inst all this appli ance without reading the “INST ALLATION SAFETY PRECAUTIONS” section of this manual. 1. This grill is desig ned to use L.P . gas onl y. Only use this grill with L.P . gas and the regulator assembly supplied by the manufacturer. -
Page 6: Exploded View & Parts List
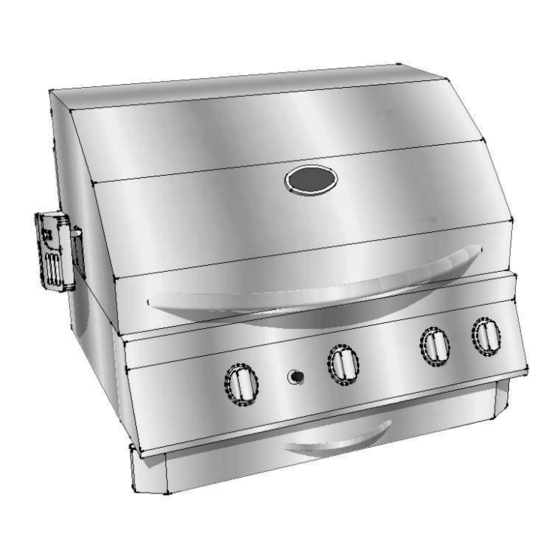
EXPLODED VIEW & PARTS LIST... - Page 7 EXPLODED VIEW & PARTS LIST REF# DESCRIPTION REF# DESCRIPTION Q’TY Q’TY Hood Gas Valve, Rear Burner Thermometer Gas Valve, Main Burners Logo Badge Red Insulator Control Knobs Hood Handle Control Panel Inner Hood Warming Rack Rear Burner Ignition Module Rotisserie Handle Grease Pan Rotisserie Rod/Forks Grease Pan Handle...
-
Page 8: Assembly Instructions
ASSEMBLY INSTRUCTIONS Please ensure the proper tools are used for ease of installation. Please remove all component s from the packaging and inspect all components to ensure there is no damage to any components in the packaging. Please remove all packaging from all components of the gas grill before operating. -
Page 9: Gas Connection
GAS CONNECTION ONLY USE THE REGULATOR AND HOSE ASSEMBLY PROVIDED WITH THIS GRILL. REPLACEMENT PRESSURE REGULATORS AND HOSE ASSEMBLIES MUST BE THOSE SPECIFIED BY THE MANUFACTURER. This is a L.P. (Liquefied Petroleum Gas) configured grill. Do not attempt to use a natural gas supply unless the grill has been reconfigured for natural gas use. - Page 10 6. When connecting the regulator assembly to the valve, hand tighten nut clockwise to a positive stop. Do not use a wrench to tighten. Use of a wre nch may damage quick coupling nut an d result in a hazardous condition. (as the figure shown below) 7.
-
Page 11: Natural Gas Conversion
NATURAL GAS CONVERSION Tools required to convert this grill from Propane Gas to Natural Gas (tools not provided): 1. # 2 Phillips screwdriver 2. 7 and 9 mm wrenches The NG conversion kit is supplied with this grill: Item Description Quantity 3 pcs NG Orifice, Main Burner: #53 drill size... - Page 12 ROTISSERIE BURNER CONVERSION 1. Using a # 2 Phillips screwdriver, undo the 4 screws that hold the back cover plate to the inner hood. 2. Once the cover h as been removed use a 9 mm wrenc h to remove the rear burner orifice from the rear burner.
-
Page 13: Installation
INSTALLATION INSTALL LUX GRILL MODEL INTO A NON COMBUSTIBLE ISLAND ONLY. ALL DIMENSIONS ARE IN INCHES: LUX SERIES 24.5” 10” 3” 24” min. 17.75” 5.5” min Ensure that the constructed island is well secured and the island is level in all directions. Place the grill into the cut out l ocated in t he island. -
Page 14: Leaking Test
10. DO NOT STORE L.P. TANK IN OR NEAR AN AREA WHERE CHILDREN PLAY. 11. DISCONNECTED THE T ANK AND REMOVE FROM THE GRILL IF T HE GRILL IS STORED INDOORS. 12. ANY OTHER PROBLEMS, SEE “TROUBLESHOOTING” OR CONTACT JACKSON GRILLS AT 888-287-3333. -
Page 15: Installer Final Check List
INSTALLER FINAL CHECK LIST At least 36” clearance maintained from combustible constructions to the sides and back of this grill. There is no unprotected combustible construction over the grill. All internal packaging removed. Burners are sitting properly on orifices. ... - Page 16 the grill as possible when lighting 3. Open lid during lighting. 4. Push and turn rear burner control knob to the “HIGH” position. Push and hold igniter button until burner lights. Up to 5 seconds is allowed for ignition. 5. Follow match lighting instruction if burner can’t be lit after repeating above steps 3-4 times. TO LIGHT THE REAR BURNER BY MATCH: ...
-
Page 17: Operation Instructions
OPERATION INSTRUCTIONS ! ! !CAUTION! ! ! 1. Clean your grill often. Failing to do so may cause a grease fi re that may damage the grill. Please clean your grill frequently. 2. NEVER leave the grill unattended while using. 3. - Page 18 USING THE GRILL: Grilling requires high heat for searing and proper browning. Most foods are cooked at the “HI” heat setting for the entire cooking time. However, when grilling large pieces of meat or poultry, it may be necessary to turn the heat to a lower setting after the initial browning. This cooks the food through without burning the outside.
-
Page 19: Care & Maintenance
CARE & MAINTENANCE MAINTENANCE 1. Keep the grill area clear and free from combustibl e materials, gasoline and other flammable vapors and liquids. 2. Keep the holes in th e three side s of the cart clear and fr ee from de bris, thus ensure the flow of combustion and ventilation air is unobstructed. -
Page 20: Trouble Shooting
TROUBLE SHOOTING SPIDER AND INSECT WARNING Spiders and insects can nest in the burne rs after storing, these nest can cause fires inside the tube or beneath the grill. This is very dangerous condition. So always clean the burners before use after storing. WHEN TO LOOK FOR SPIDERS ... -
Page 21: Grilling Tips
GRILLING TIPS The doneness of meat, whether rare, medium, or well done, is af fected by the thickness to a large extent. The cooking time is affected by the kind of meat, the size and shape of the cut, the temperature of the meat when cooking begins, and the degree of doneness desired. -
Page 22: Limited Warranty
Jackson Grills Inc. or its parties will not be responsible for the installation, labor or any other costs or expenses related to the re installation of the warranted part, and such expenses are not covered by this warranty.
Need help?
Do you have a question about the LUX Built In Series and is the answer not in the manual?
Questions and answers