Jackson Grills JLS700-LP Lux Owner's Manual
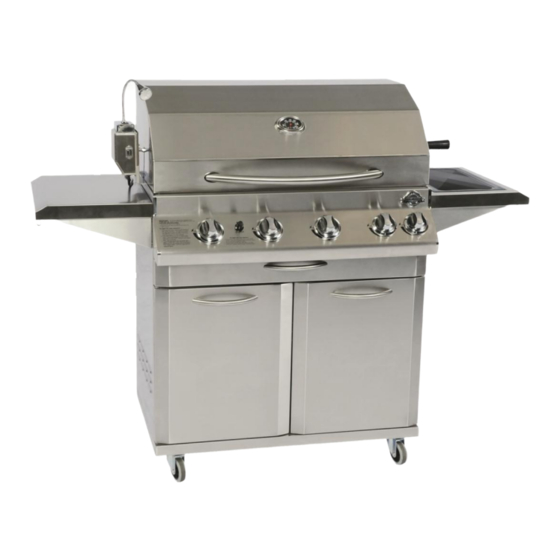
Cart style gas grill
Hide thumbs
Also See for JLS700-LP Lux:
- Owner's manual (23 pages) ,
- Assembly, use and care manual (23 pages) ,
- Owner's manual (21 pages)
Table of Contents
Advertisement
Quick Links
OWNER'S MANUAL:
FOR OUTDOOR USE ONLY
!WARNING!
If you smell gas:
1. Shut off gas to the appliance.
2. Extinguish any open flame.
3. Open lid.
4. If odor continues, keep away from
appliance and immediately call your gas
supplier & fire department.
Model # JLS700-LP Lux
JACKSON GRILLS INC.
#106-2480 Mt. Lehman Rd.
Abbotsford, BC V4X 2N3
TEL:
FAX:
SUPPORT: support@jacksongrills.com
WEB SITE: www.jacksongrills.com
Cart Style Gas Grill
!WARNING!
1. Do not store or use gasoline or
other flammable liquids in the vicinity
of this appliance.
2.
Do
not
propane tanks in the vicinity of this
appliance.
1
1(888) 287-3333
1(877) 855-5373
store
disconnected
Version: Dec.12
Advertisement
Table of Contents

Related Manuals for Jackson Grills JLS700-LP Lux


Summary of Contents for Jackson Grills JLS700-LP Lux
- Page 1 TEL: 1(888) 287-3333 FAX: 1(877) 855-5373 SUPPORT: support@jacksongrills.com WEB SITE: www.jacksongrills.com OWNER’S MANUAL: Model # JLS700-LP Lux Cart Style Gas Grill FOR OUTDOOR USE ONLY !WARNING! !WARNING! If you smell gas: 1. Do not store or use gasoline or 1. Shut off gas to the appliance.
-
Page 2: Table Of Contents
TABLE OF CONTENTS Table of Contents: Safety Warnings: Certification & Testing; Unpacking Your Grill; Parts Checklist Special Message to Owners: Owner Registration: Tools Required for Assembly: Assembling & Preparing your Grill: Propane Gas Connection: Leak Testing: Installer Final Checklist: Natural Gas Conversion: Lighting Instructions: Grilling and Rotisserie Cooking 13-14... -
Page 3: Safety Warnings
!SAFETY WARNINGS! SAFETY FIRST: Please read and understand all warnings and precautions prior to operating your gas grill. This grill is for outside use only, and shall not be used in any building, garage, enclosed area or vehicle. This grill is set up from the factory for use with Propane Gas (LP). (Propane Cylinder /Tank not included) Do not use gasoline, alcohol or other volatiles for lighting! The Propane (LP) gas supply cylinder must be constructed and marked in accordance with the specifications for propane gas cylinders of the US Department of transport (DOT) CFR 49 or the National... -
Page 4: Certification & Testing
CERTIFICATION & TESTING This appliance has been tested by Labtest Certification (LC) and has been tested to ANSI Z21.58a-1198 & CGA 16a-M98, and Certified for Canada and the USA. NOTE: The use and installation of this product must conform to local codes. In the absence of local codes, use the National Fuel and Gas Code, ANSI A223.1, Storage and Handling of Liquefied Petroleum Gasses, NFPA / ANSI 58. -
Page 5: Special Message To Owners
OWNER REGISTRATION: Please take the time to fill out and return a Warranty Registration Card. This can be done on-line at www.jacksongrills.com, or simply fill in the form below and mail or fax to: Jackson Grills Inc. Fax: 1 (877) 855-5373 #106-2480 Mt. -
Page 6: Tools Required For Assembly
Tools Required for Assembly: Please use the proper tools to simplify installation and prevent injury or damage to your grill. Tool Included with your Grill: 6mm wrench Installer Supplied Tools: Large Phillips Screwdriver Medium Phillips Screwdriver OPTIONAL: Socket wrench with 6mm socket &... - Page 7 Rotisserie Kit Installation: 1. Carefully remove the rotisserie kit parts from the packaging. 2. Install the motor mounting bracket supplied to the left hand side of the inner hood.(Fig. 3) 3. Install the motor on the motor bracket. 4. Place the forks and counter balance on the rotisserie rod in the desired location.
-
Page 8: Propane Gas Connection
Propane Gas Connection: Fuel Source: This is a Propane (or LP = Liquid Propane) configured grill. Do not attempt to use a natural gas supply unless the grill has been converted to natural gas use. Hose & Regulator: Use only the propane hose and regulator supplied with this grill. ... - Page 9 Propane Cylinder Storage: 1. Disconnected propane cylinders must have a dust cap installed for storage purposes. 2. Store all propane cylinders outdoors in a well-ventilated area. 3. Do not store cylinders in direct sunlight or near a source of heat or combustion. 4.
-
Page 10: Leak Testing
If any grease or hot items fall on the valve, regulator, hose or any part that conveys gas, shut the gas off immediately, check the cause and rectify it. Then, perform a complete leak test before reusing the grill. Jackson Grills help line: 1-888-287-3333. -
Page 11: Installer Final Checklist
Installer Final Check List: At least 36” clearance maintained from combustible constructions to the sides and back of this grill. There is no unprotected combustible construction or materials above the grill. All internal packaging removed. When using Natural Gas; conversion kit must be installed. ... -
Page 12: Lighting Instructions
Grill Lighting Instructions: 1. BEFORE LIGHTING: Always inspect the gas supply hose before turning the gas “ON”. If there is evidence of cuts, wear, or abrasion, it must be replaced before use. Use only a manufacturer approved replacement hose. Check all gas connections for leaks before each use. Do not light grill if gas odor is present. 2. -
Page 13: Grilling And Rotisserie Cooking
Grilling and Rotisserie Cooking: Total Gas Consumption: Total gas consumption per hour, per burner: MODEL JLS700-LP: Main burners: 15,000 Btu/hr. X 4 = 60,000 BTU/hr. Rear burner: 15,000 Btu/hr. X 1 = 15,000 BTU/hr. Total Potential Consumption: = 75,000 BTU/hr. !WARNING! Clean your grill often, especially the grease pan and grease cup. - Page 14 2. Using the Grilling Surface (Cook Grids): !WARNING! Grilling requires high heat for searing and proper browning. Do not leave grill unattended Most foods are cooked at the “HI” heat setting for the entire while cooking! Potential cooking duration. BURN and FIRE RISK! When grilling large pieces of meat or poultry, it may be necessary to turn the heat to a lower setting, after the initial searing.
-
Page 15: Cleaning & Maintenance
Cleaning and Maintenance: CAUTION: Keep the grill area clear and free from combustible materials, gasoline and other flammable vapors and liquids Ensure that the grill is completely cold before performing any cleaning and maintenance. Burning off deposits and soiling by turning the main burners on high for about 5 minutes after each use will keep excessive food residue from building up, but this DOES NOT replace proper cleaning and maintenance. - Page 16 Your grill is designed to allow grease to flow along the bottom of the firebox, and collect in both the grease collecting pan and the small grease cup. (See photos below). Both the grease pan and the cup must be cleaned on a regular basis, for the system to work as designed, and prevent grease fires.
-
Page 17: Storing Your Grill
Specks of grease can adhere to the surfaces of the stainless steel and bake on; this will give the appearance of rust. Use an abrasive pad with stainless steel cleaner to remove. Sand heavy scratches lightly with 600 grit wet and dry sandpaper. ... -
Page 18: Trouble Shooting
Trouble Shooting: A) SPIDER AND INSECT WARNING: Spiders and insects can nest in the burners during storage: these nests can cause fires inside burners or beneath the grill. This is potentially hazardous: ALWAYS remove and clean the burners immediately after bringing your grill out of storage, and regularly thereafter. -
Page 19: Exploded Parts View
Exploded View: JLS700-LP... -
Page 20: Parts List
Parts List: JLS700-LP Part# Part# Loc. DESCRIPTION Loc. DESCRIPTION (Qty.) (Qty.) Thermometer Bezel JT-11 Rotisserie Ignition Module JE-03 Thermometer JT-10 Instruction Plate Tray JH-97 Hood JH-08 Lighting Instruction Plate JH-98 Hood Handle Insulator (Black) JH-95 (2) Gas Manifold Bracket JF-54 Hood Handle JH-67 Hose &... -
Page 21: Warranty
Jackson Grills Inc. warrants its products to the original purchaser only (NO EXCEPTIONS) Jackson Grills Inc. or its parties will not be This Limited Warranty does not cover any responsible for the installation, labor or any...
Need help?
Do you have a question about the JLS700-LP Lux and is the answer not in the manual?
Questions and answers