Table of Contents
Advertisement
Quick Links
Advertisement
Table of Contents

Related Manuals for Jackson Grills JLS400-NG


Summary of Contents for Jackson Grills JLS400-NG
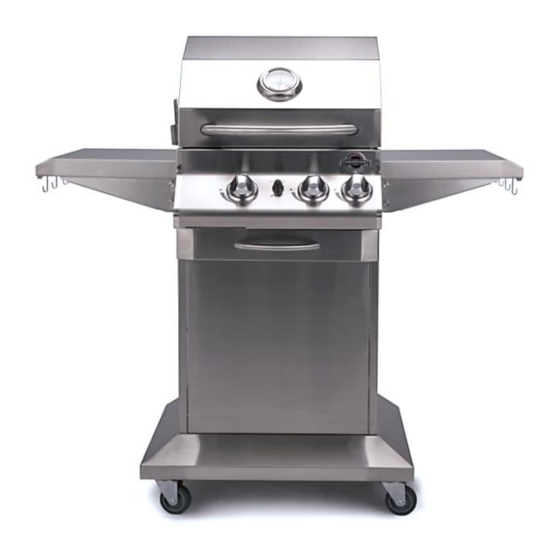
- Page 1 OWNER’S MANUAL for LUX400 For CART Models: JLS400-LP (Liquid Propane) JLS400-NG (Natural Gas) Important Notice Please read ALL safety notices on P.3 before assembling or operating this grill. Version JUL14 FIRE IT UP WITH JACKSON GRILLS. www.jacksongrills.com...
-
Page 2: Table Of Contents
Table of Contents: Safety Warnings: Certification & Testing; Unpacking Your Grill; Parts Checklist: Contact Us: Owner Registration: Tools Required for Assembly: Assembling & Preparing your Grill: Clearance to Combustibles Propane Gas Connection: 9-10 Natural Gas Connection: Leak Testing: Installer Final Checklist: Gas Conversion Kits: Lighting Instructions: 14-15... -
Page 3: Safety Warnings
!SAFETY WARNINGS! IMPORTANT: Please read and understand all warnings and precautions before using your gas grill. !WARNING! !DANGER! If you smell gas: 1. Do not store or use gasoline or 1. Shut off gas to the appliance. other Flammable liquids in the 2. - Page 4 Inspect fuel supply hose for damage before each use. If excessive wear, abrasion, or cracks are present, the hose MUST be replaced with a genuine Jackson Grills replacement part, prior to using this outdoor cooking gas appliance (Contact your nearest dealer for assistance).
-
Page 5: Certification & Testing
Certification and Testing: This appliance has been tested by Labtest Certification Inc. (LC), and has been tested to ANSI Z21.58b-2012, & CSA 1.6b-2012, and Certified for Canada and the USA. Unpacking Your Grill: Please open your packaging carefully and set aside all loose components. Once unpacked, please match the parts to the list shown below. -
Page 6: Contact Us
To obtain replacement parts for your Jackson Grill, contact your local dealer. If you have any questions please call us anytime at the number below: (Please have your model and serial number at hand) Grill Model: JLS400-LP or JLS400-NG Serial Number: ___________________ Write your serial number here for future reference. -
Page 7: Tools Required For Assembly
Tools Required for Assembly: Please use the proper tools to simplify installation and avoid injury or damage to your grill. TOOLS INCLUDED WITH YOUR GRILL: 5mm Allen Wrench (for Casters) INSTALLER SUPPLIED TOOLS: Large Phillips Screwdriver Small Crescent Wrench Assembling &... -
Page 8: Clearance To Combustibles
INSTALL ROTISSERIE KIT: (For Rotisserie Cooking) 1. Carefully remove the rotisserie kit parts from the packaging. 2. Install the motor mounting bracket supplied to the left hand side of the inner hood. (Fig. 6) 3. Install the motor on the motor bracket. 4. - Page 9 1. Maximum Cylinder Size: 20 lbs. (9 Kg) 2. Measurement: (approximately) Diameter: 12’’(30.5cm) X Height: 18” (45.7cm): 3. USA: All LP cylinders used with this grill must be constructed and marked in accordance with the Specifications for LP (Propane) Gas Cylinders of the US Department of Transportation (D.O.T.). Refer to your propane cylinder collar for markings.
- Page 10 STORING PROPANE CYLINDERS: 1. Disconnected propane cylinders must have a dust cap installed for storage purposes. 2. Store all propane cylinders outdoors in a well-ventilated area. 3. Do not store cylinders in direct sunlight or near a source of heat or combustion. 4.
-
Page 11: Natural Gas Connection
Natural Gas Connection: !WARNING! 1 Never insert any foreign objects in valve outlet, as this may cause leaks. 2 Do NOT connect this grill to unregulated Propane systems such as in a motor home or camper trailer. System pressure MUST be regulated before hook up. 3 Do NOT use this grill until leak tests have been completed. -
Page 12: Leak Testing
Perform a leak test before reusing the grill. 4. If the smell of gas is detected, immediately shut off gas or disconnect from source, and repair leaks before further attempts are made to use the grill. Jackson Grills Support: 1-888-287-3333 or info@jacksongrills.com... -
Page 13: Installer Final Checklist
Installer Final Check List: Ensure that clearances to combustible materials are maintained per specifications listed in this manual. Make sure that all internal packaging has been removed. Check that the burners are sitting properly on orifice end of the valves. (p.7) ... -
Page 14: Lighting Instructions
Grill Lighting Instructions: 1. BEFORE LIGHTING: • Always inspect the gas supply hose before turning the gas “ON”. If there is evidence of cuts, wear, or abrasion, it must be replaced before use. Use only a manufacturer approved replacement hose. •... -
Page 15: Grilling And Rotisserie Cooking
5. LIGHTING THE ROTISSERIE BURNER: TECH-TIP • Open lid during lighting. • Turn all knobs to “OFF” then open the propane cylinder valve Remove Warming Rack before or the natural gas valve at the natural gas quick release. using your rotisserie burner; •... - Page 16 USING THE GRILLING SURFACE (Cook Grids): !WARNING! Do not leave grill • Grilling requires high heat for searing and proper browning. unattended while cooking! • Most foods are cooked at the “HI” heat setting for the entire cooking time. Potential BURN and FIRE •...
-
Page 17: Cleaning & Maintenance
Cleaning and Maintenance: CAUTION: • Keep the grill area clear and free from combustible materials, gasoline and other flammable vapors and liquids • Ensure that the grill is completely cold before performing any cleaning and maintenance. • Burning off deposits and soiling by turning the main burners on high for about 5 minutes after each use will keep excessive food residue from building up, but this DOES NOT replace proper cleaning and maintenance. - Page 18 3. COOKING GRID CLEANING: TECH-TIP Do NOT turn on the rotisserie burner • If the grids are heavily soiled, turn your main burners on when the main burners are being used high for 10 minutes to burn off excess deposits. (Do NOT to clean the grill;...
-
Page 19: Storing Your Grill
• Remover burners and inspect inner and outer surfaces for contamination and debris. • Clean the exterior burner surface with a stiff stainless steel grill brush. • Make sure all of the burner port holes are free of obstruction by using a large paperclip to poke the holes out. This is extremely important to prolong the lifespan of the stainless steel burner. -
Page 20: Trouble Shooting
Trouble Shooting: A) SPIDER AND INSECT WARNING: Spiders and insects can nest in burners during storage. This hazard has been known to cause grill fires. Clean the main burners periodically, as well as before storing the grill. Closed for Nat Gas B) BURNER INSPECION: Inspect burners each time you use your grill, or immediately if one of the following occurs: 1. -
Page 21: Exploded Parts View
Exploded View: LUX JLS400... -
Page 22: Parts List
Parts List: LUX JLS400 DESCRIPTION DESCRIPTION Loc. Part# (Qty.) Loc. Part# (Qty.) Temp Gauge Bezel JT-11 Rotisserie Motor Bracket JR-10 Temperature Gauge JT-10 Rotisserie Motor JR-05 Hood Rubber Bumper JH-00 (2) Side Shelf (L & R) JC-12 (2) Handle Insulator (Black) JH-95 (2) Side Shelf Bumper (See # 03) JH-00 (4) -
Page 23: Warranty
Jackson Grills warrants its products to the original owner’s manual. purchaser only (NO EXCEPTIONS) • Jackson Grills or its parties will not be responsible for • the installation, labor or any other costs or expenses This Limited Warranty does not cover any damage...
Need help?
Do you have a question about the JLS400-NG and is the answer not in the manual?
Questions and answers