Table of Contents
Advertisement
Quick Links
Roller Shades & Screen Shades Collection
Product View ................................................................................................................................................................ 1
Tools and Fasteners Needed ....................................................................................................................................... 2
INSTALLATION
Installation Overview ................................................................................................................................................... 2
Mount the Installation Brackets Cassette - Inside Mount ..................................................................................... 3
Mount the Installation Brackets Cassette - Outside Mount ................................................................................. 4
Install the Shade ........................................................................................................................................................... 5
Connect the Power Source ......................................................................................................................................... 5
Unpack the Wand and Add to Activation Arm ......................................................................................................... 7
OPERATION
Operate the Shade ....................................................................................................................................................... 8
Adjust the Shade Limits ............................................................................................................................................... 9
Troubleshooting ........................................................................................................................................................... 9
CARE
Removing the Shade (If Necessary) ........................................................................................................................... 1
Cleaning Procedures .................................................................................................................................................. 11
................................................................................................................................................................. 13
Touch Control
Installation Instructions
Rev. A
9/3/19
Advertisement
Table of Contents

Related Manuals for Kirsch Roller Shades Touch Control


Summary of Contents for Kirsch Roller Shades Touch Control
-
Page 1: Table Of Contents
Roller Shades & Screen Shades Collection Touch Control Installation Instructions GETTING STARTED Product View ................................1 Tools and Fasteners Needed ............................2 INSTALLATION Installation Overview ..............................2 Mount the Installation Brackets Cassette — Inside Mount ..................3 Mount the Installation Brackets Cassette — Outside Mount ................. 4 Install the Shade ................................ -
Page 2: Getting Started
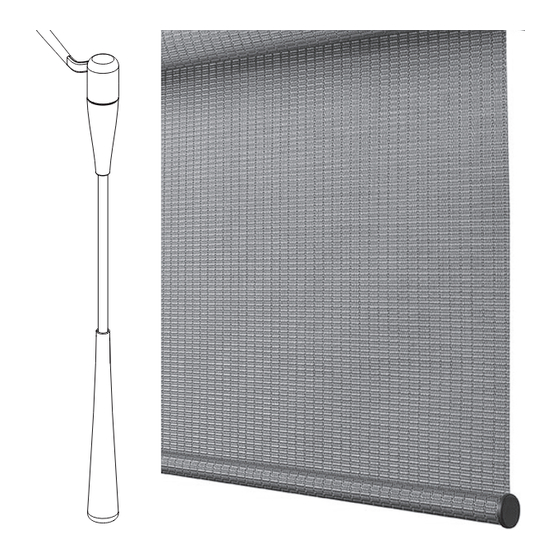
GETTING STARTED Product View Cassette Installation Brackets Cassette Activation Touch Control Wand Bottom End Cap... -
Page 3: Tools And Fasteners Needed
GETTING STARTED ® Thank you for purchasing the Kirsch Roller Shades & Screen Shades with Touch Control Collection. With proper installation, operation, and care, your new shades will provide years of beauty and performance. Please thoroughly review this instruction booklet and the enclosed packing list before beginning the installation. -
Page 4: Mount The Installation Brackets Cassette - Inside Mount
INSTALLATION INSTALLATION Mount the Installation Brackets — Inside Mount The number of installation brackets required varies depending on the shade width, as shown in the table. Shade Brackets Width Required Up to 36" Cassette ⁄ " – 66" Installation ⁄ "... -
Page 5: Mount The Installation Brackets Cassette - Outside Mount
INSTALLATION INSTALLATION Mount the Installation Brackets — Outside Mount The number of installation brackets required varies depending on the shade width, as shown in the table. Cassette Shade Shade Brackets Width Required Up to 36" Cassette ⁄ " – 66" Installation ⁄... -
Page 6: Install The Shade
INSTALLATION INSTALLATION Install the Shade If You Have a Cassette Shade with an attached Battery Wand Attach the battery wand clip to the back of the cassette approximately 10” from the motor side. ■ Place the bottom of the clip into the lip, squeeze to compress the clip then rotate it up and hook it into the top channel. ➤... - Page 7 INSTALLATION INSTALLATION If You Have a Satellite Battery Pack Mount the Satellite Battery Pack Decide where you want to mount the bracket. A satellite battery pack may be mounted in any orientation. ■ Mark the screw holes. Bracket for the ■...
-
Page 8: Unpack The Wand And Add To Activation Arm
INSTALLATION INSTALLATION If You Have a DC Power Supply Power Cable Connect the Power Supply from Shade Plug the power cable from the shade into the extension cable. ■ Plug the other end of the extension cable into the DC power supply. ■... -
Page 9: Operate The Shade
INSTALLATION OPERATION Operate the Shade Touch Control To Open the Shade Briefly push the wand up and release to move the shade in the up/open direction. ■ The shade will move to the fully open limit position. ■ To Close the Shade Briefly pull the wand down and release to move the shade in the down/closed direction. -
Page 10: Adjust The Shade Limits
Pull and hold the wand down (approximately 6 seconds), until the shade buzzes a green LED will flash and shade jogs down to ■ indicate the new lower limit has been set. Release the wand. ■ If the shade stalls prior to reaching the bottom limit ordered, please contact Kirsch. Troubleshooting Problem The shades raises or lowers unevenly. Solution Check that the installation brackets are level and aligned. - Page 11 LED flashes twice and the shade jogs up to indicate the lower limit has been set. The shade’s LED should now be turned off, indicating the shade is ready for normal operation. ■ Release the wand. ■ If the shade stalls prior to reaching the bottom limit ordered, please contact Kirsch.
- Page 12 INSTALLATION OPERATION Problem The shade limits have been lost or the LED is blinking RED when installed. Solution The internal mechanical limit needs to be adjusted on shade. Raise shade, disconnect power and remove shade from the window, see “Removing the Shade (If Necessary)” on ■...
-
Page 13: Removing The Shade, If Necessary
INSTALLATION CARE Removing the Shade, If Necessary Disconnect the power. ■ Insert the tip of a flathead screwdriver into the screwdriver slot provided on the bracket. ■ Push the screwdriver toward the window to release the cassette. ■ Roll the cassette forward and then down to remove. ■... -
Page 14: Warranty
© 2019 Kirsch Custom Window Coverings. All rights reserved. All trademarks used herein are the property of Kirsch or their respective owners. 09/19...
Need help?
Do you have a question about the Roller Shades Touch Control and is the answer not in the manual?
Questions and answers